...
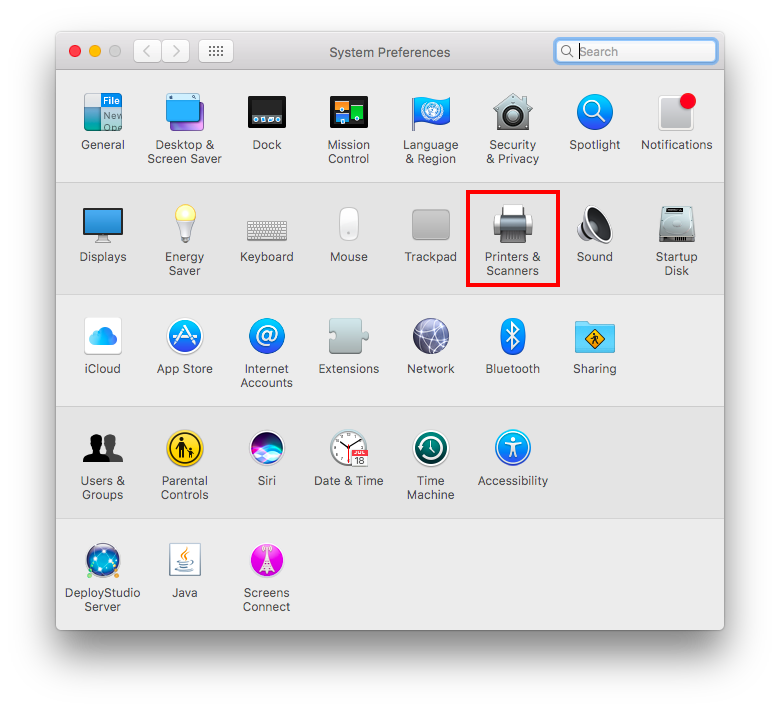
Open System Preferences from the Apple menu or the Dock.
Select Printers & Scanners.
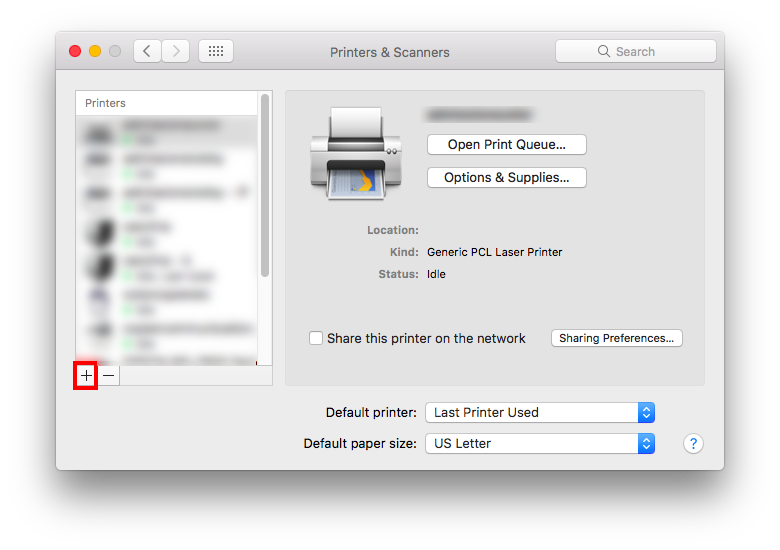
Click the + button to add a printer.
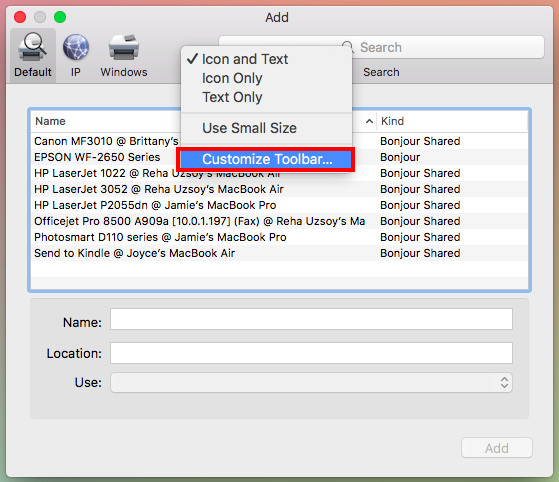
Press the Control key on your keyboard while clicking the "Default" icon (or any other icon on the toolbar), then choose Customize Toolbar... from the contextual menu that appears.
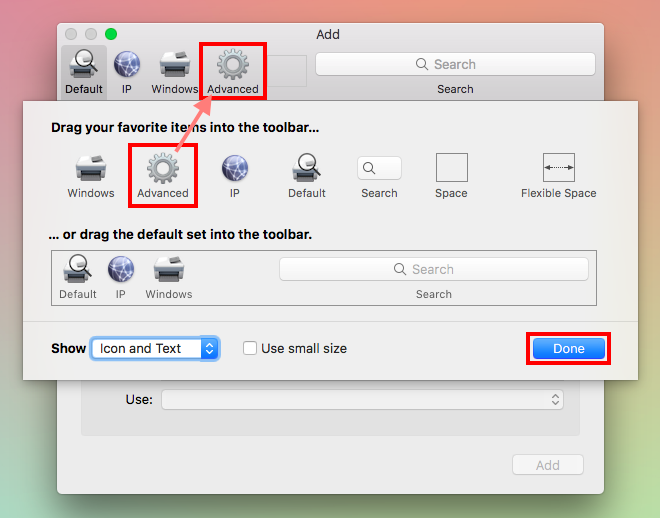
Drag the Advanced (gear) icon to the toolbar.
Click Done.
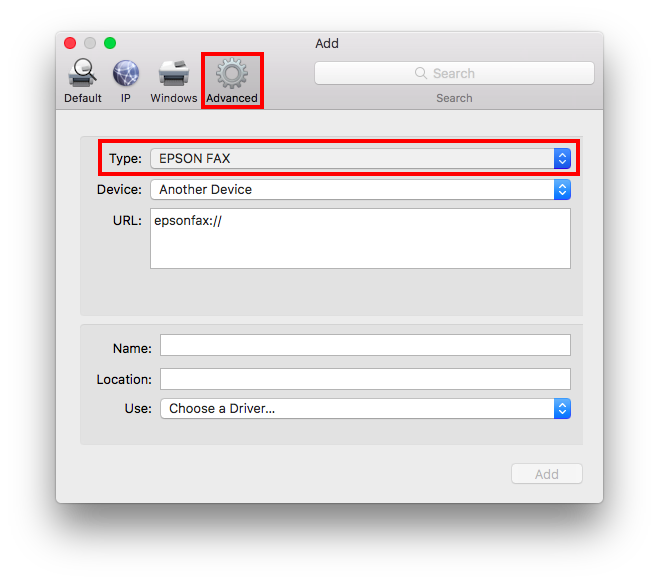
Click the Advanced icon that was added to the toolbar.
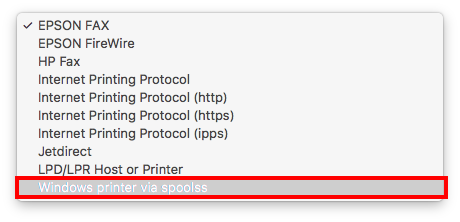
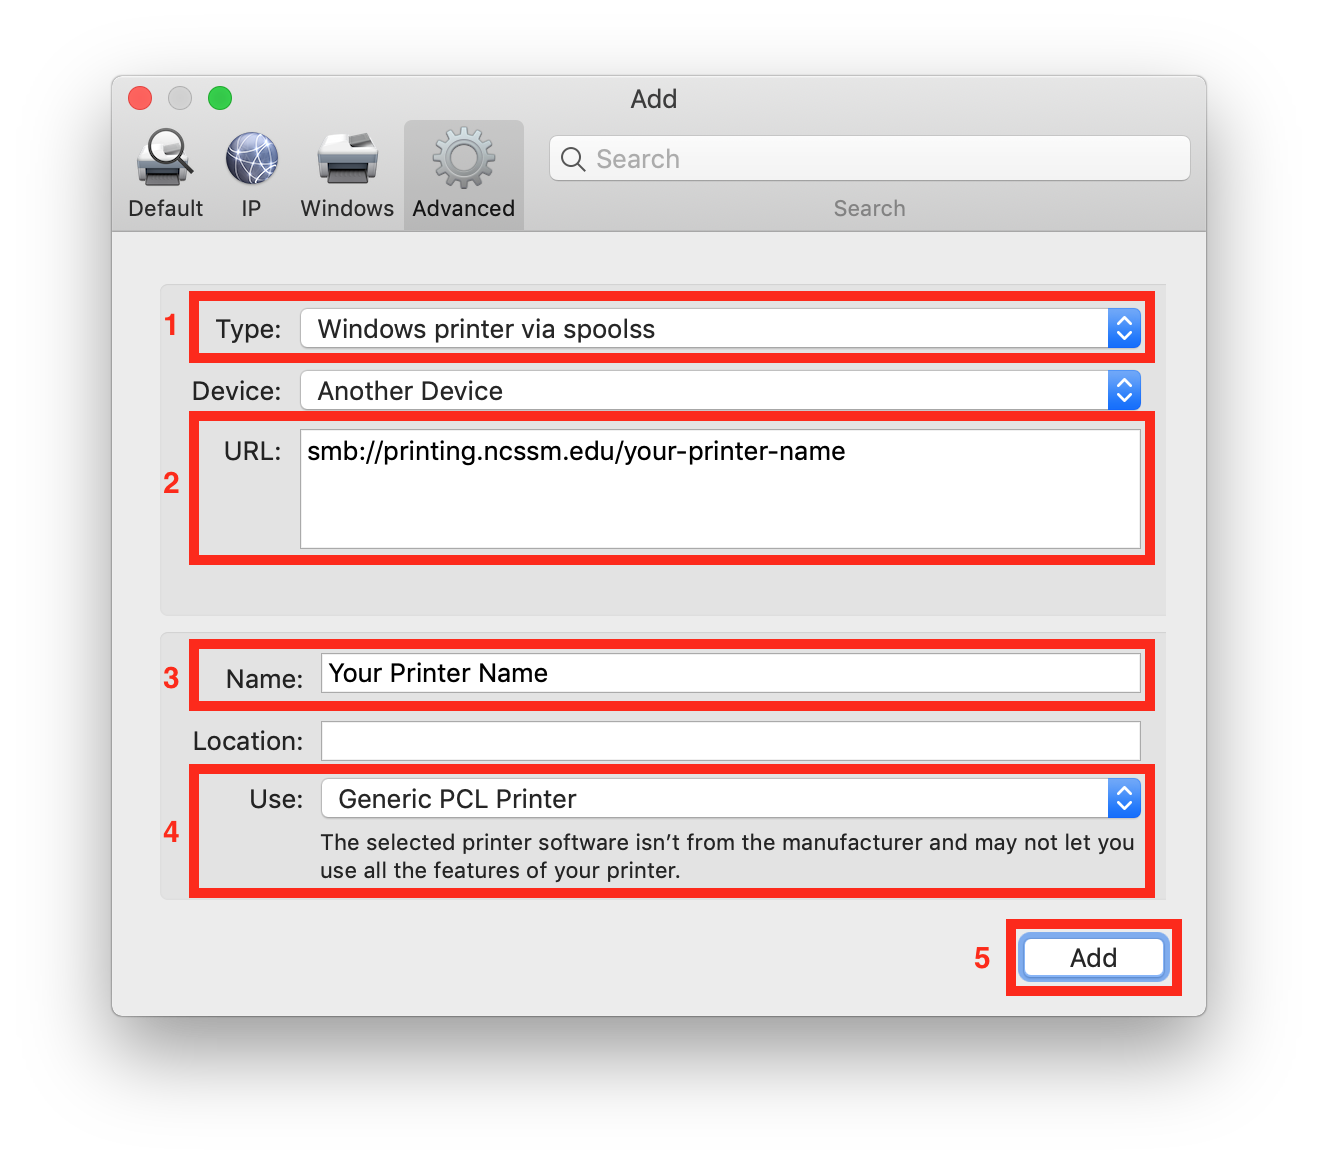
Choose Windows printer via spoolss from the Type pop-up menu.
In the URL field, type the printer's address in the following format:
smb://printing.ncssm.edu/your_printer_name
For a complete list of available printers, please refer to this Wiki article: Full list of printer names
In the Name field, type the name you would like to use for this printer in OS X.
Choose the appropriate PPD or printer driver from the "Use:" pop-up menu. For the library printer and many other printers, Generic PCLwill work. Otherwise, you may need to go to the printer manufacturer's and download the correct driver for the Mac.
Click Add.
Once you’re ready to print for the first time, you may be asked for credentials to do so.
Your username should include: ncssm\<username>
Your password should be your NCSSM password.
...