...
Use the Start menu to search for and then open the Control Panel.
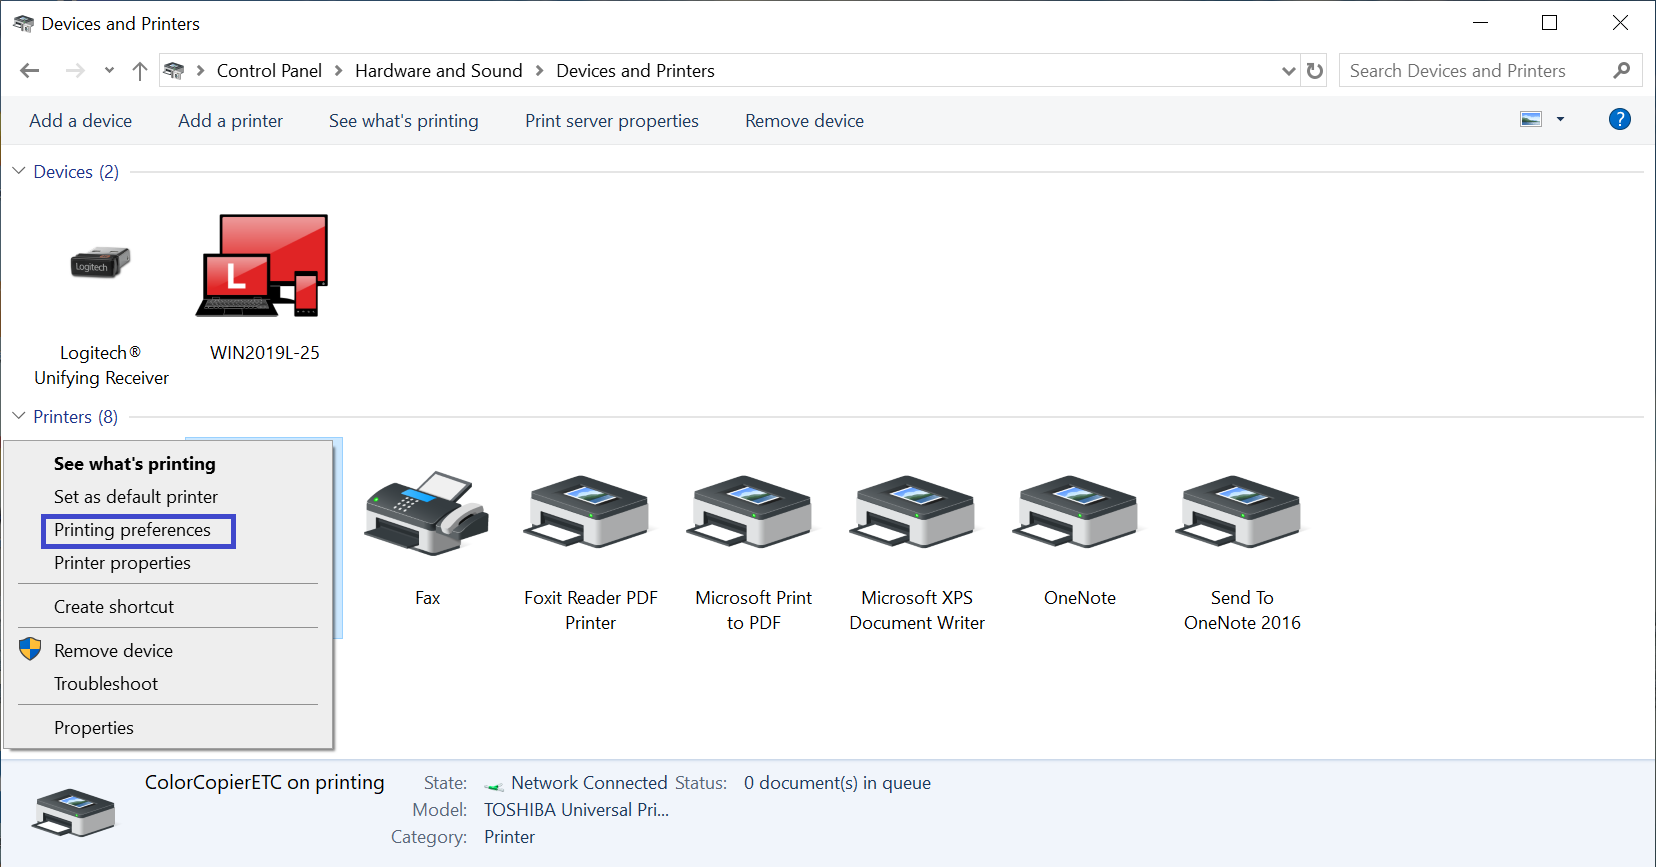
Under "Hardware and Sound", select View devices and printers. If you are viewing the Control Panel by "Large icons" or "Small icons", click on Devices and Printers.
Once you locate the printers, right-click on the desired printer, and select Printer preferences. NOTE Note: It may take about 5-10 seconds for the preferences to show up.
Once the preferences show, you will see eight tabs at the top.
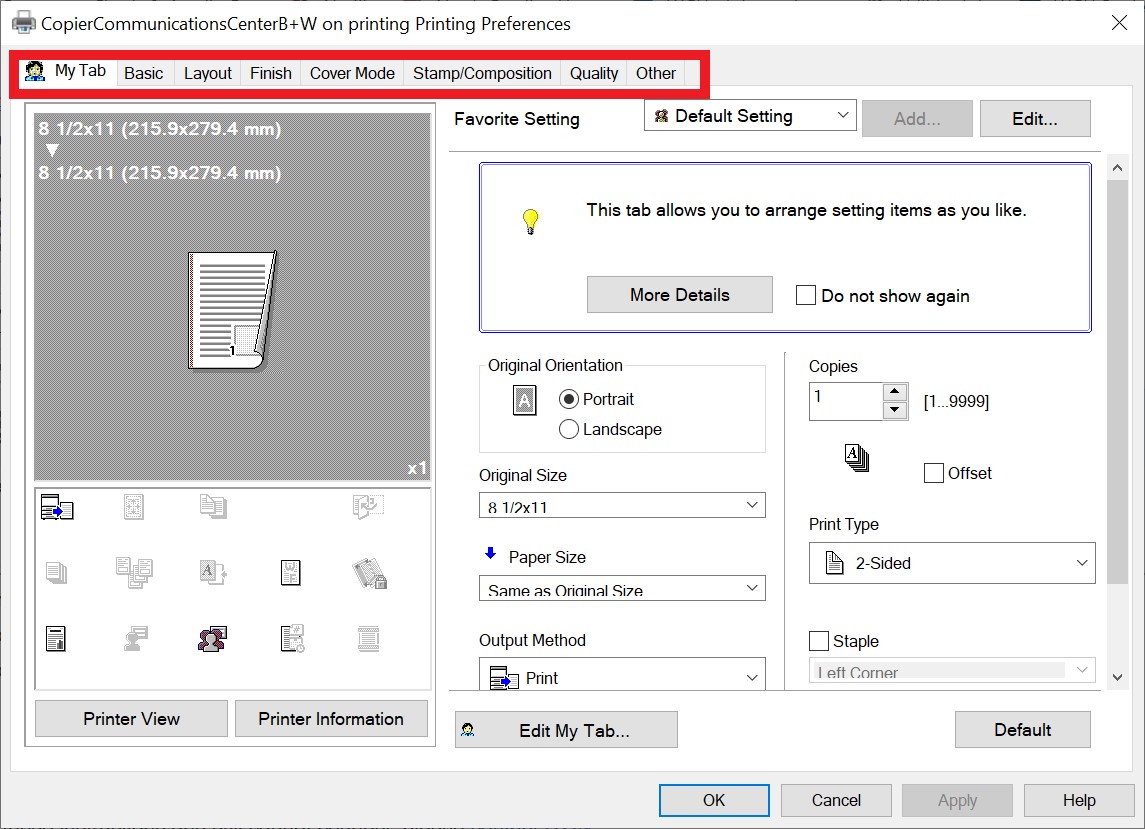
Click on the Basic tab, which is right next to My Tabs.
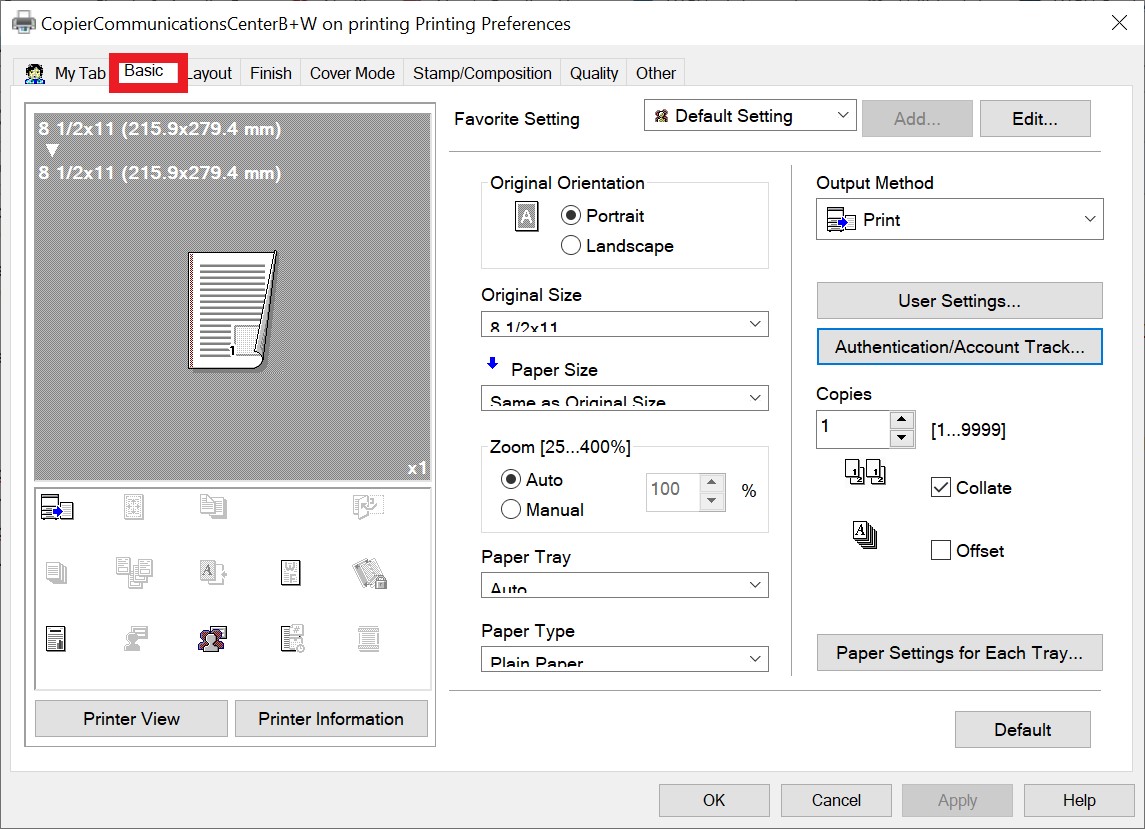
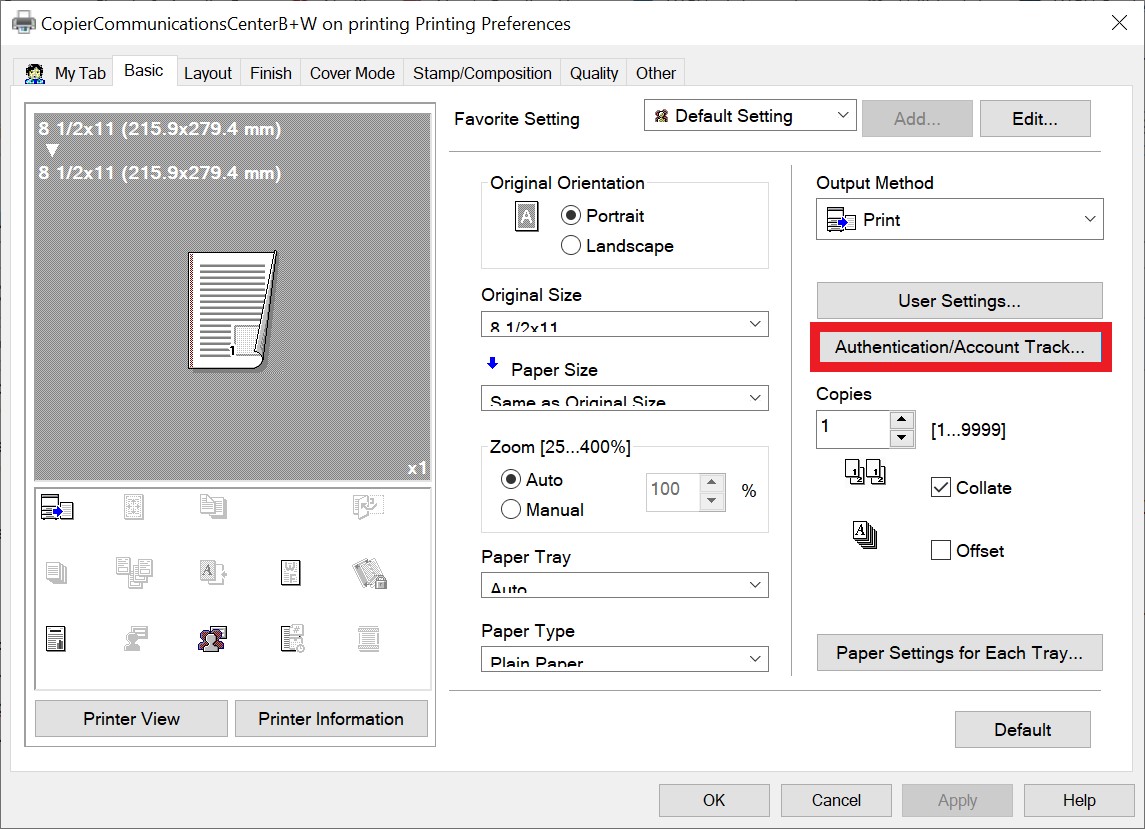
From the Basic menu, look to the right under Output Method, and click on the Authentication/Account Track button.
User Authentication will be a grayed out menu, as your username will already be in the text box. Instead, go to Account Track, and enter your printer code underneath the Password option. The Department Name is optional.
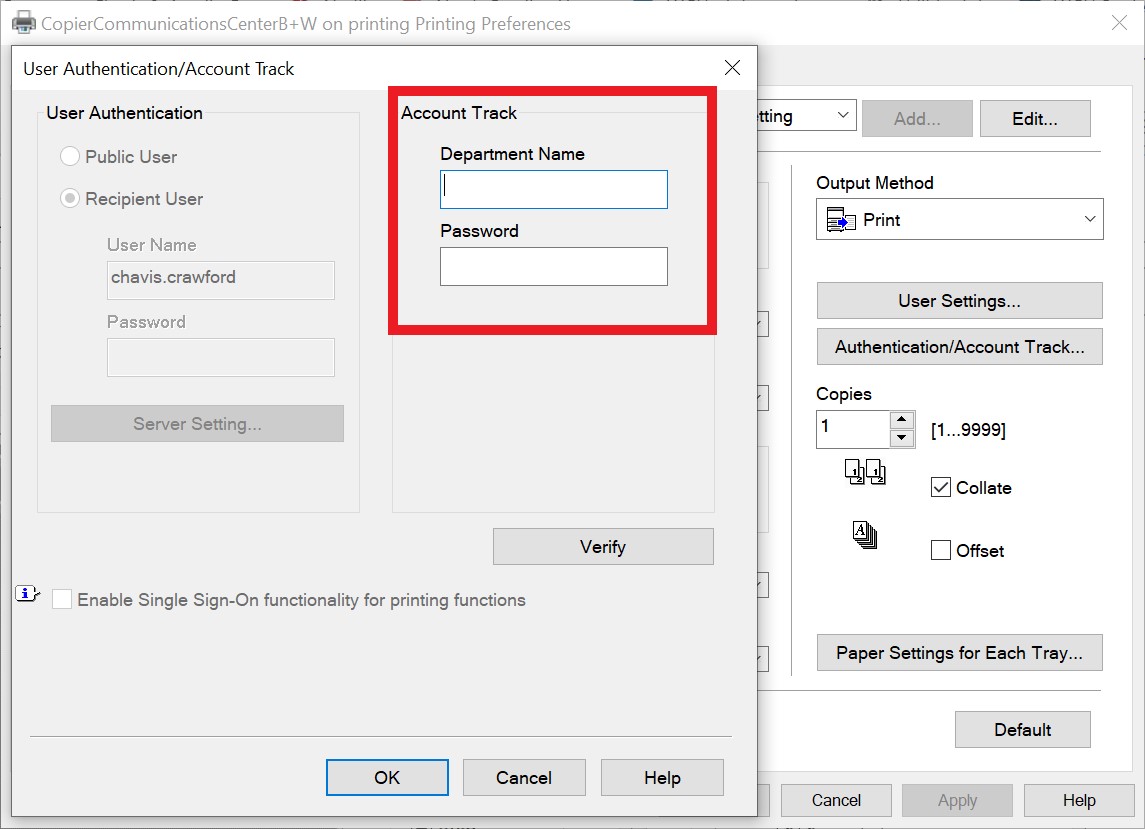
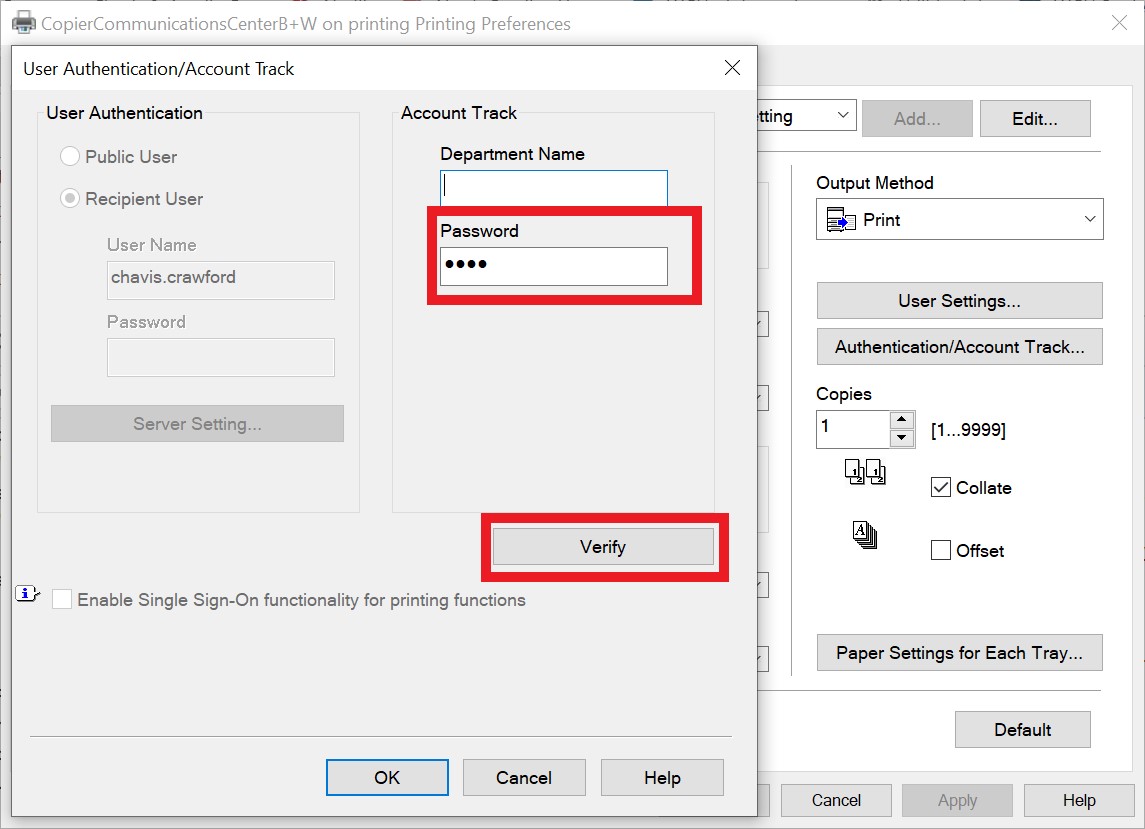
Enter your 4-digit department code, and then click on Verify.
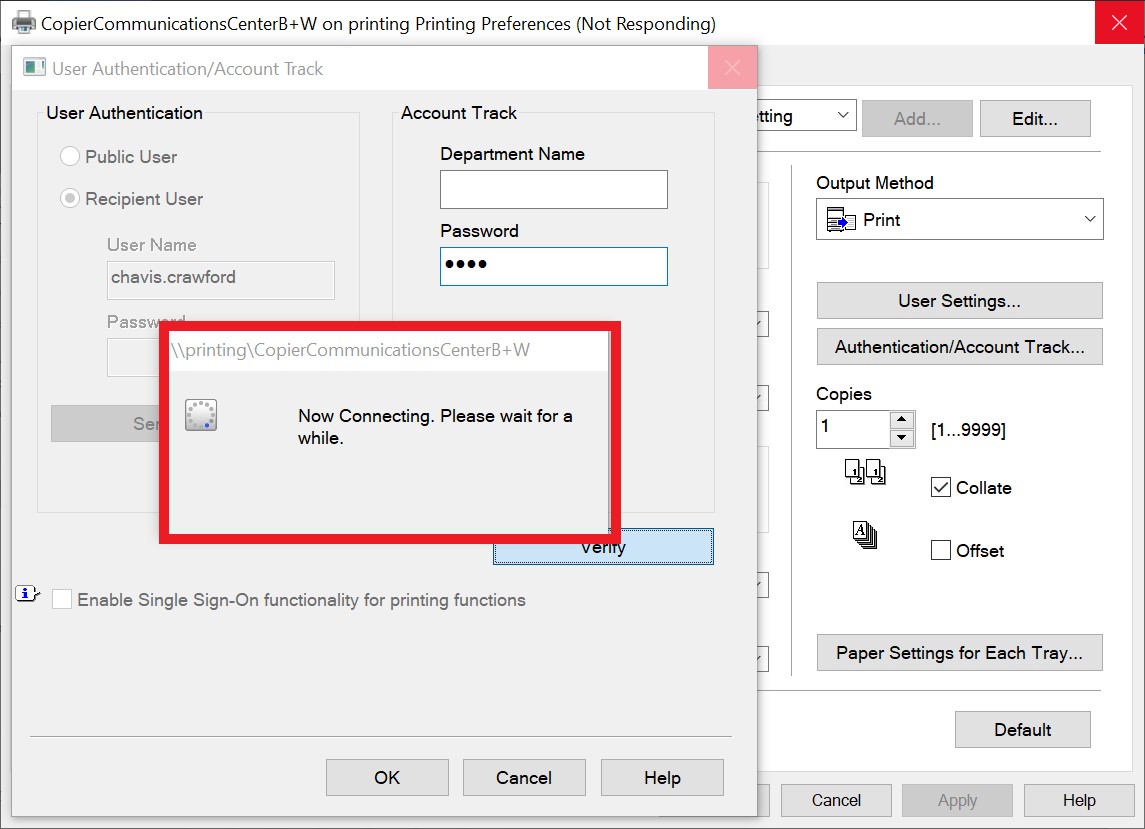
You will then see a notification message that says "Now connecting. Please wait a while". This is to save and ensure that the right department code was entered.
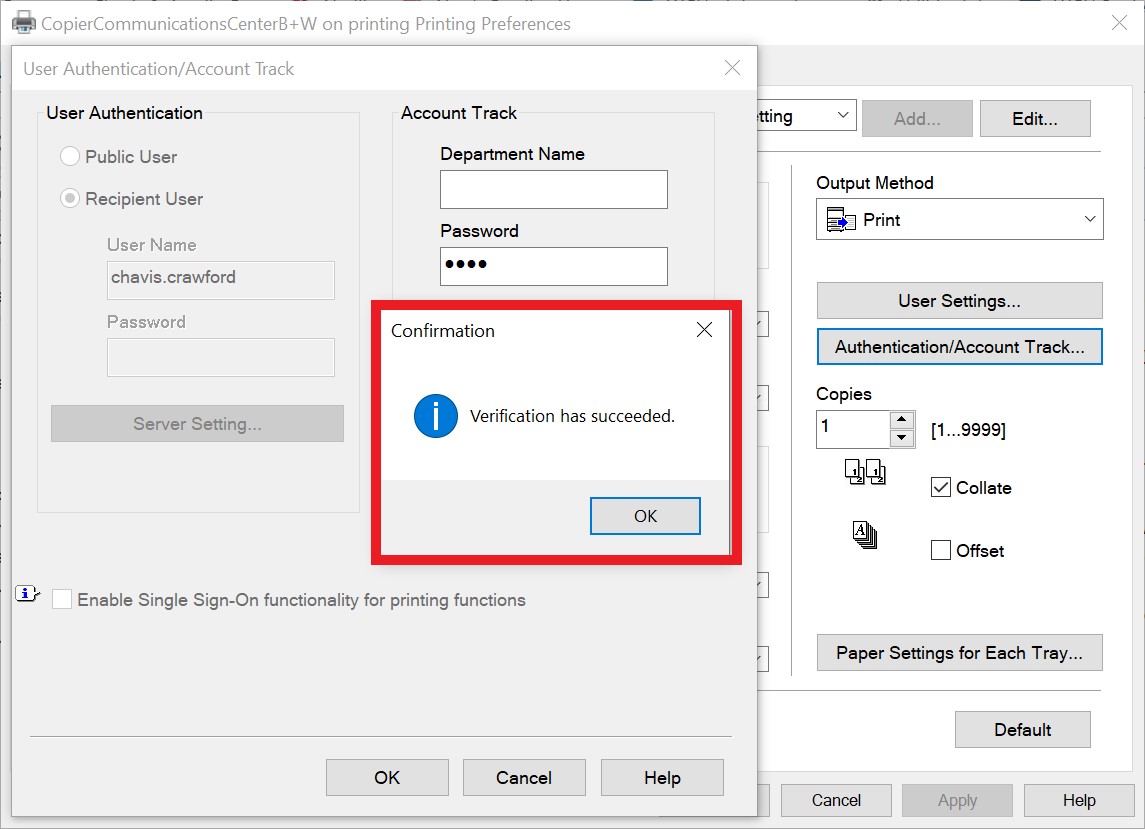
Once entered correctly, you will see the confirmation message below. You are now set to print from the Konica Minolta copiers.
Printing using network printer
...