| Note |
|---|
In order to use Asana project management software, you must contact ITS for a license. |
Asana is a web and mobile project management platform designed to help teams organize, track, and manage their work. At NCSSM, this will allow departments to manage work-related projects like hosting an event, writing curricula, hiring other employees, or implementing a new business process. See Asana’s full guide and tutorial website.
| Table of Contents | ||||
|---|---|---|---|---|
|
🔒 How to Login to Asana
Click login with Google.
Use your NCSSM Email Address and password to sign in to Asana.
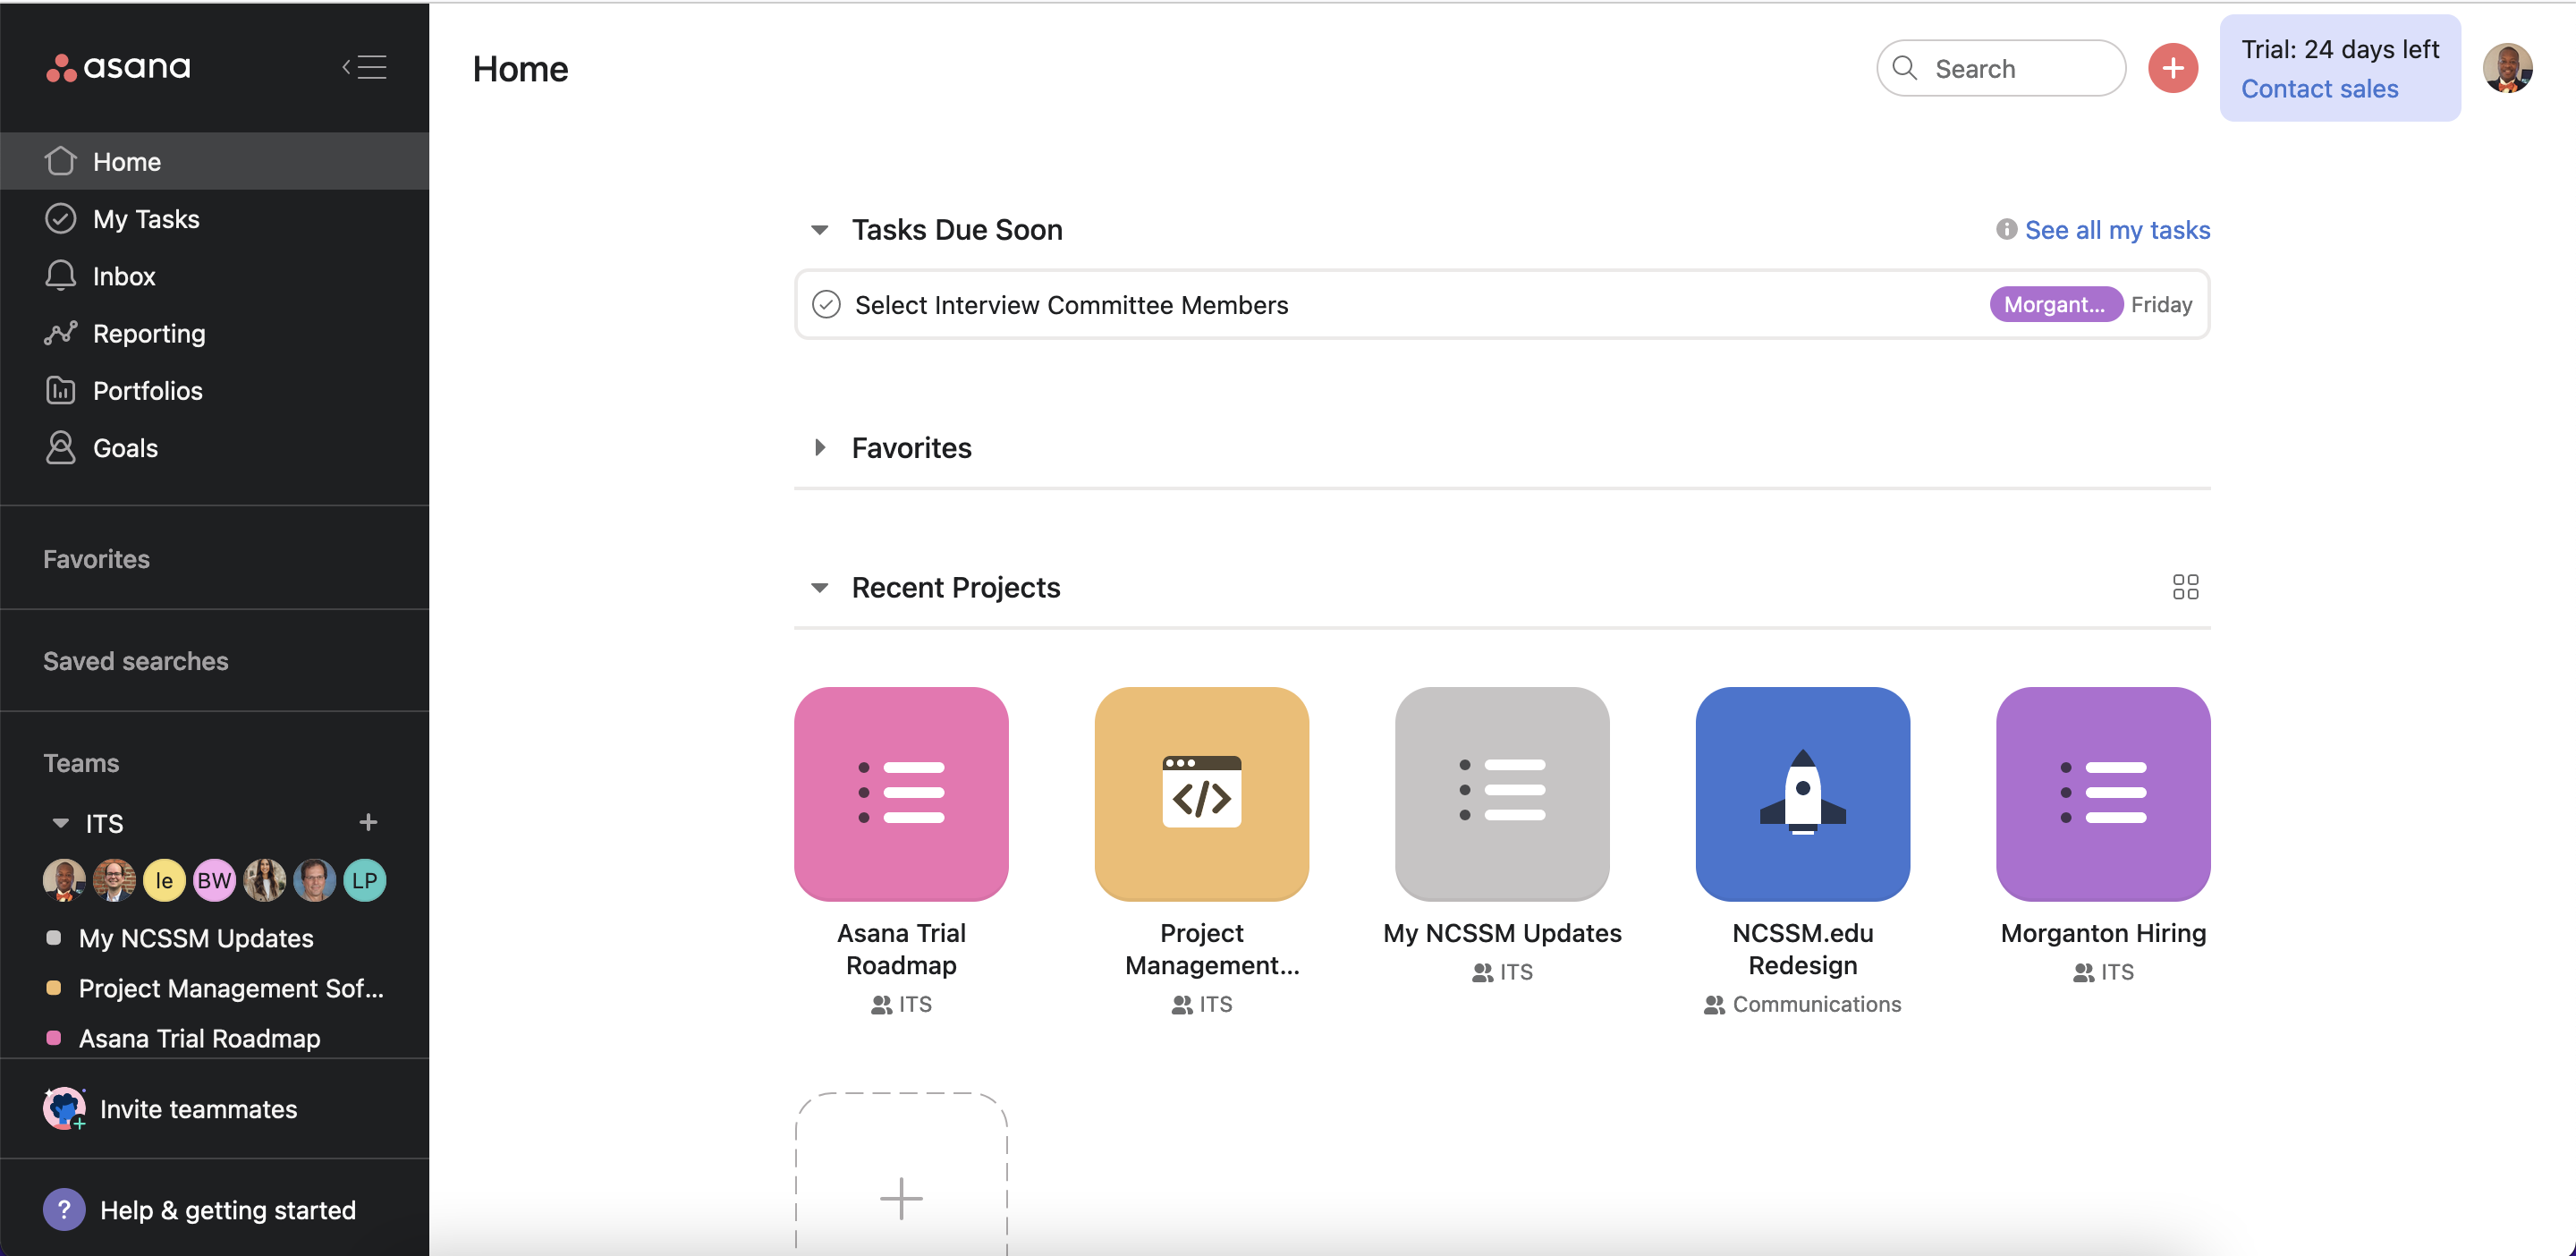
This brings you to the homepage. If you have a license, you should see your upcoming tasks under Tasks Due Soon and recent projects under Recent Projects.
📁 How to Create a Project
| Info |
|---|
Projects are how you organize and plan all of the tasks related to a specific initiative, goal, or big piece of work. You can visualize projects on the list view, board view, calendar view, or timeline view and toggle among these views at anytime. |
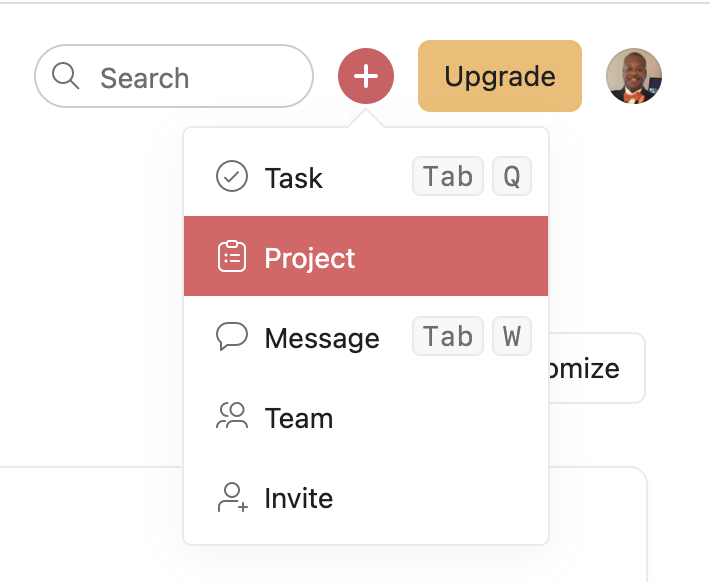
Click the plus button in the top right corner and select Project.
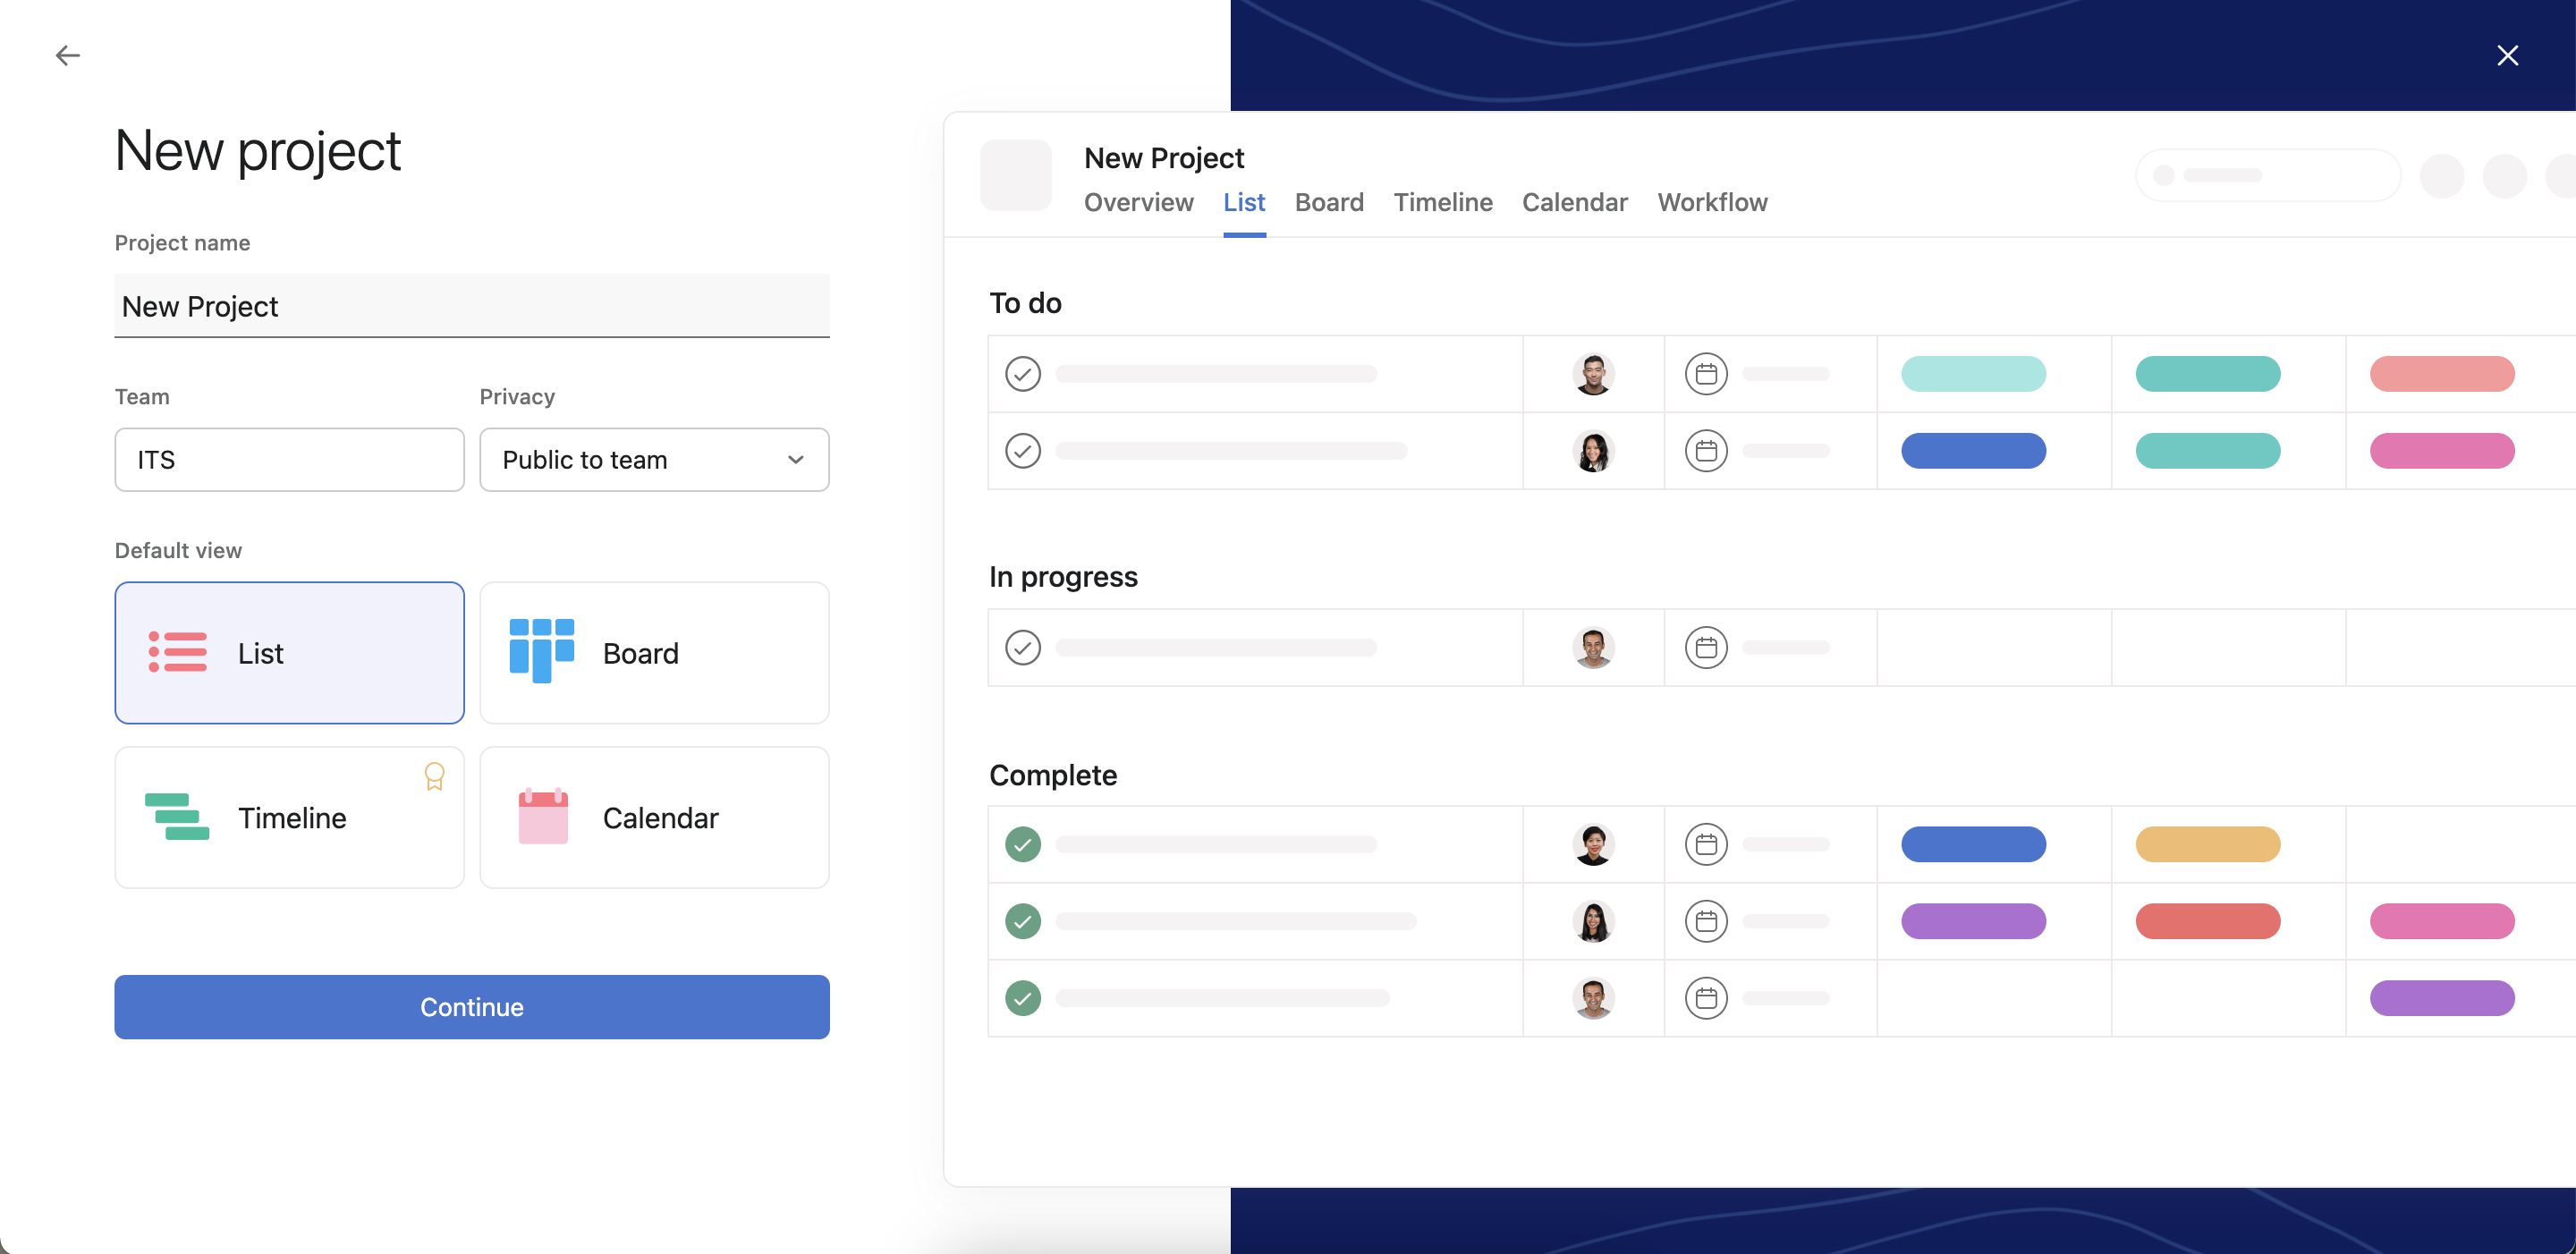
2. Select blank project. Note: To use a template, see the instructions below.
3. Give the new project a title.
4. Select which team should have access.
5. Select whether the project is public to the team, private to the team, or private to you. Note: The details of a public project may only be viewed by the team that has access to it. Other users may request to see the details of the project.
6. Select the default view. Note: You can leave list selected as the default view for most projects.
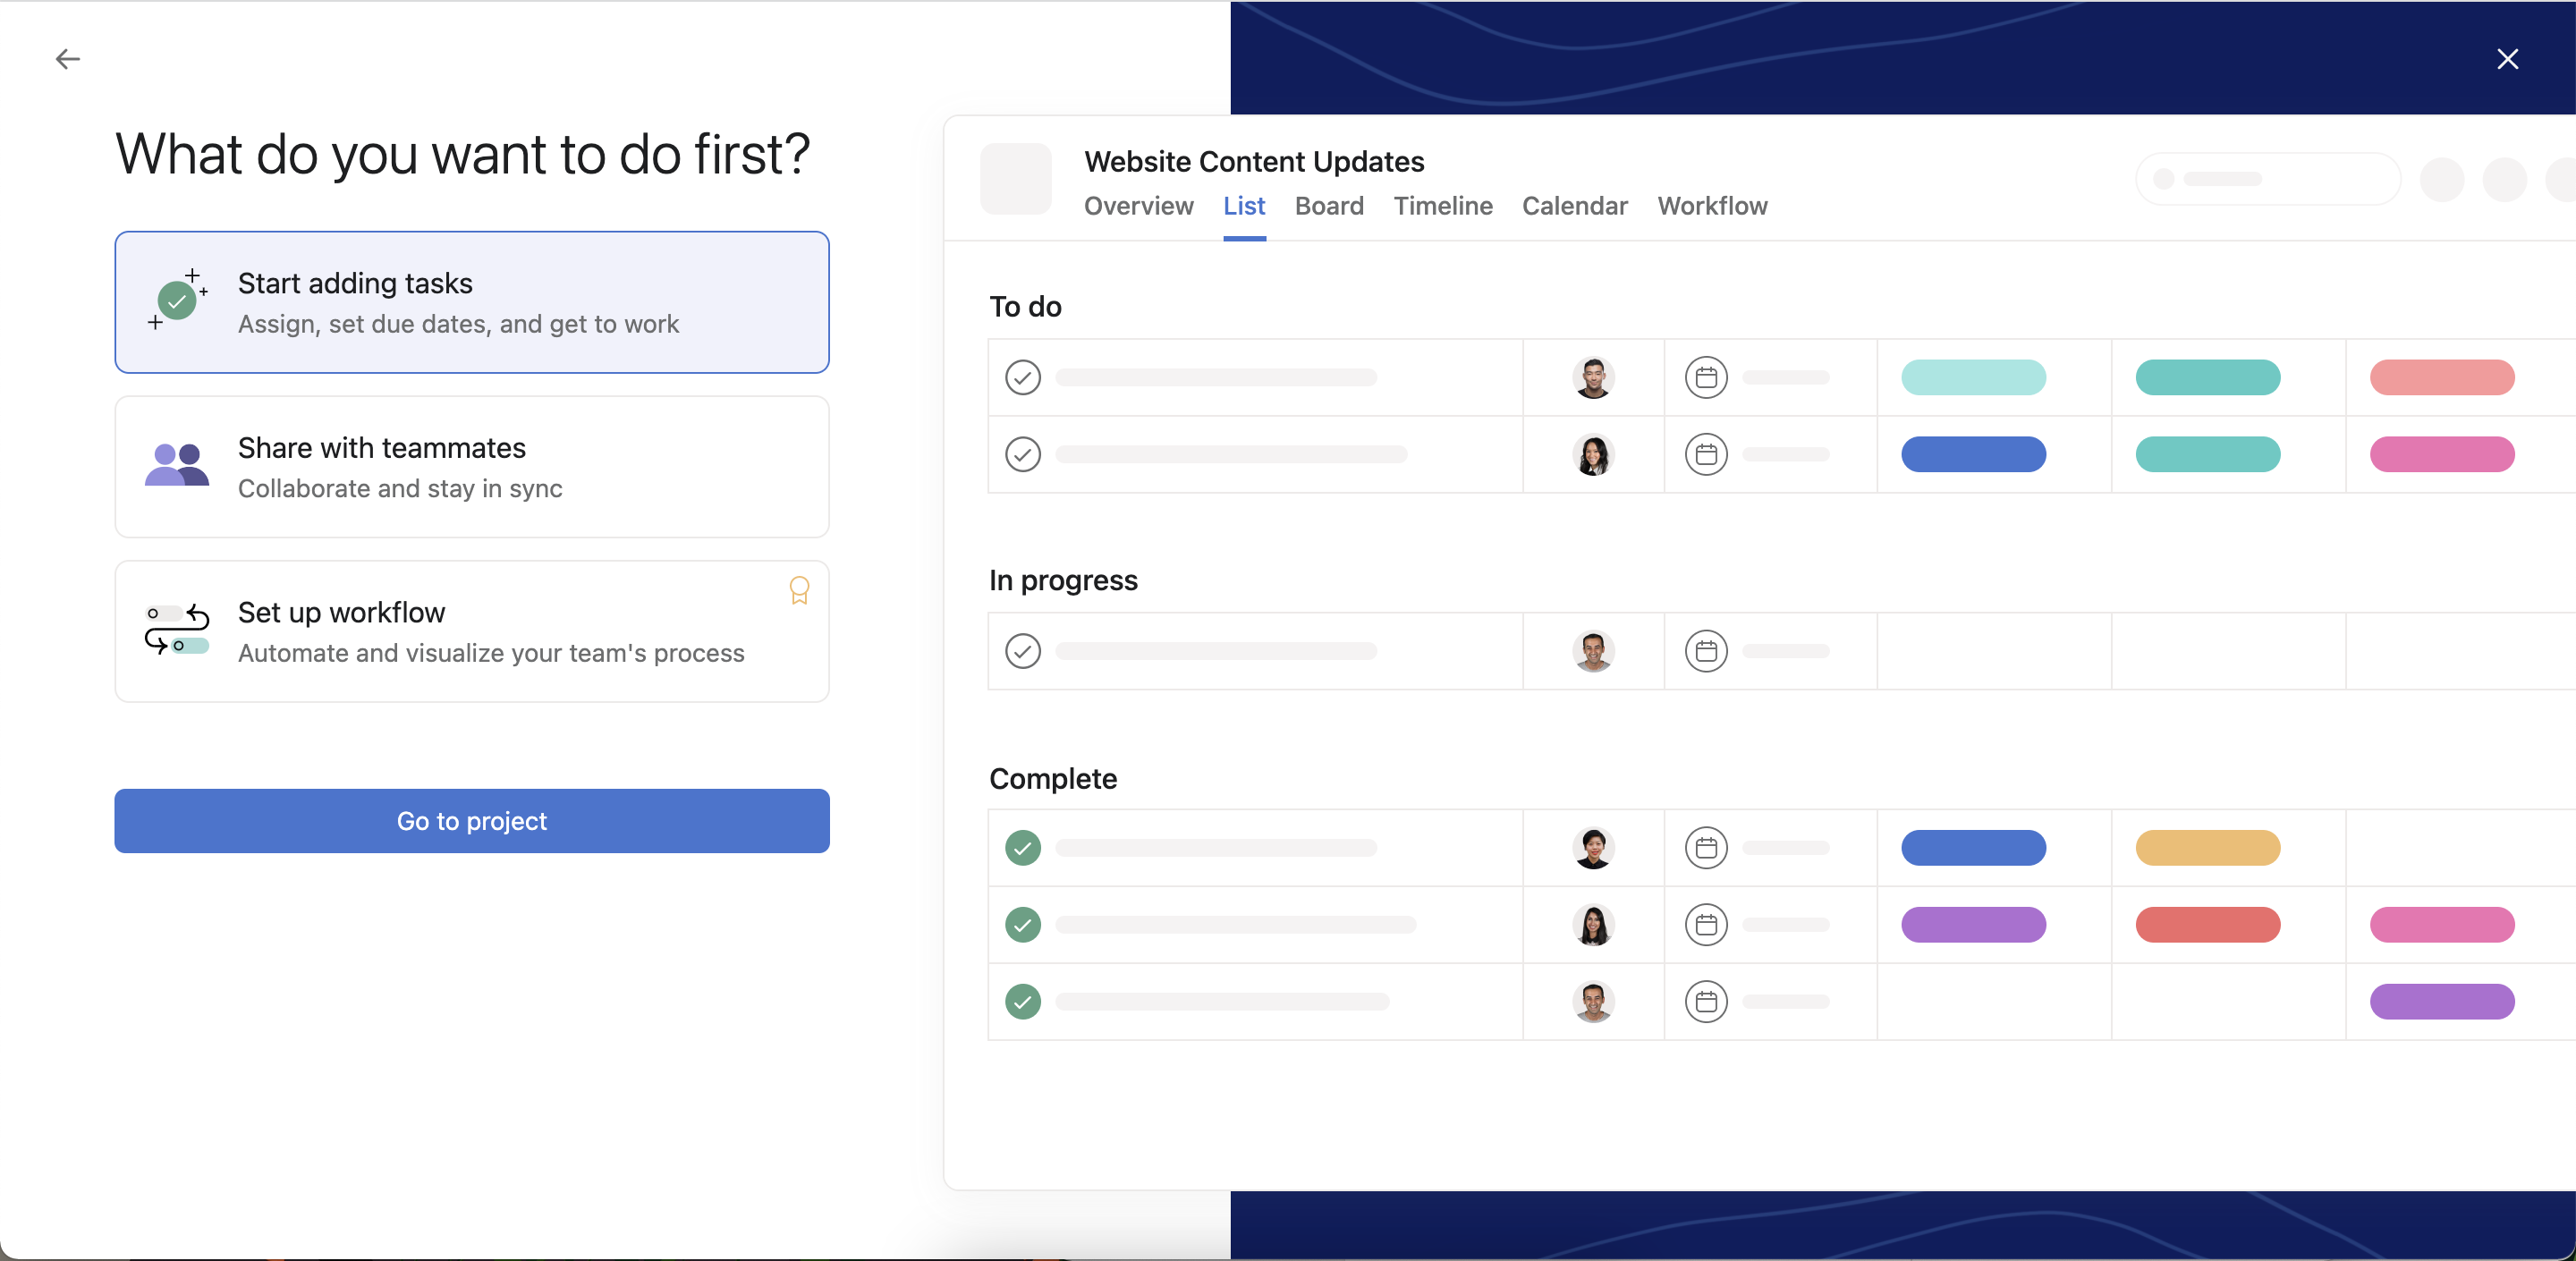
7. Select which action you want to do first after the project is built. Note: You can leave this setting as Start Adding Tasks. This brings you to the Project overview page.
⚙ How to Customize Your Project
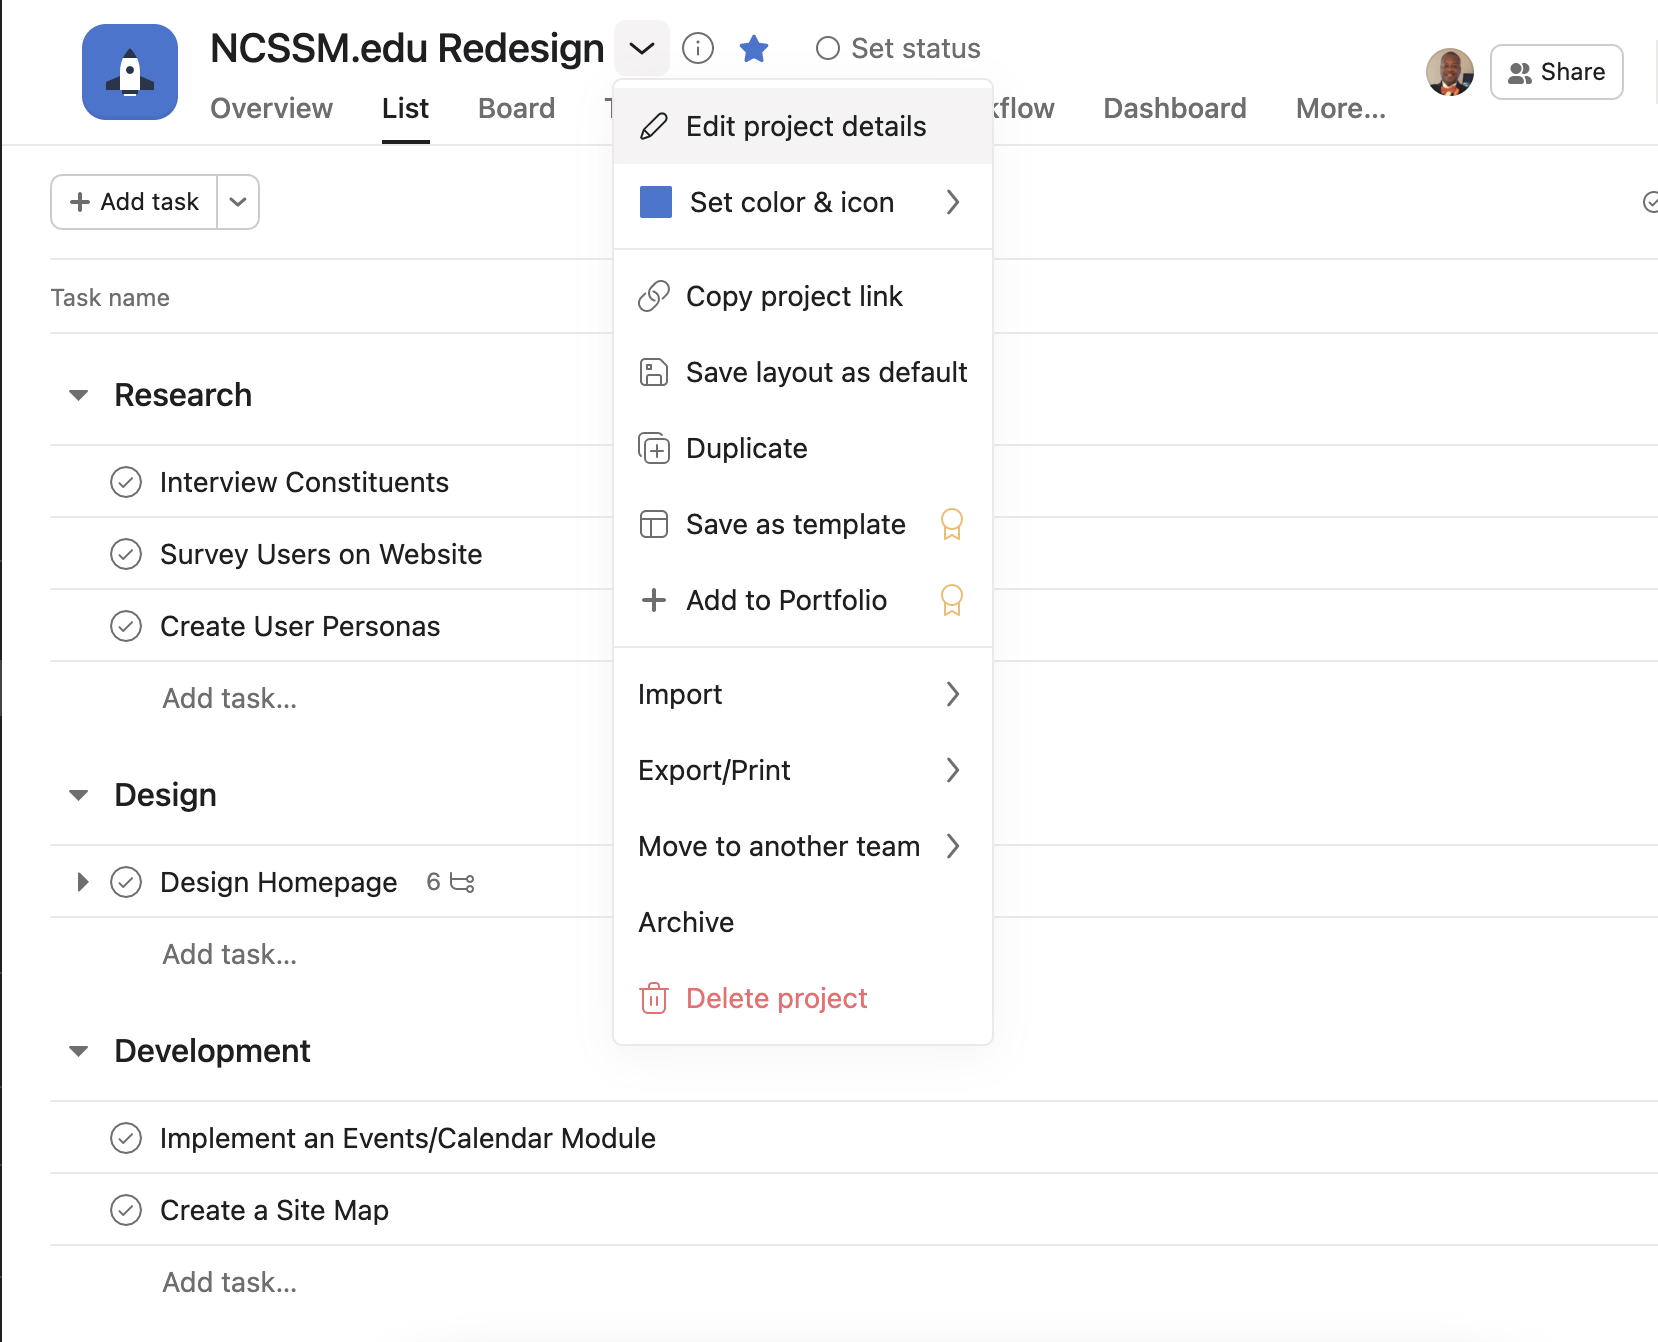
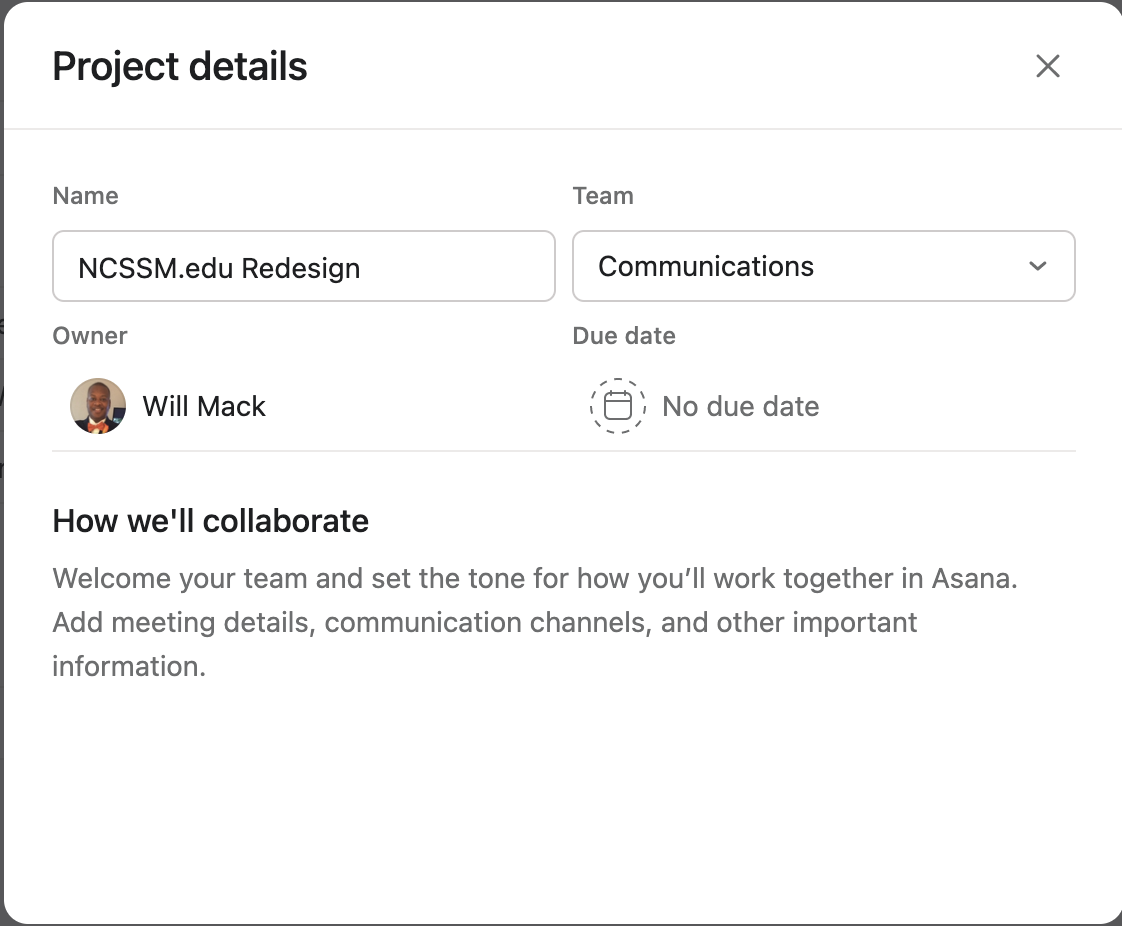
Click the down arrow next to the project name and select Edit project details.
Here you change the name, add a due date, change the team assigned to it or add a description—called How we’ll collaborate in this system.
(Optional) You may set the color & icon for the project.
(Optional) You may also copy the project link or sync it to Google Calendar.
📂 Select a Project Template
| Anchor | ||||
|---|---|---|---|---|
|
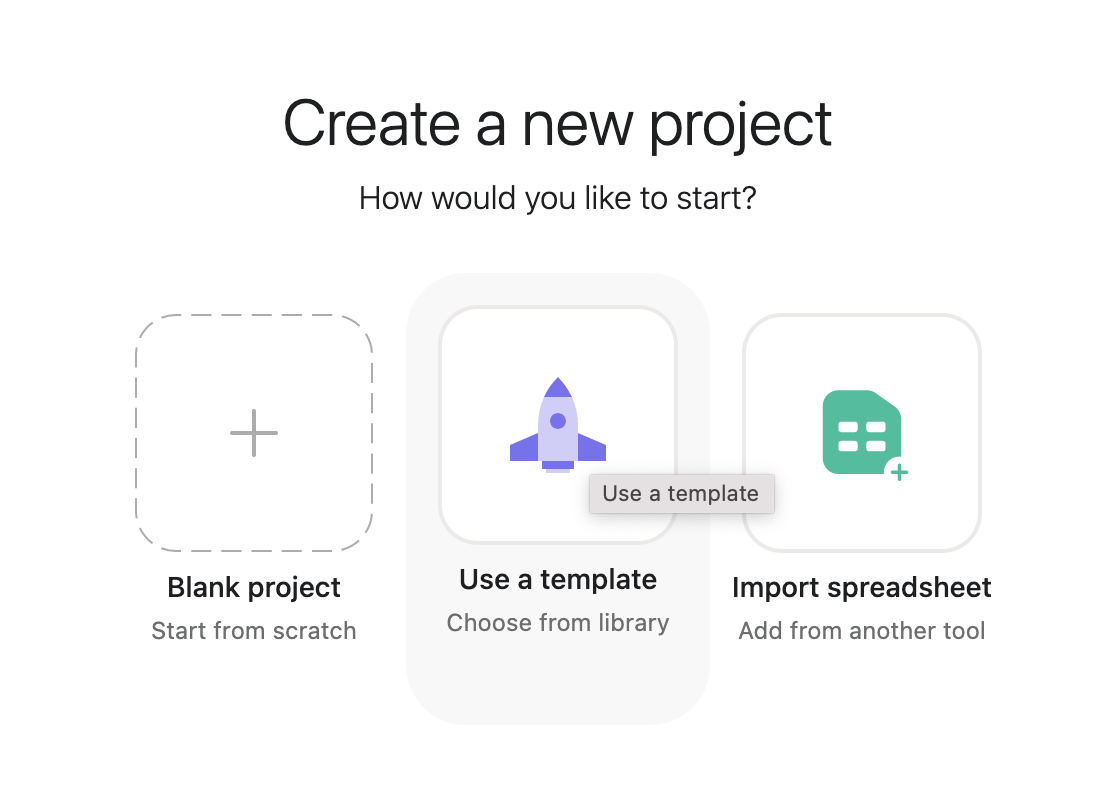
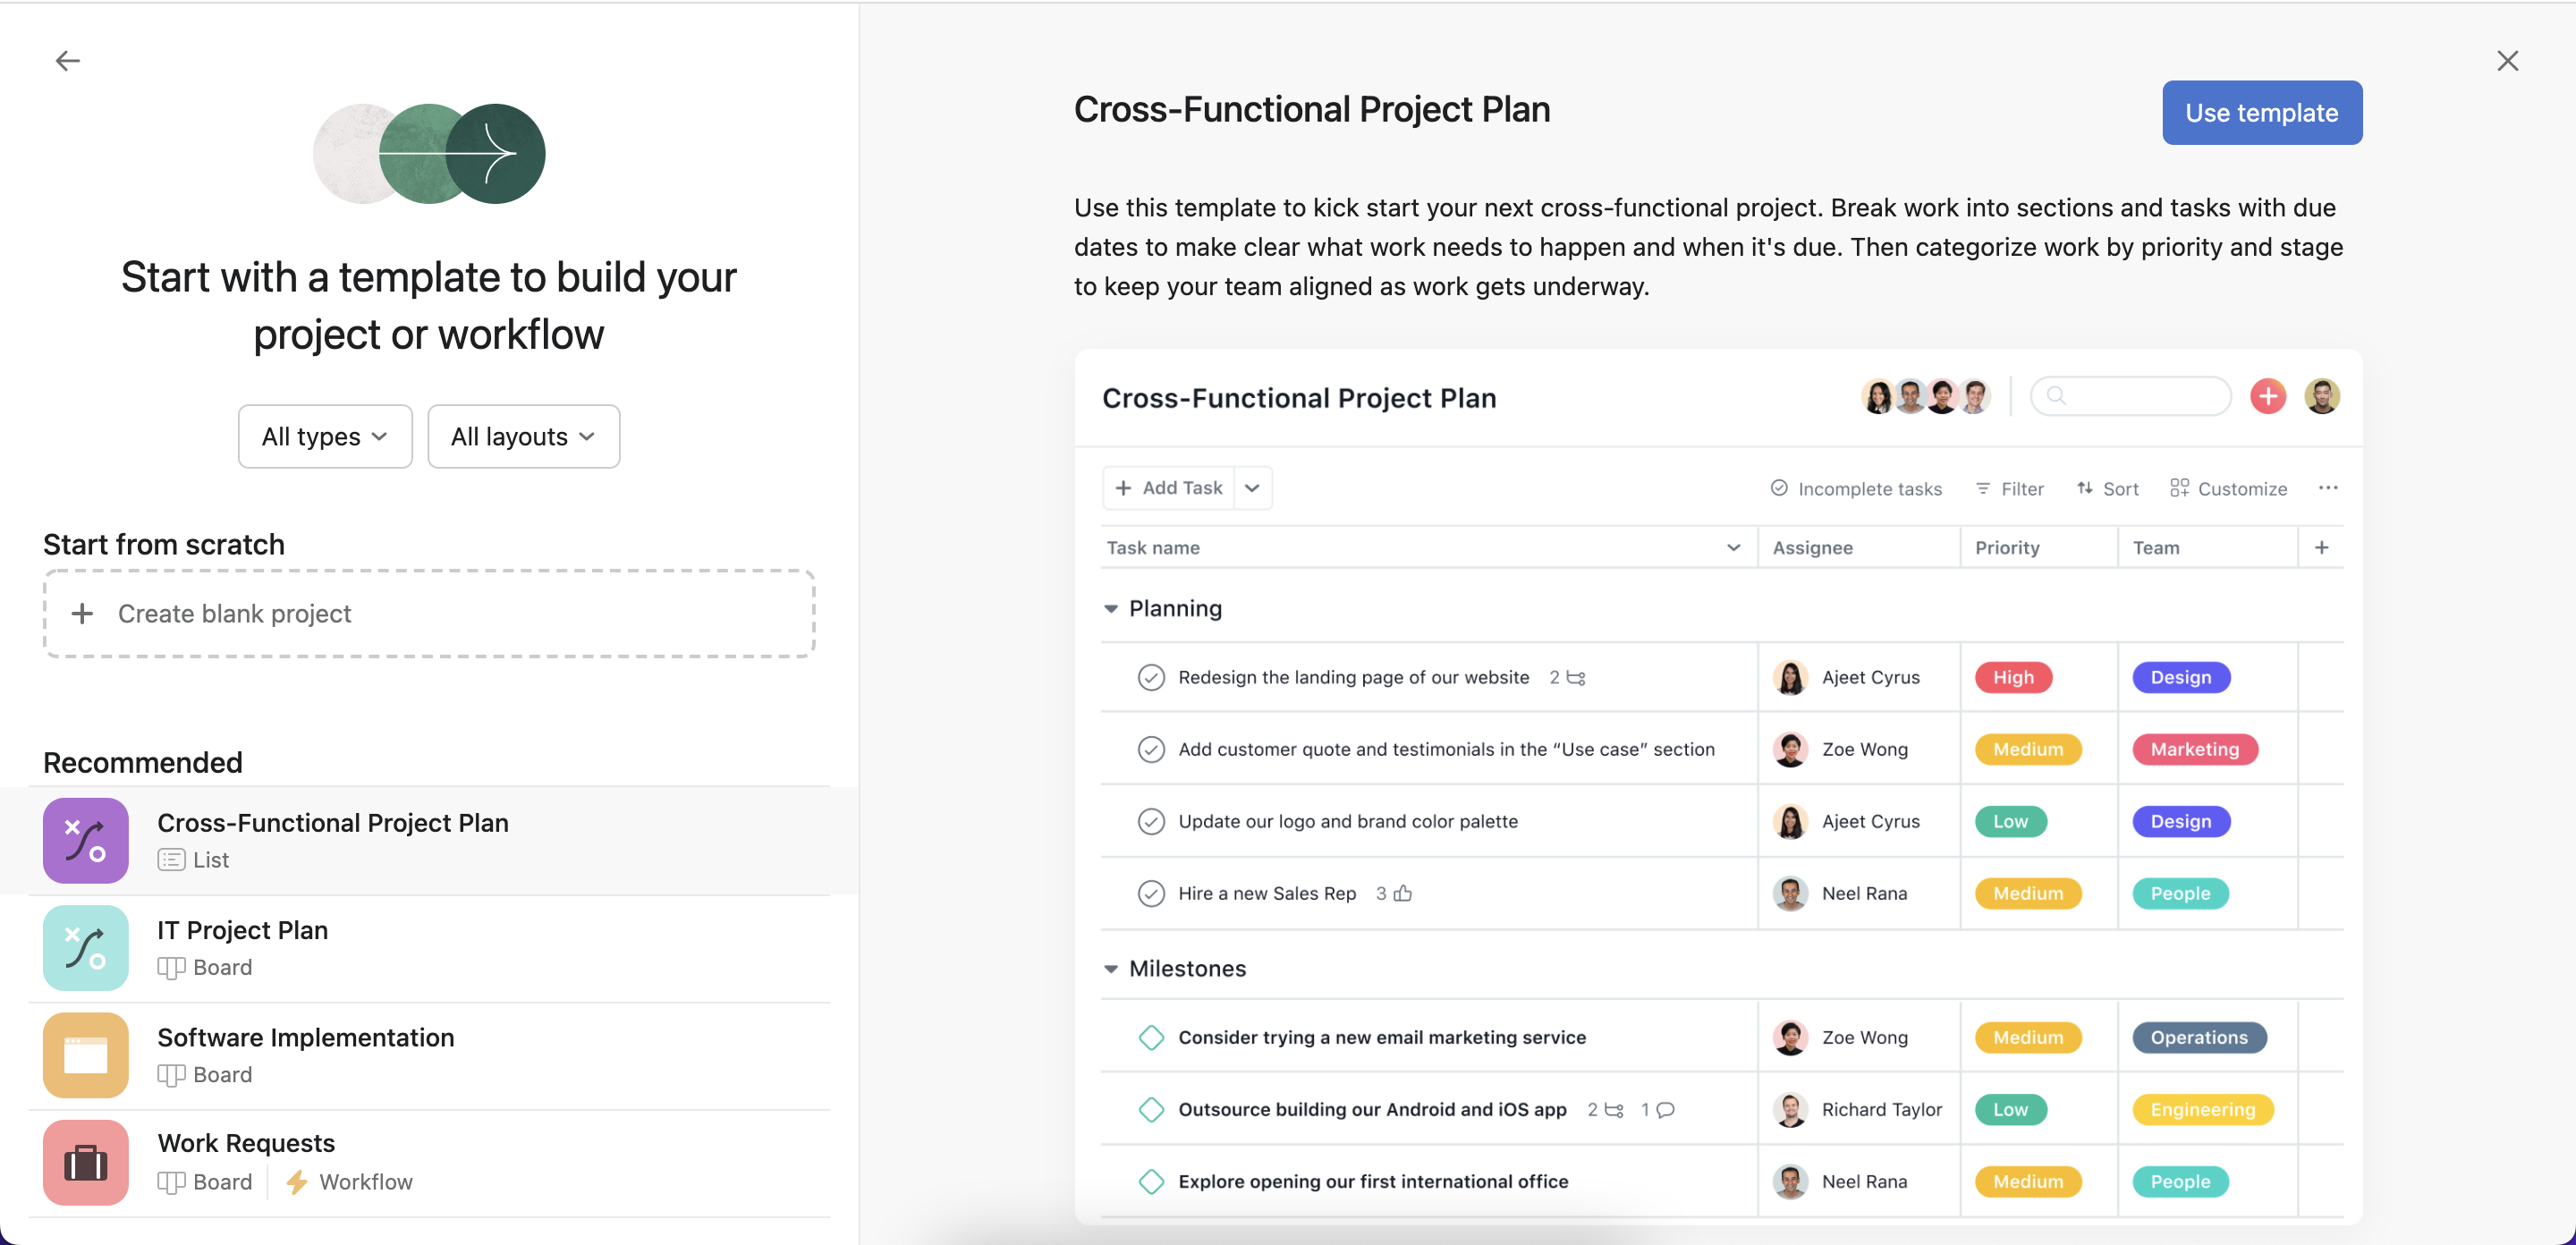
To select a template, when creating a new project, select Use a template.
Scroll down the list on the left to see the various kinds of templates Asana offers. Note: You can filter this list with the dropdown lists labeled All types and All layouts.
Select a template on the left to see its preview on the right.
Click the blue Use template button in the top right corner.
👥 How to Add Team Members to Projects
Click the Share button in the top right corner of the project home page.
Under Invite with email, type the email address of the person to add them to the list. Note: Guests are users whose email addresses do not end with @ncssm.edu. They will have limited access to the projects or tasks assigned to them.
(Optional) Add a message to the email that will be sent.
(Optional) Check/Uncheck Also invite to teamName (grant access to all public projects in this team).
Click Send.
✅ How to Create Tasks in Asana
| Anchor | ||||
|---|---|---|---|---|
|
| Info |
|---|
Tasks are actionable to-do’s and the most important building block of Asana. They may be associated with one or more projects or outside of any projects. To see all your current tasks, go to My Tasks in the navigation menu on the left side of the screen. For more information about tasks and how to organize them, see Asana Quick Lessons. |
In the My Tasks, List, Board, or Timeline view, click the blue Add Task button.

Type a task name, then press
enter/returnto keep adding more. Note: Make task names specific and action-based so it's clear what you need to do.Add a task description so the assignee knows what they need to do.
Assign the task to a teammate and set a due date.
(Optional) Attach files with any relevant information or working documents (ie Google Doc). Note: Make sure to attach completed files when you're marking the task complete so teammates can find your work and know it's done.
(Optional) Add teammates as task collaborators so they can stay up to date on task progress. You can ping them by @mentioning them when you comment on a task.
🗒 List View
| Info |
|---|
List view is also the default view for the My Tasks section of Asana. For more information about the list view, see list. |
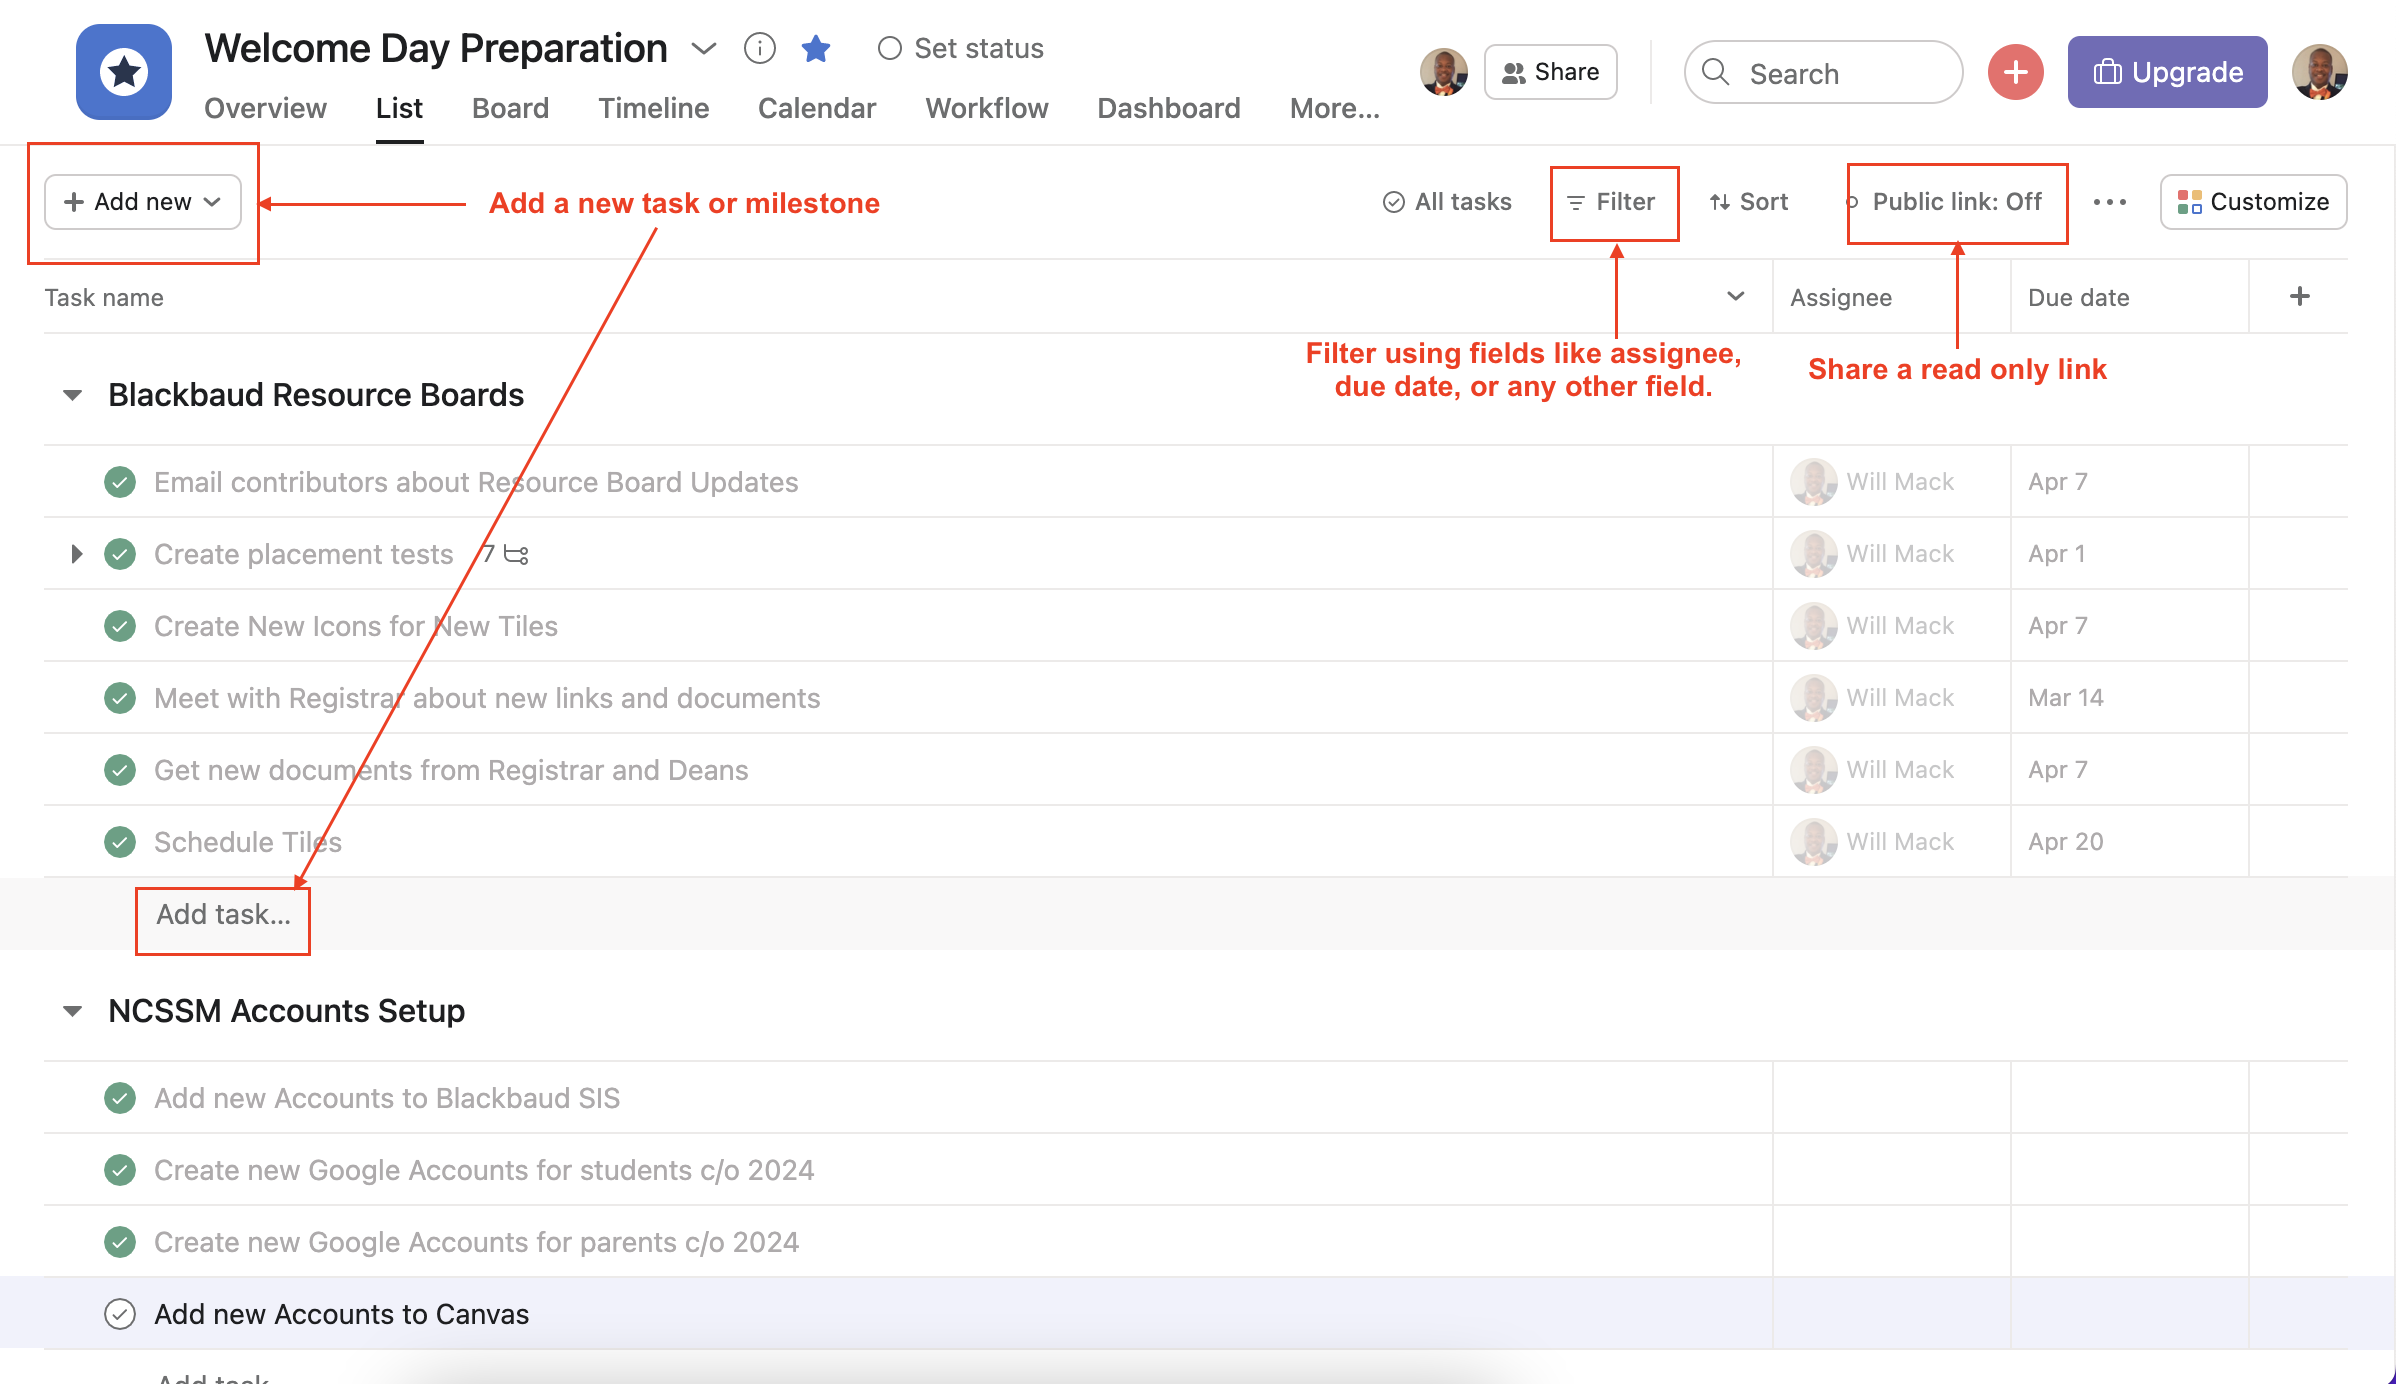
Select a project from the Favorites list or under your Team name.
Select the List tab link in the Project Toolbar.
From this point, you can do one or more of the following:
Filter or sort tasks
🔖 Board View
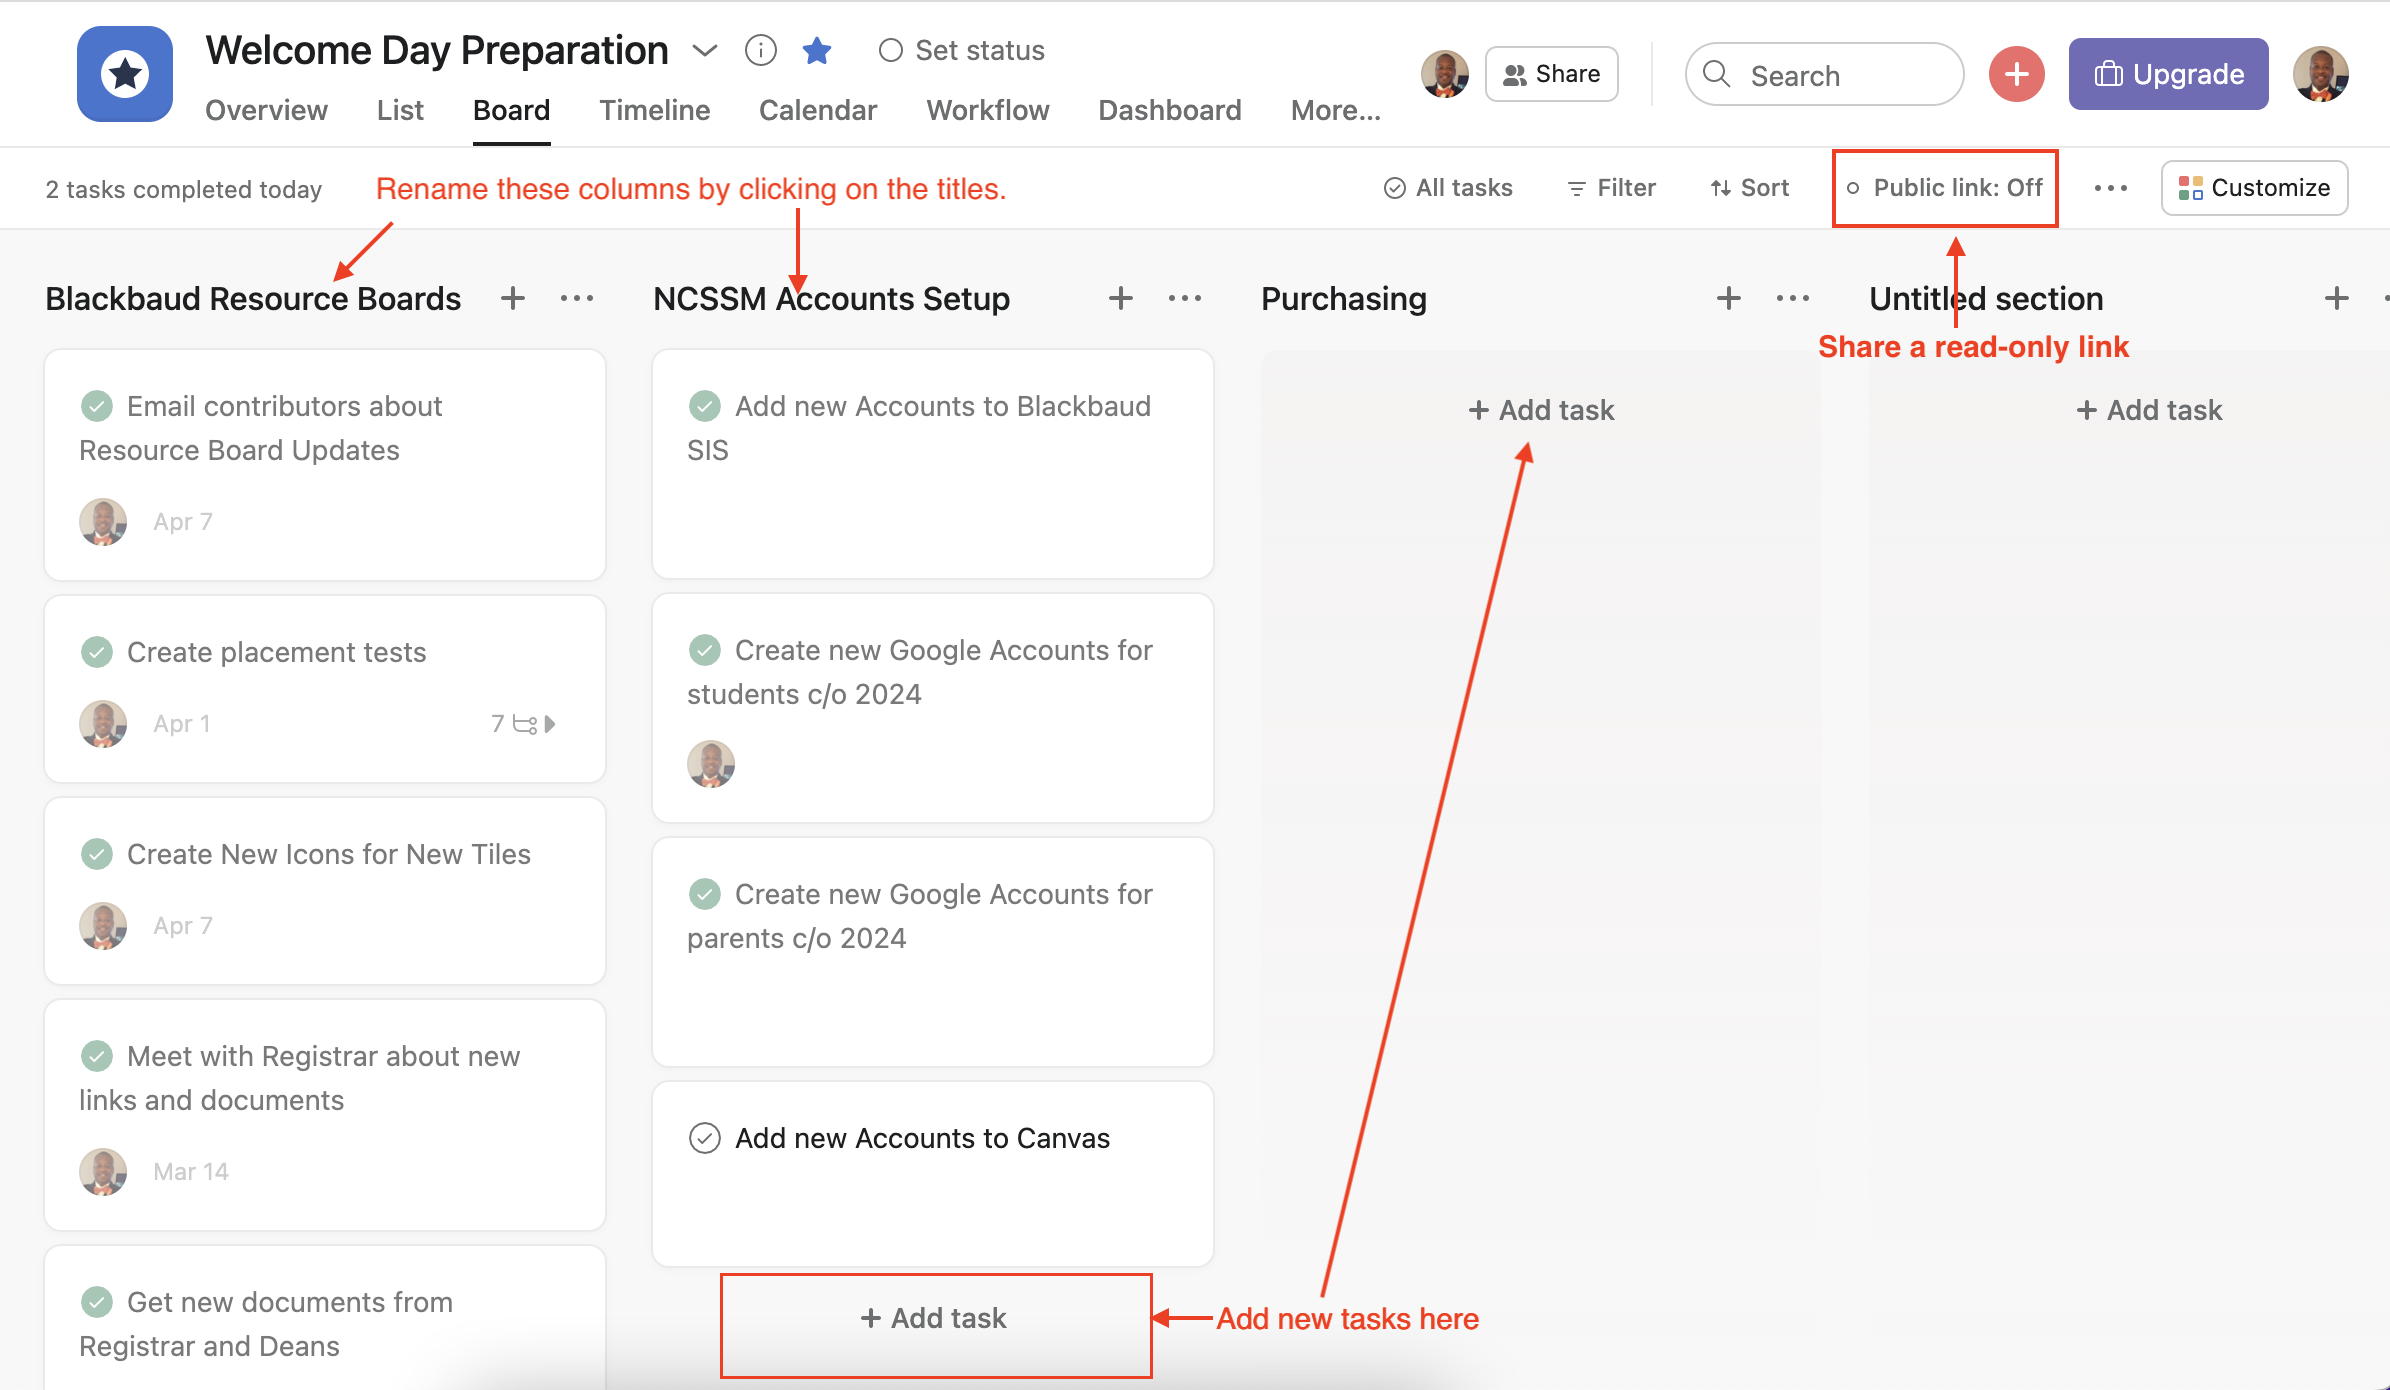
Select a project from the Favorites list or under your Team name.
Select the Board tab link in the Project Toolbar.
Click the title of each column to rename it.
From this point, you can do one or more of the following:
Drag and drop the tasks on different columns.
🕓 Timeline View
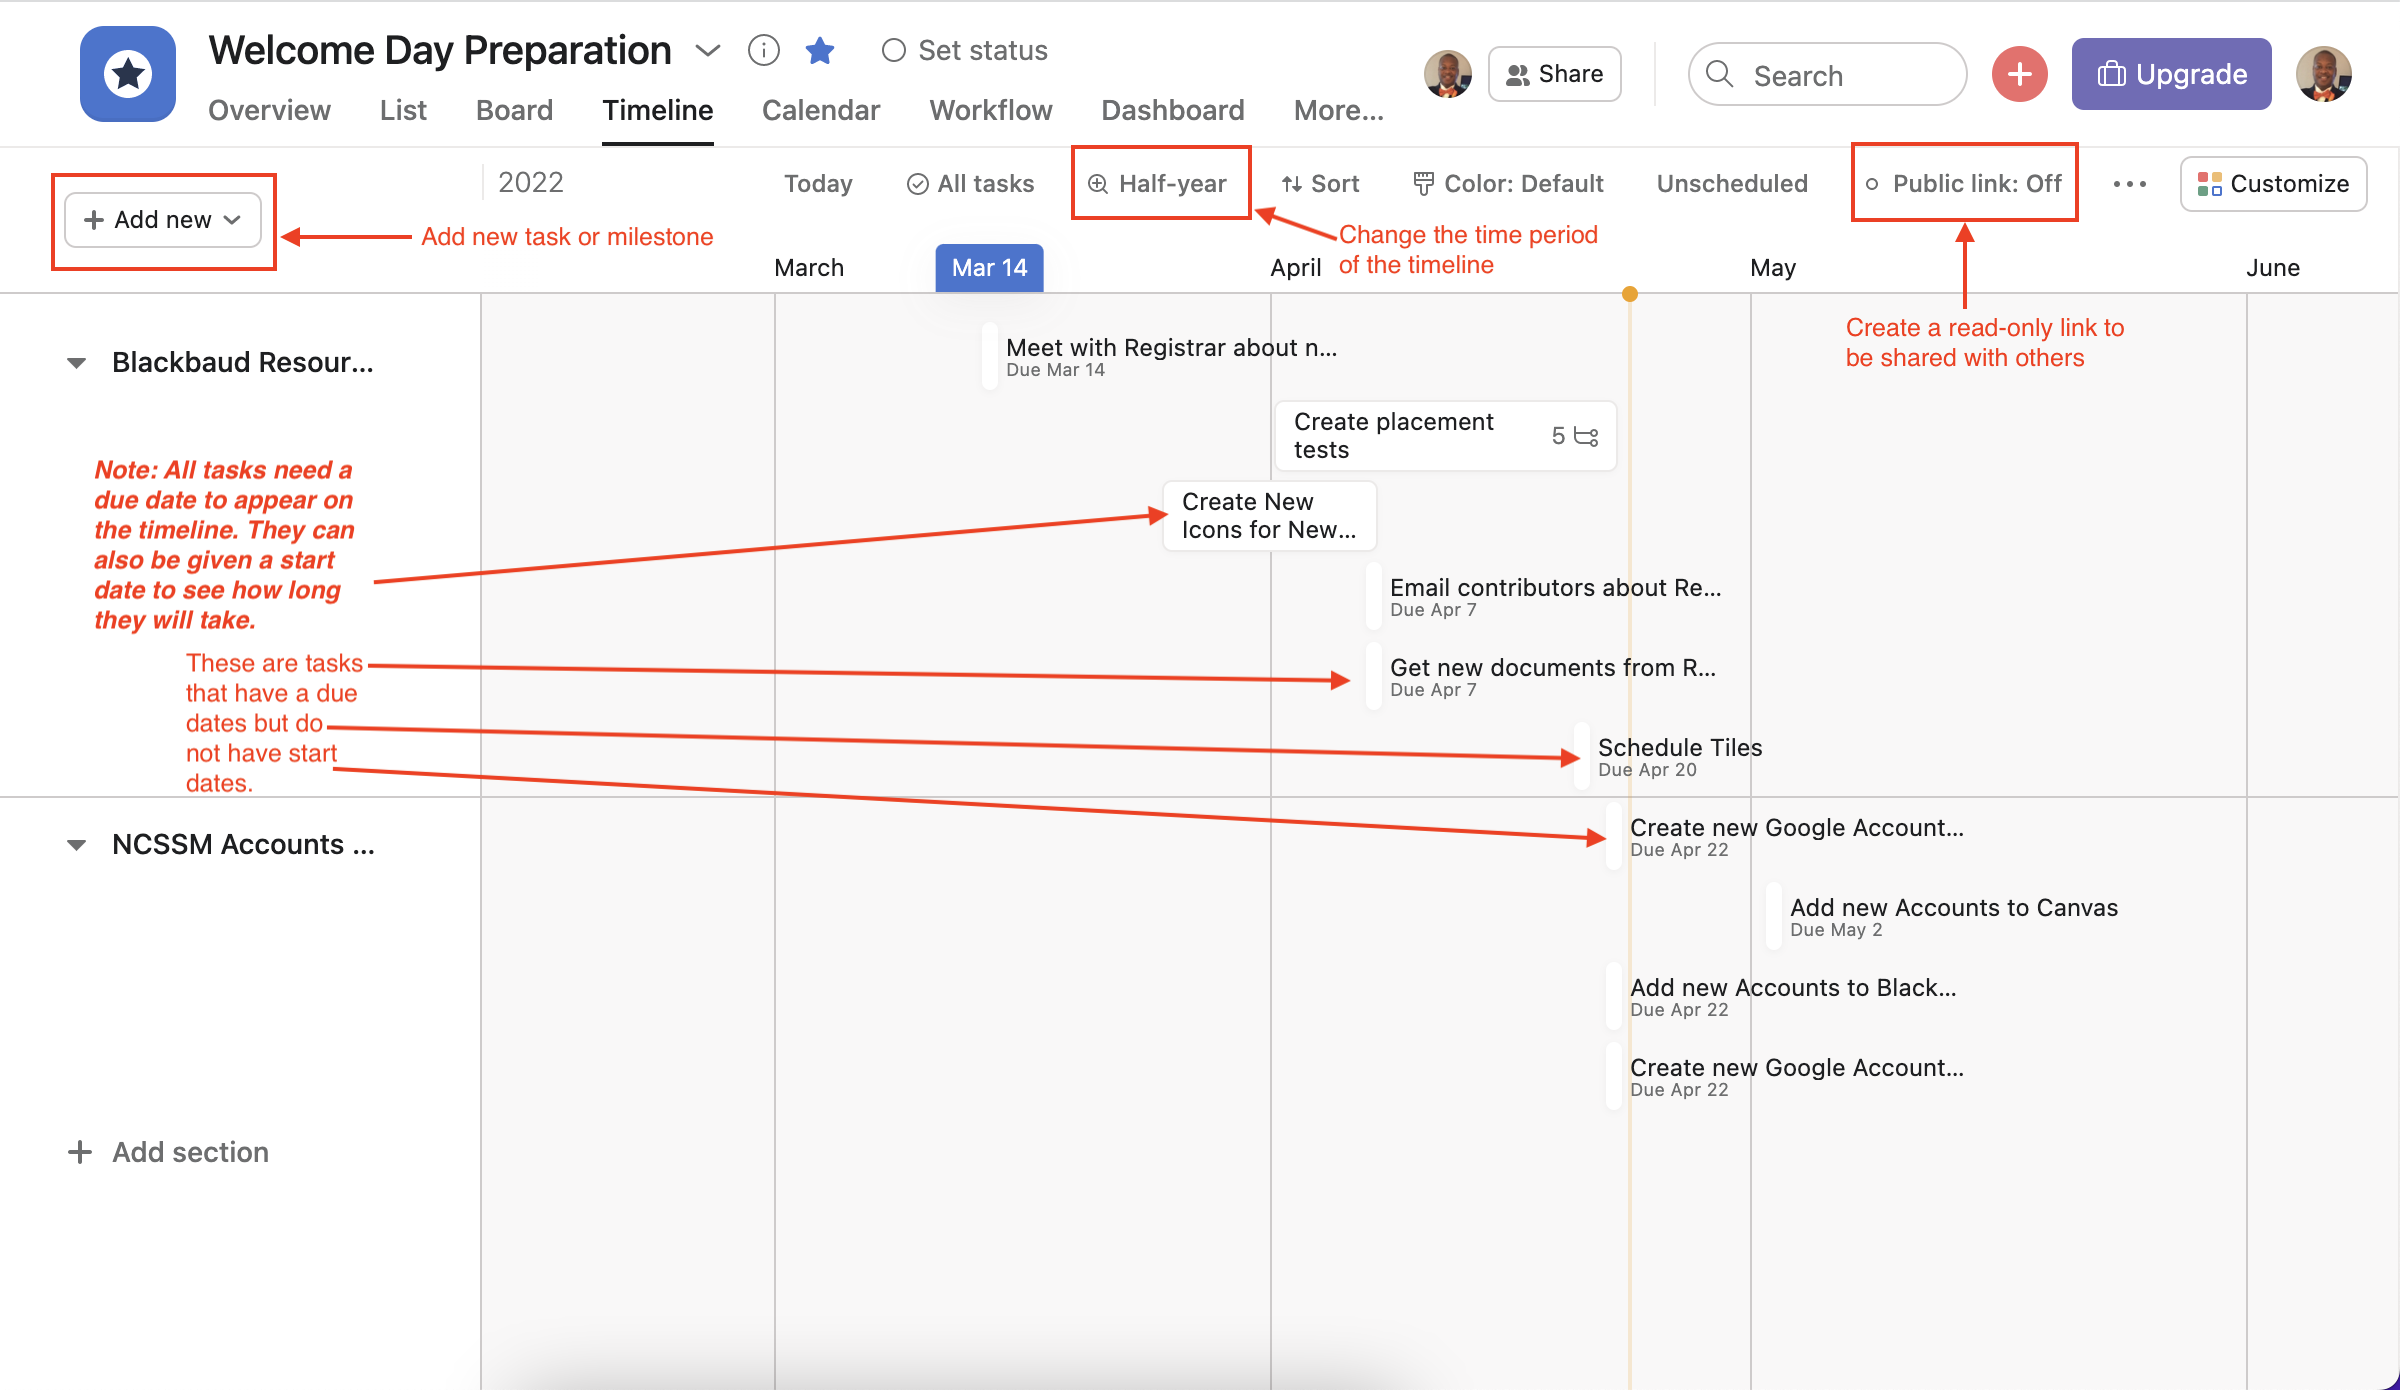
Select a project from the Favorites list or under your Team name.
Select the Timeline tab link in the Project Toolbar.
From this point, you can do one or more of the following:
📅 How To Add Your Tasks List to Google Calendar
https://asana.com/apps/google-calendar
📅 How to Add Your Projects to Google Calendar
| Anchor | ||||
|---|---|---|---|---|
|
| Note |
|---|
It’s best to create the project and its tasks in Asana before syncing it to your Google Calendar. |
https://asana.com/apps/google-calendar
🔗 How To Share a Read-Only Access Link of your project
| Note |
|---|
Read-only links must be created in board, timeline, or list view. |
https://asana.com/guide/help/premium/read-only-links
\uD83D\uDCCB Related articles
| Filter by label (Content by label) | ||||||||||||||||||
|---|---|---|---|---|---|---|---|---|---|---|---|---|---|---|---|---|---|---|
|