| Info |
|---|
DocHub is signature and approval software that has a PDF editor, a detailed audit trail tracking each document, the ability to change out a signer midway through the approval process, templates that can be filled by role, and integration with Google Workspace and Microsoft Office. Access Dochub at Dochub.com. |
| Table of Contents | ||||
|---|---|---|---|---|
|
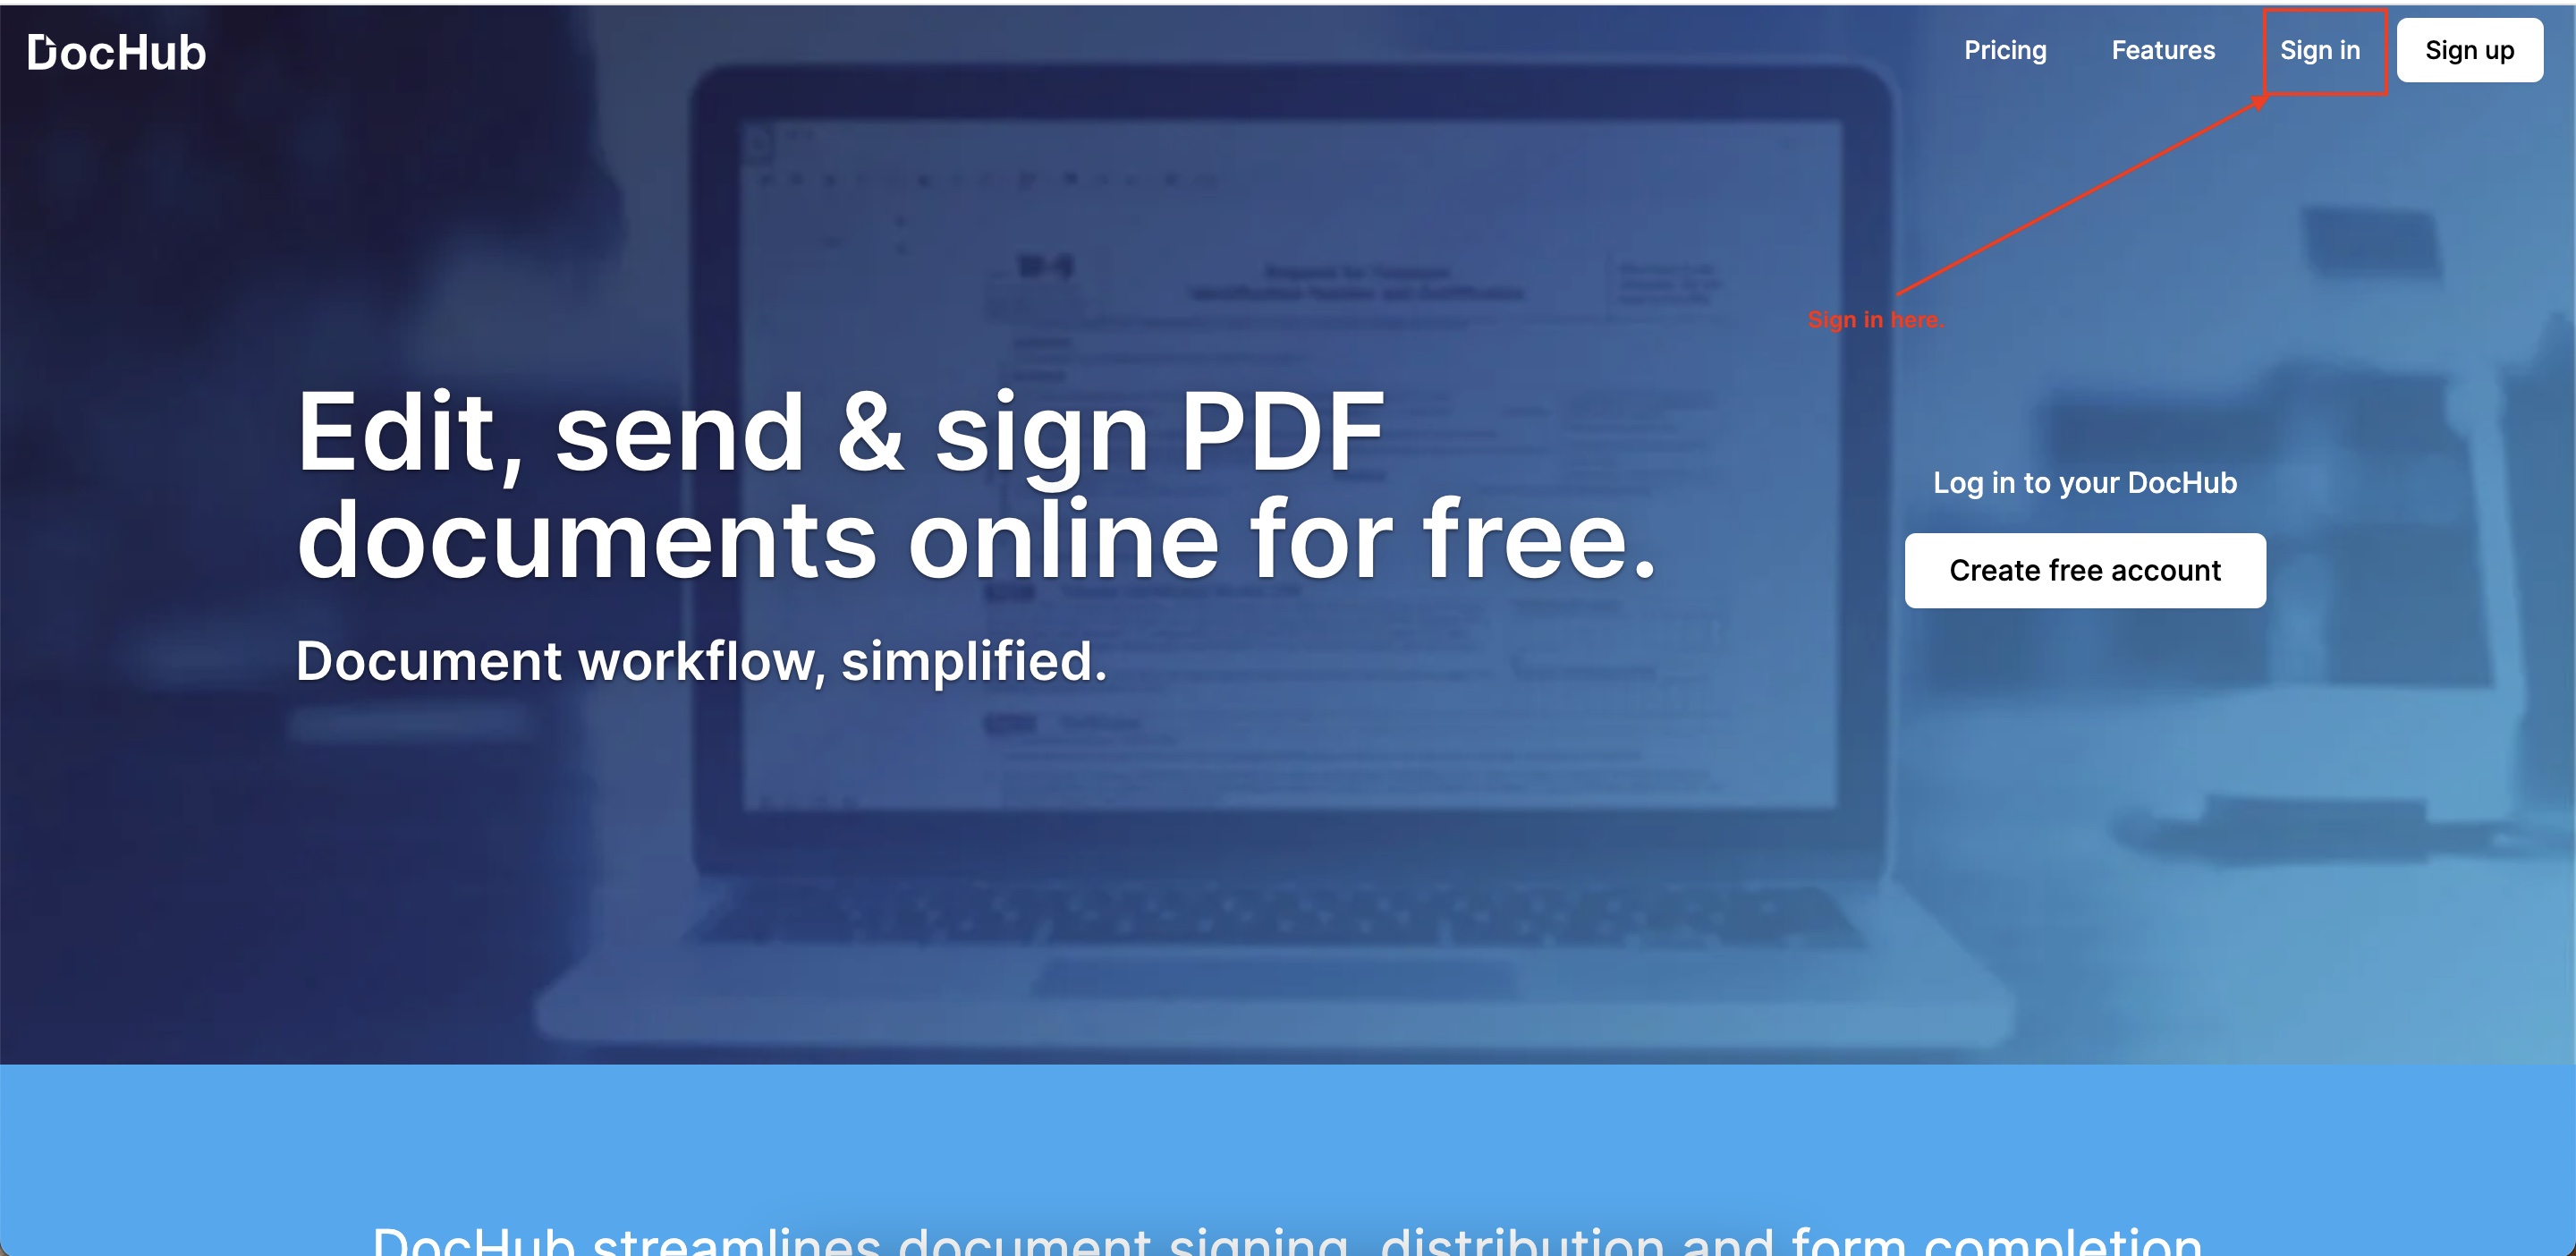
🔒 Log in to DocHub
Go to Dochub.com.
Click Sign in at the top right corn.
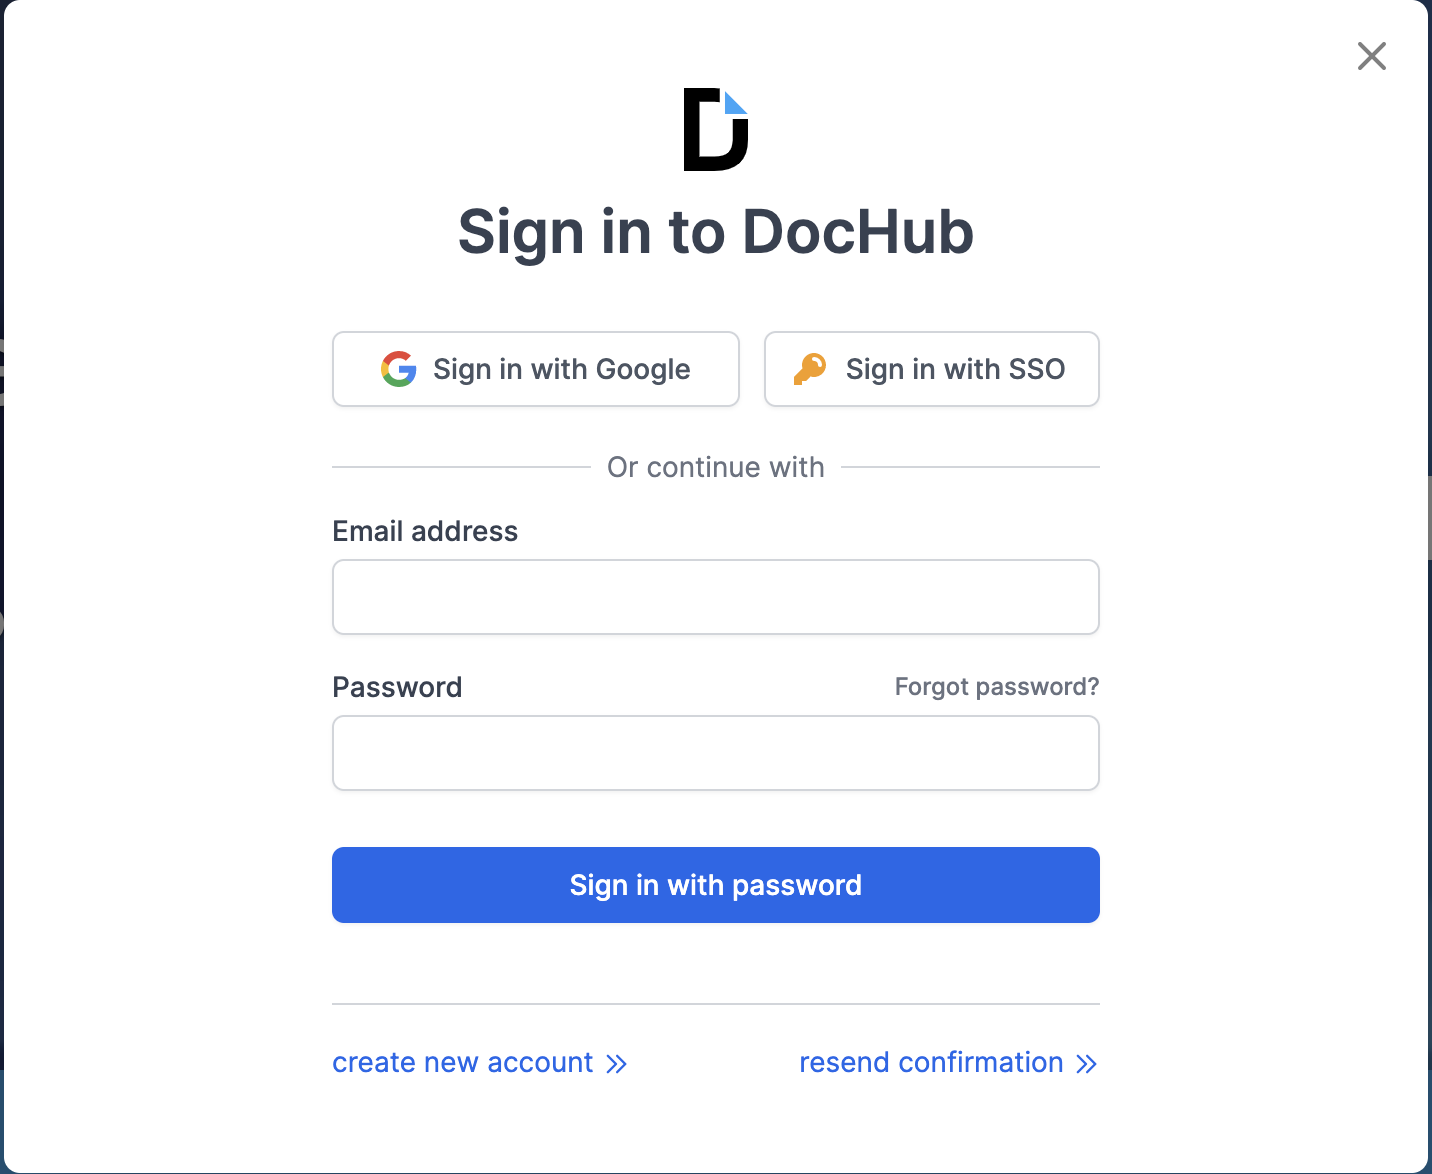
Select Sign in with Google and log in with your NCSSM email address and password.
✏️ Prepare a Document for Signing
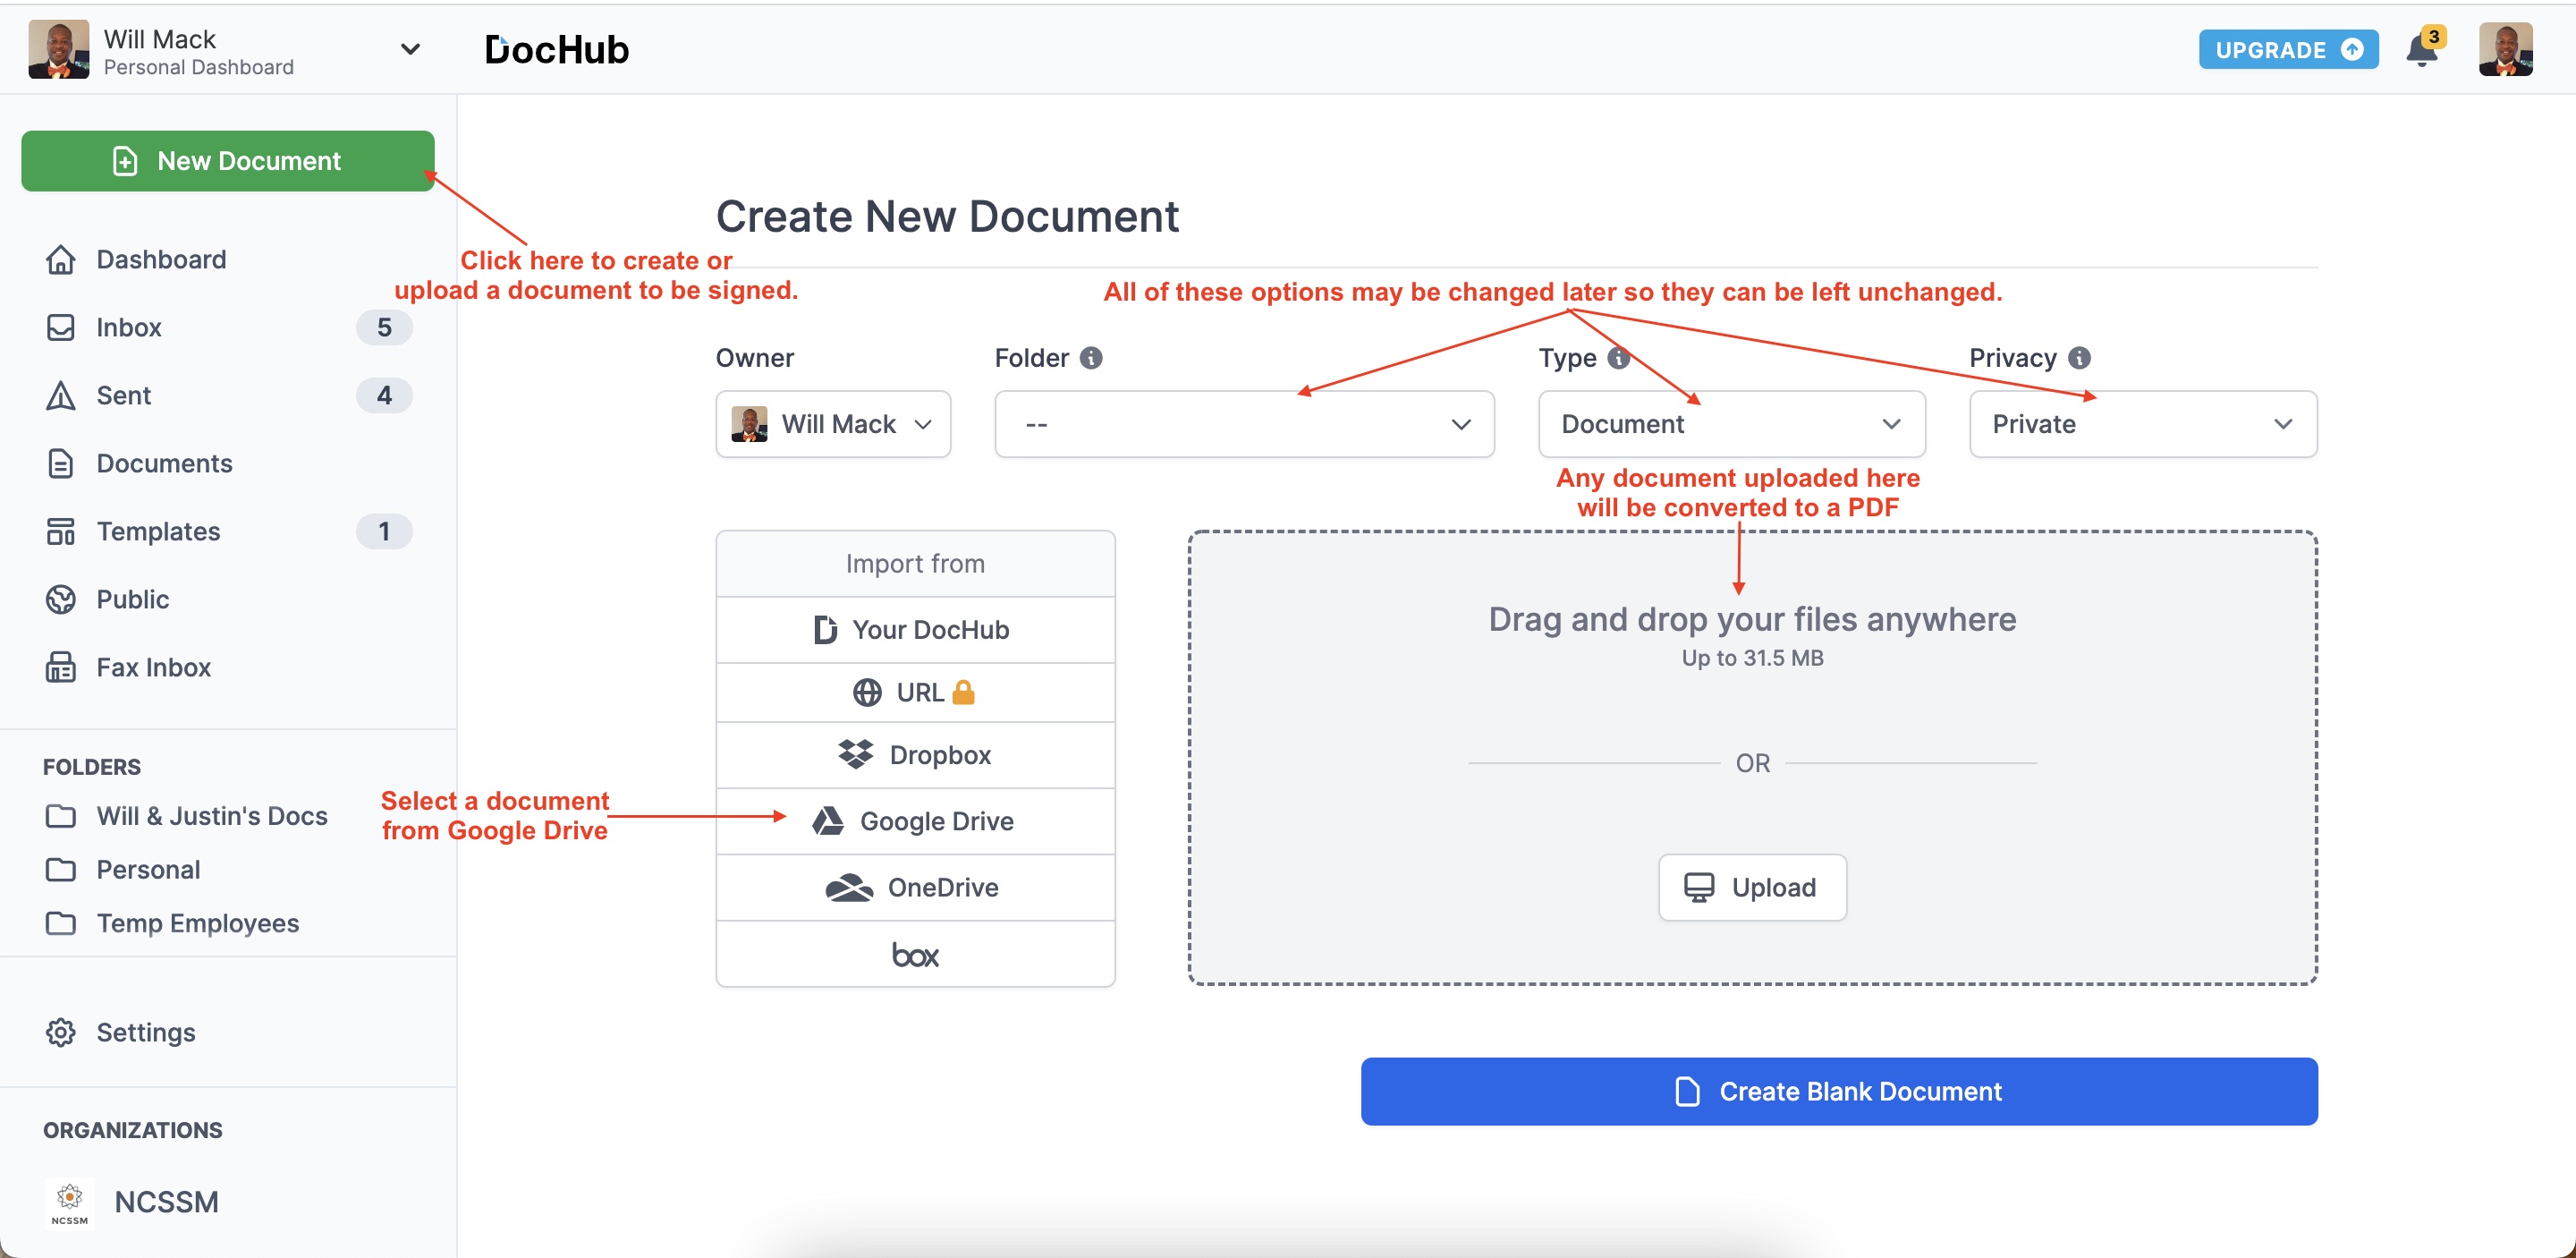
Click New Document near the top left then select from the following options:
Drag a document to the upload area.
Your DocHub - If you have a previously created document, you can reselect it to edit/sign it again.
Computer - Select a document on your computer.
Google Drive - Select a document from Google Drive.
Box, Dropbox, OneDrive - Select a document from your online storage account.
URL - Type the web address of a file that can be imported into DocHub.
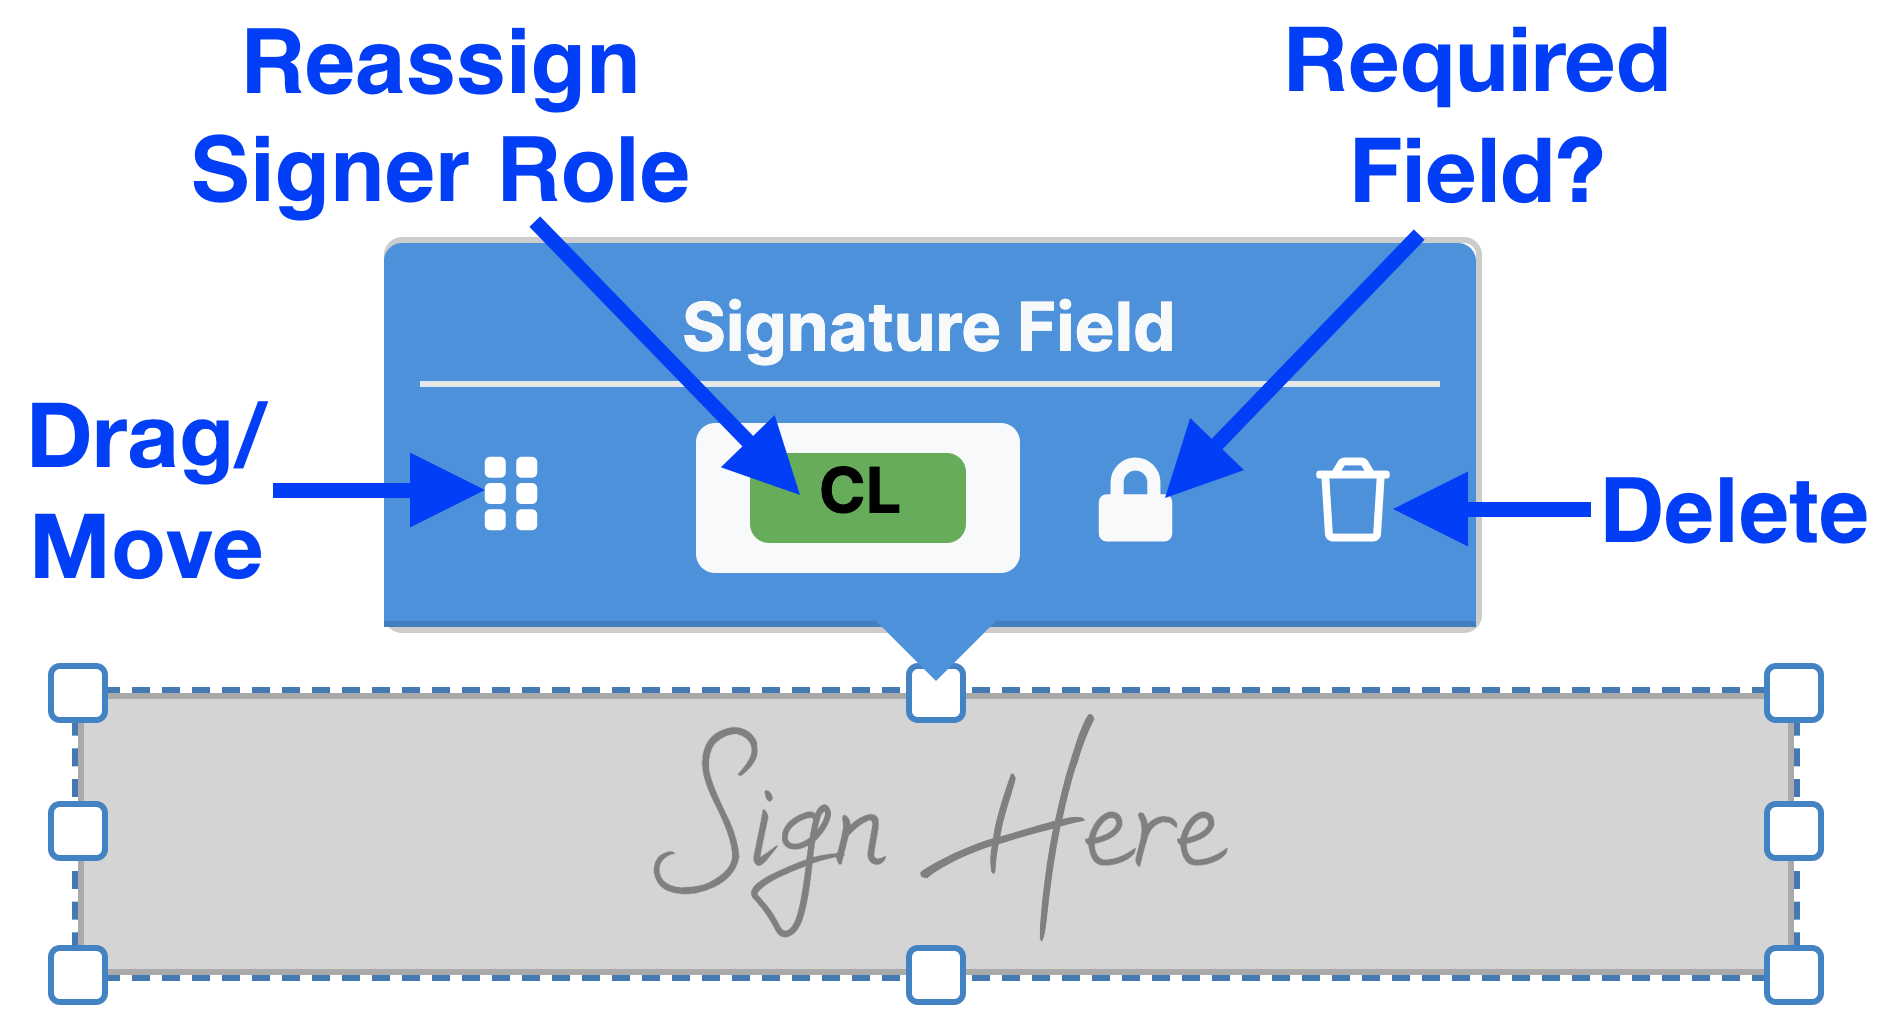
Click the Manage Fields button on the left side of the Toolbar to show the various types of fields to be added to a document. For more information about adding fields, see this article. Add any of the following fields to the document:
Text - Adds a text field.
Paragraph - Adds a text field.
Checkbox - Adds a checkbox.
Dropdown menu - Adds a dropdown menu.
Signature - Adds a signature field.
Initials - Adds an initials field.
Auto Date (Date) - Adds a date field.
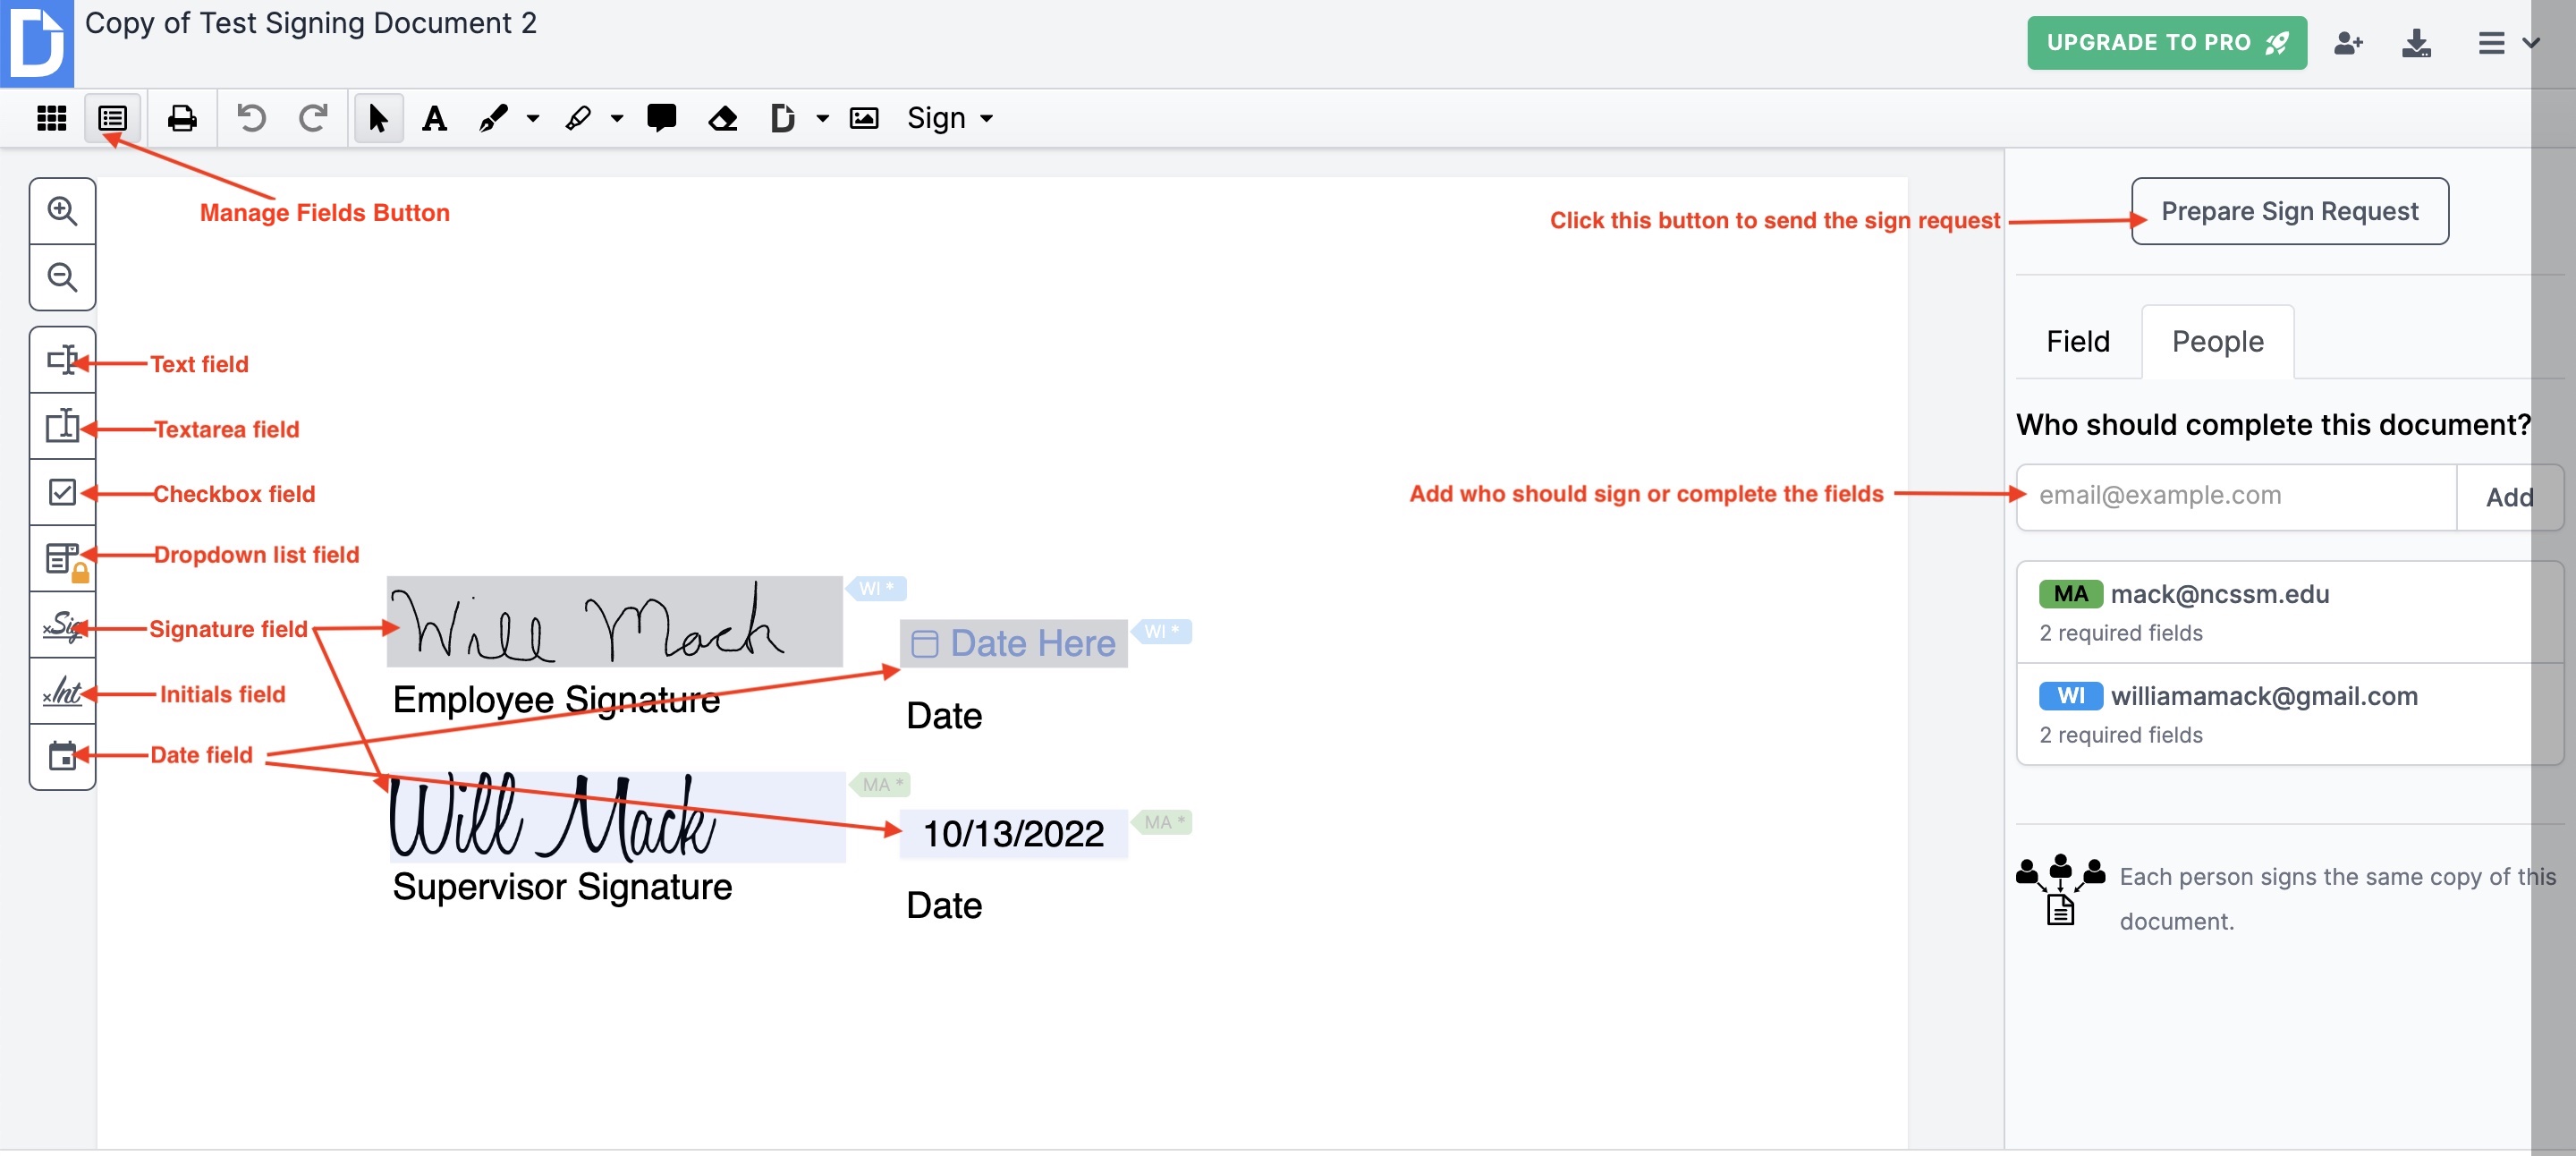
Add each signer's email address to the Who Should Complete this document? field on the People tab in the right panel.
Add fields to your document & assign an email address to each field - Use the left panel to add fields and then use the selected field's pop-up (shown below) or the right panel to assign them. For more info, see this article.
Click the Prepare Sign Request button in the right panel and click Send Request.
See Send a Sign Request.
| Note |
|---|
Sending a document as a Sign Request will remove it from the Documents section and move it to your Sent section where you'll no longer be able to make any changes to it. However, you can still make a copy of it by opening it and using the File menu > Actions > Make a Copy. |
📧 Send a Sign Request
| Anchor | ||||
|---|---|---|---|---|
|
Select either All at Once or Sign In Order. Note: This setting has Sign in Order selected by default.
Sign in Order - Email sign request in the order of the number to the left of each email address.
All at Once - Email all email addresses simultaneously so anyone can sign.
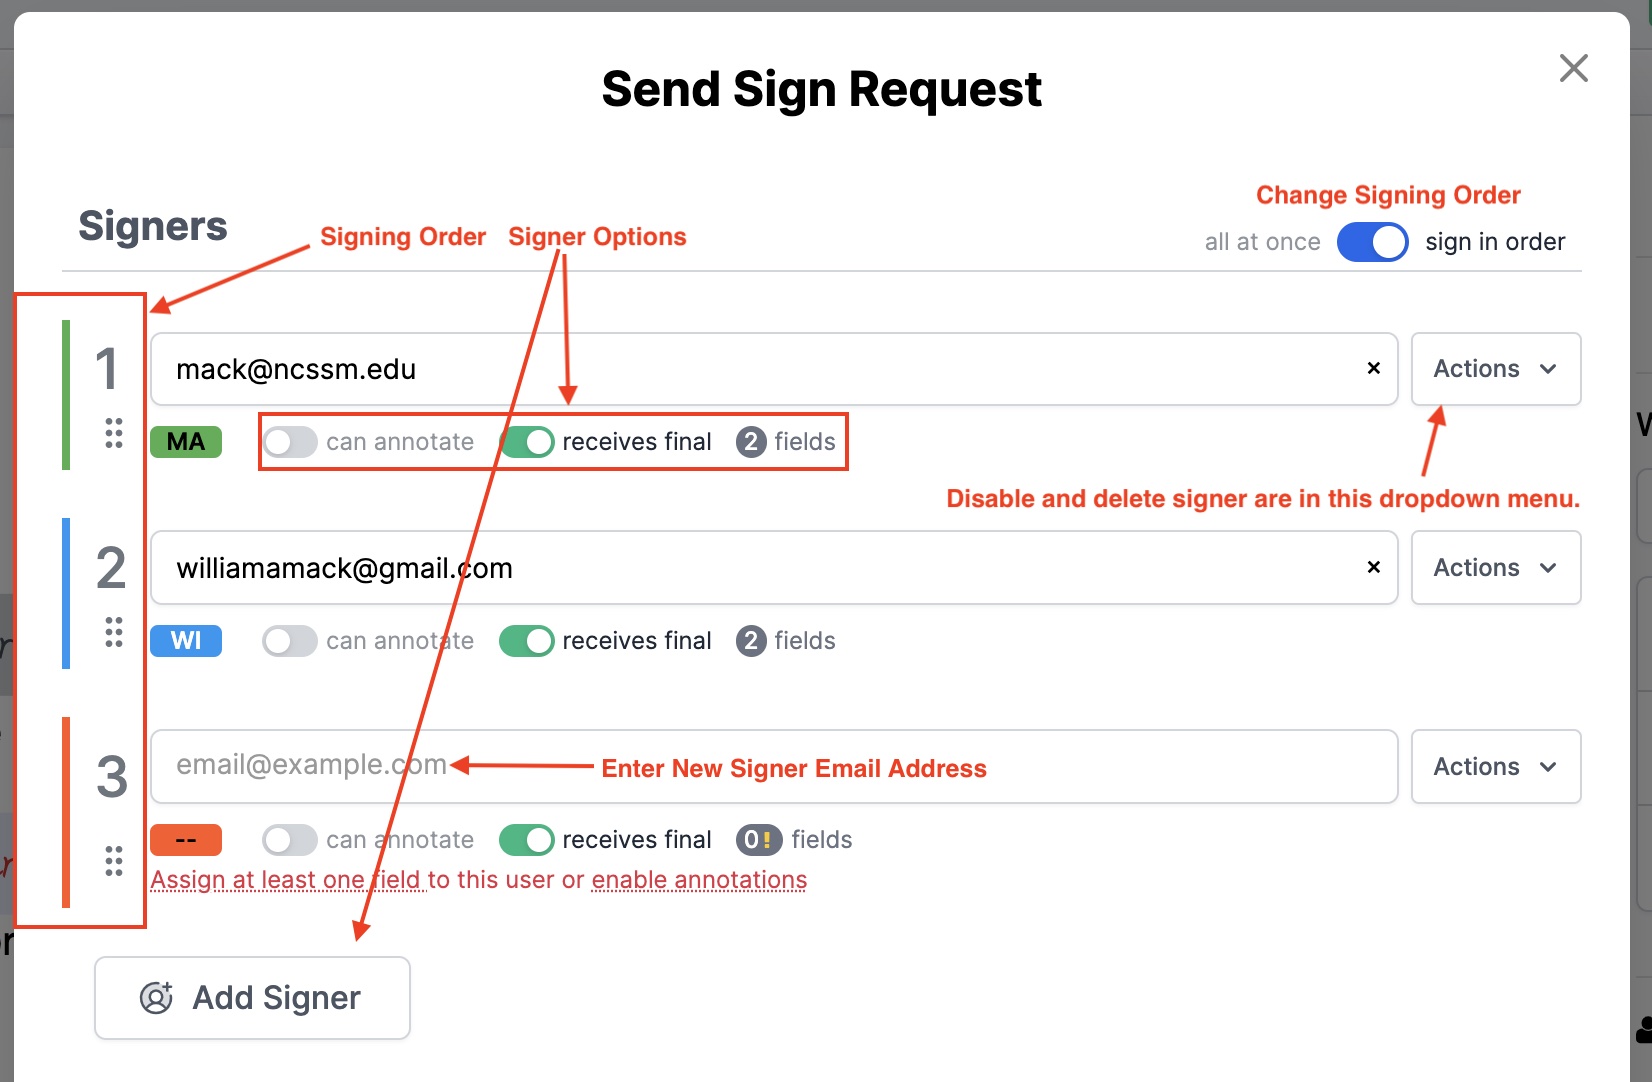
(Optional) Set the Signers options. In the Signers section, you can do the following:
Add Signer - Click this button to add a new signer. Enter the signer’s email address.
Can Annotate - Set this so a signer may add additional fields to the document.
Receives Final - Leave this set so the signer receives the signed document.
Number of Fields - This is the number of fields that the signer must complete.
Disable Signer - To make a person a viewer—they get the signed document but do not sign, select Actions > Disable Signer.
Delete Signer - If you would like to remove a signer, select Actions > Delete Signer.
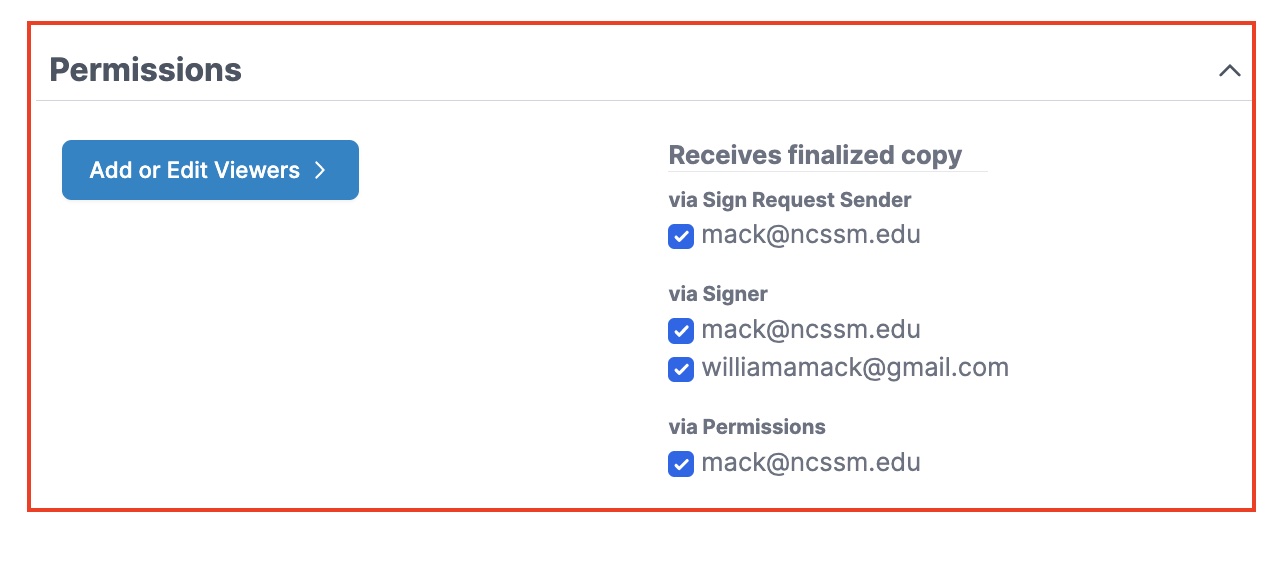
(Optional) Set the Permissions for signers and viewers—those who are being CC’d. Note: Changing permissions is uncommon and often not necessary.
Check or uncheck who receives the finished signed copy of the document.
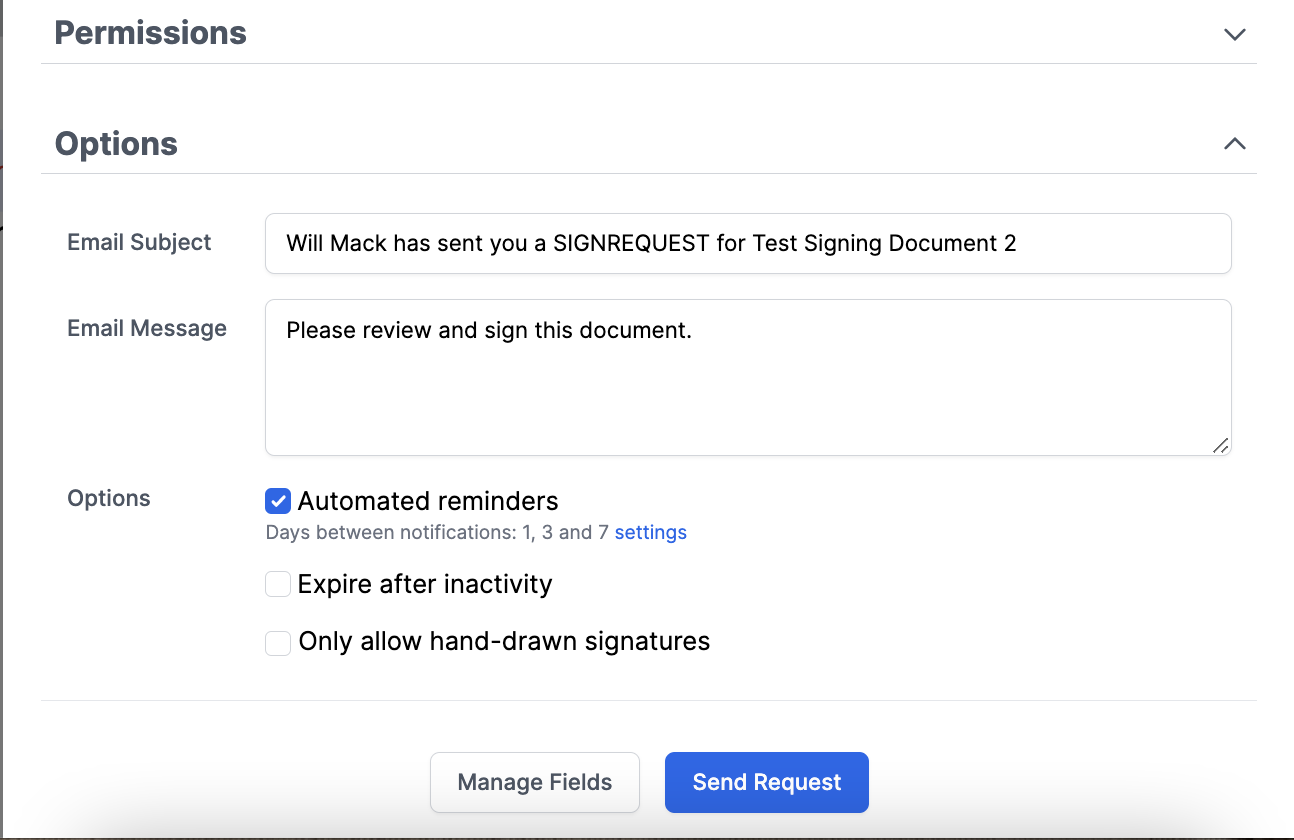
(Optional) Set the Email Options.
Email Subject(Optional) - Change the subject of the email sent to signers.
Email Message(Optional) - Change the message of the email sent to signers.
Options (Optional) - Change the settings for email Note: Changing these options is not common.
Receiving automatic reminders,
Expire after inactivity
Only allowing hand-drawn signatures.
Click Send Sign Request. Done.
🖊️ Sign a Document
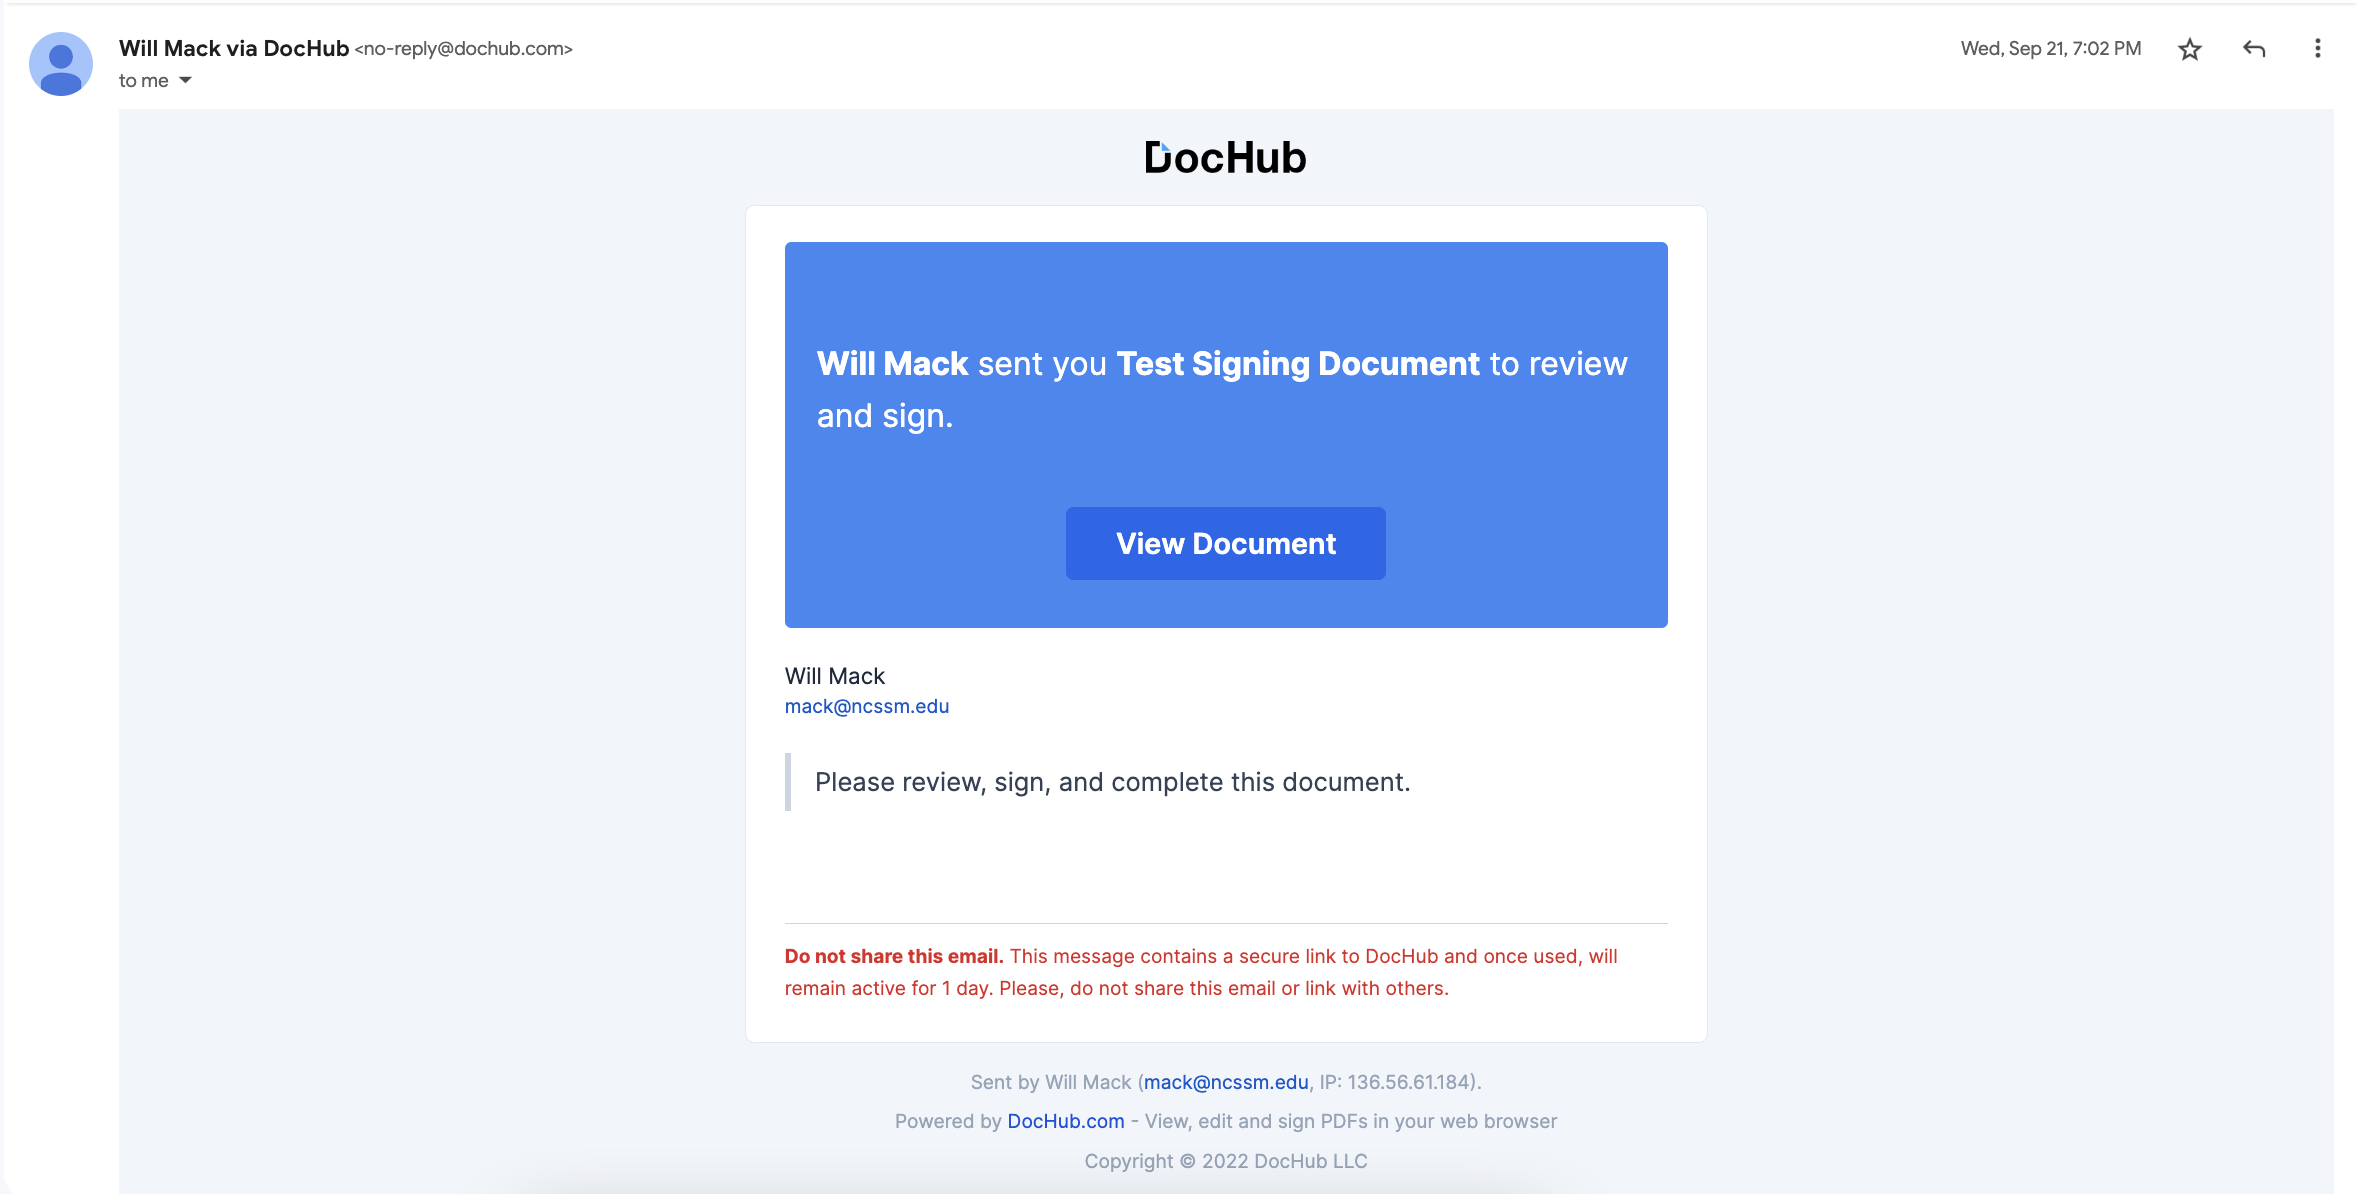
Click the blue View Document button in the email notification. Note: When a signer clicks the view document link, they are automatically logged in to DocHub.
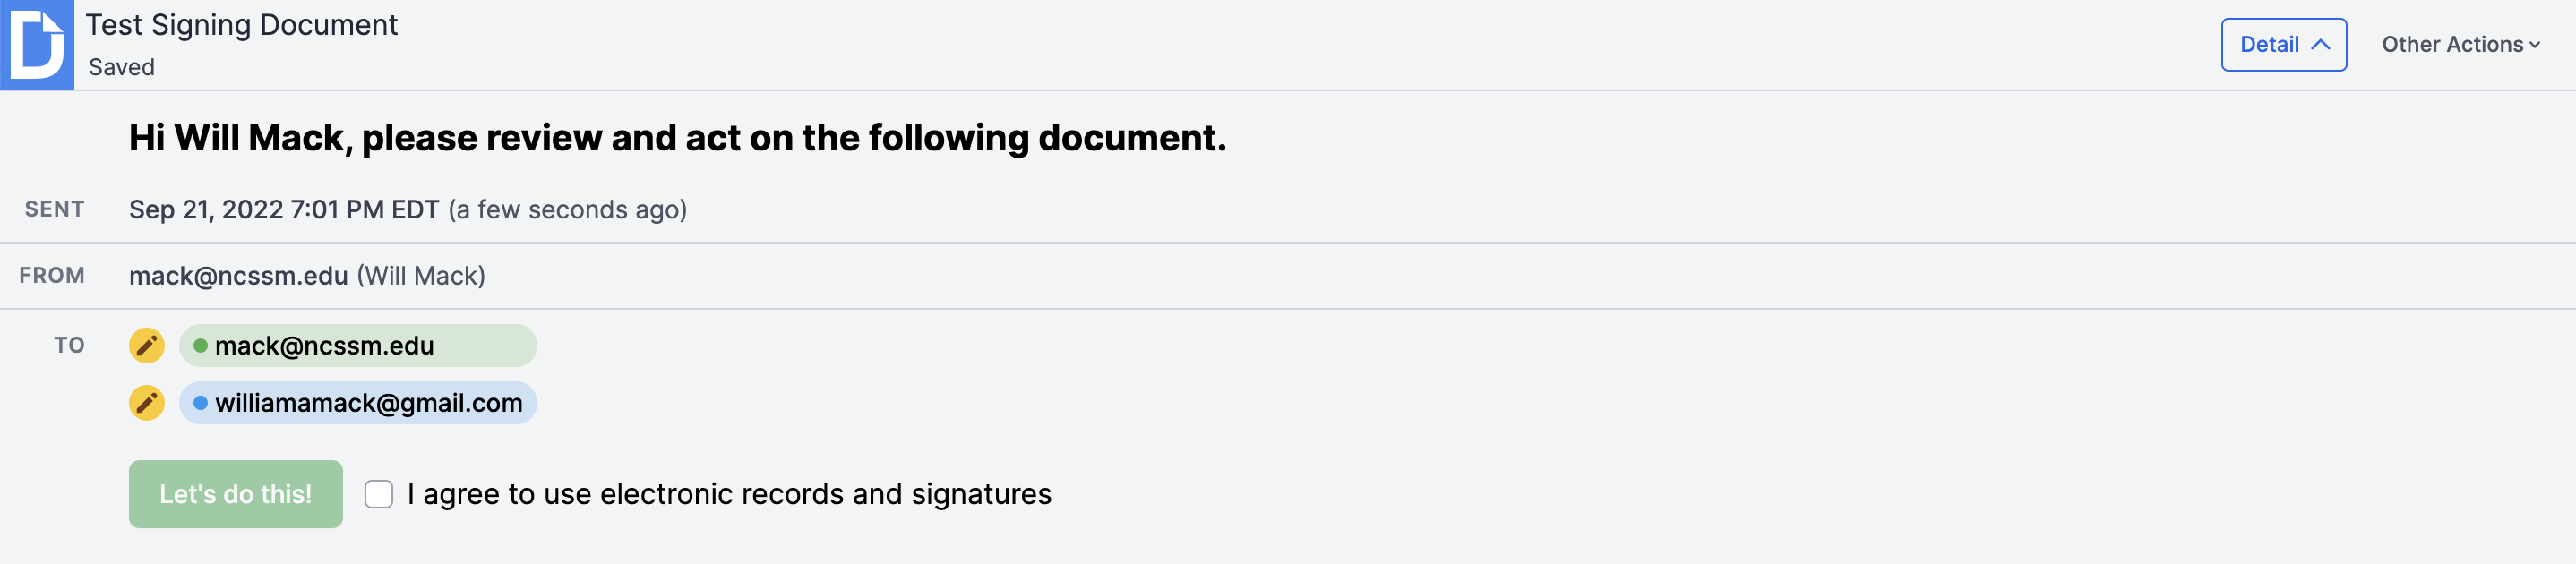
Check the checkbox for I agree to use electronics and signatures. Then click the green Let’s Do This button.
Complete the fields assigned to you as a signer. Note: Each signer has a colored tag with the fields they should complete, and the number of fields remaining is tracked at the top.
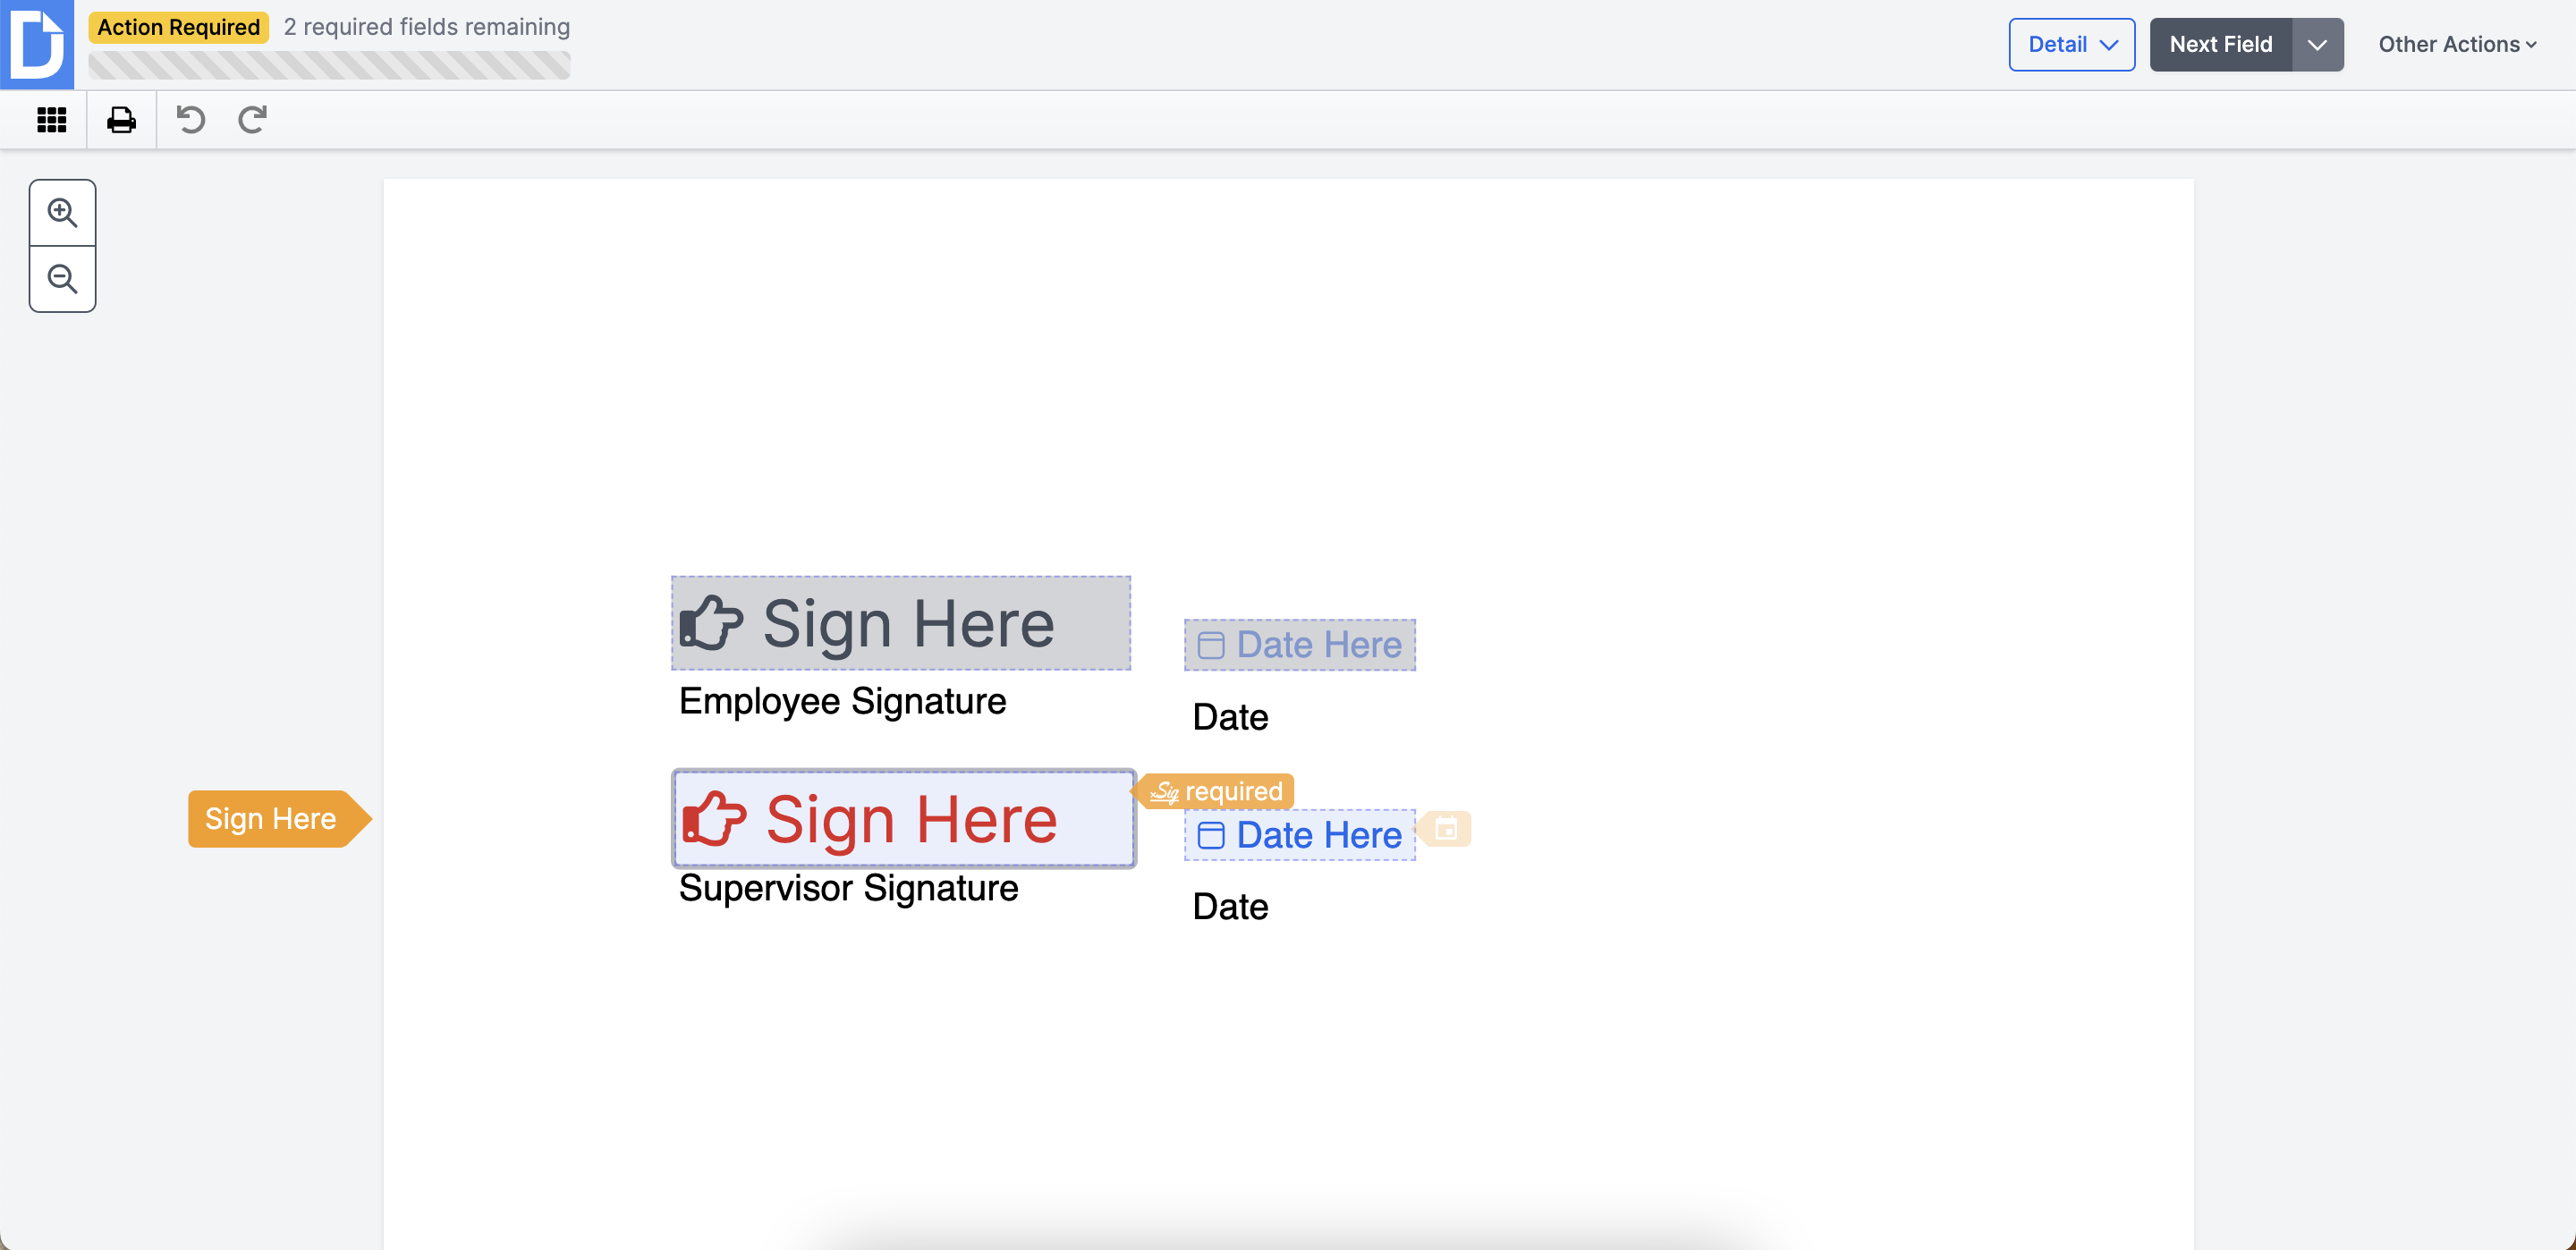
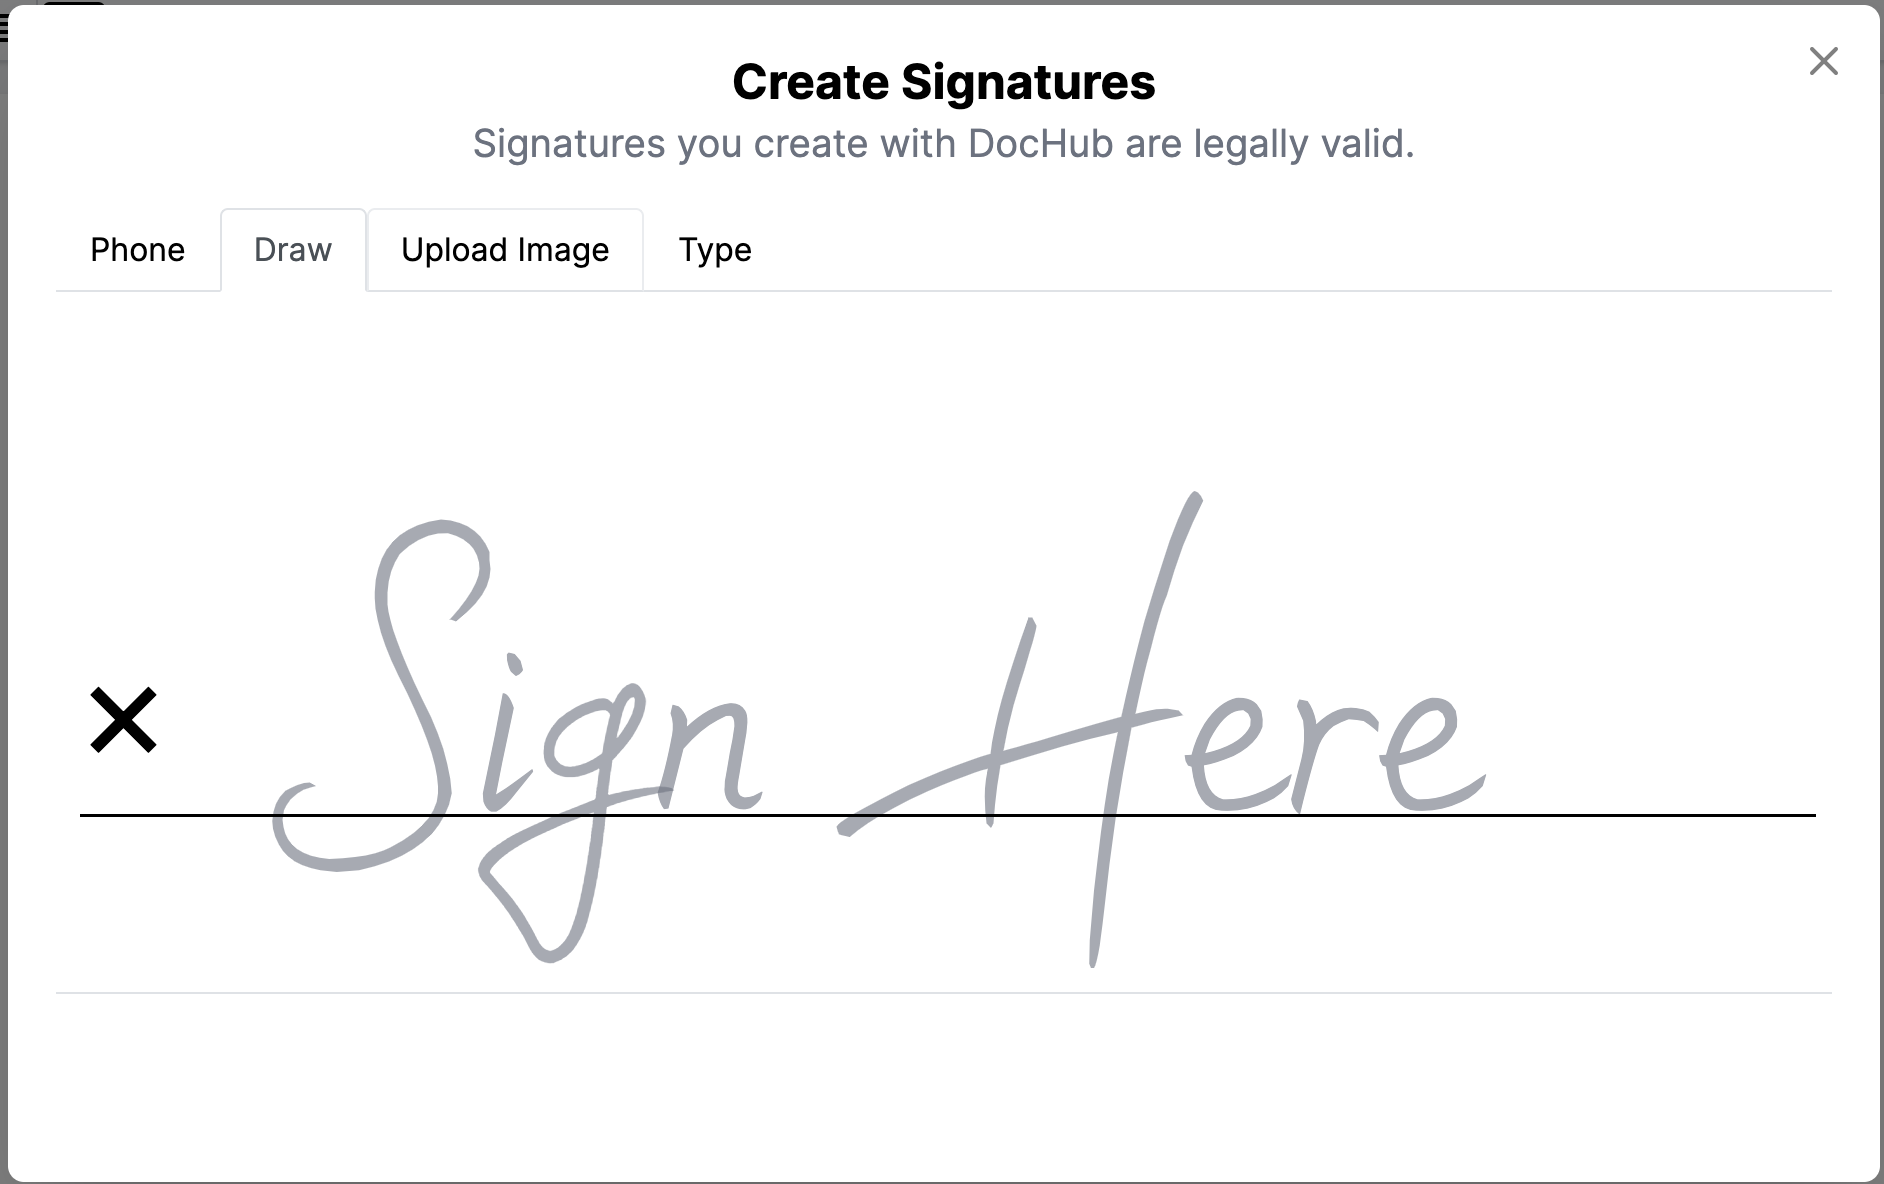
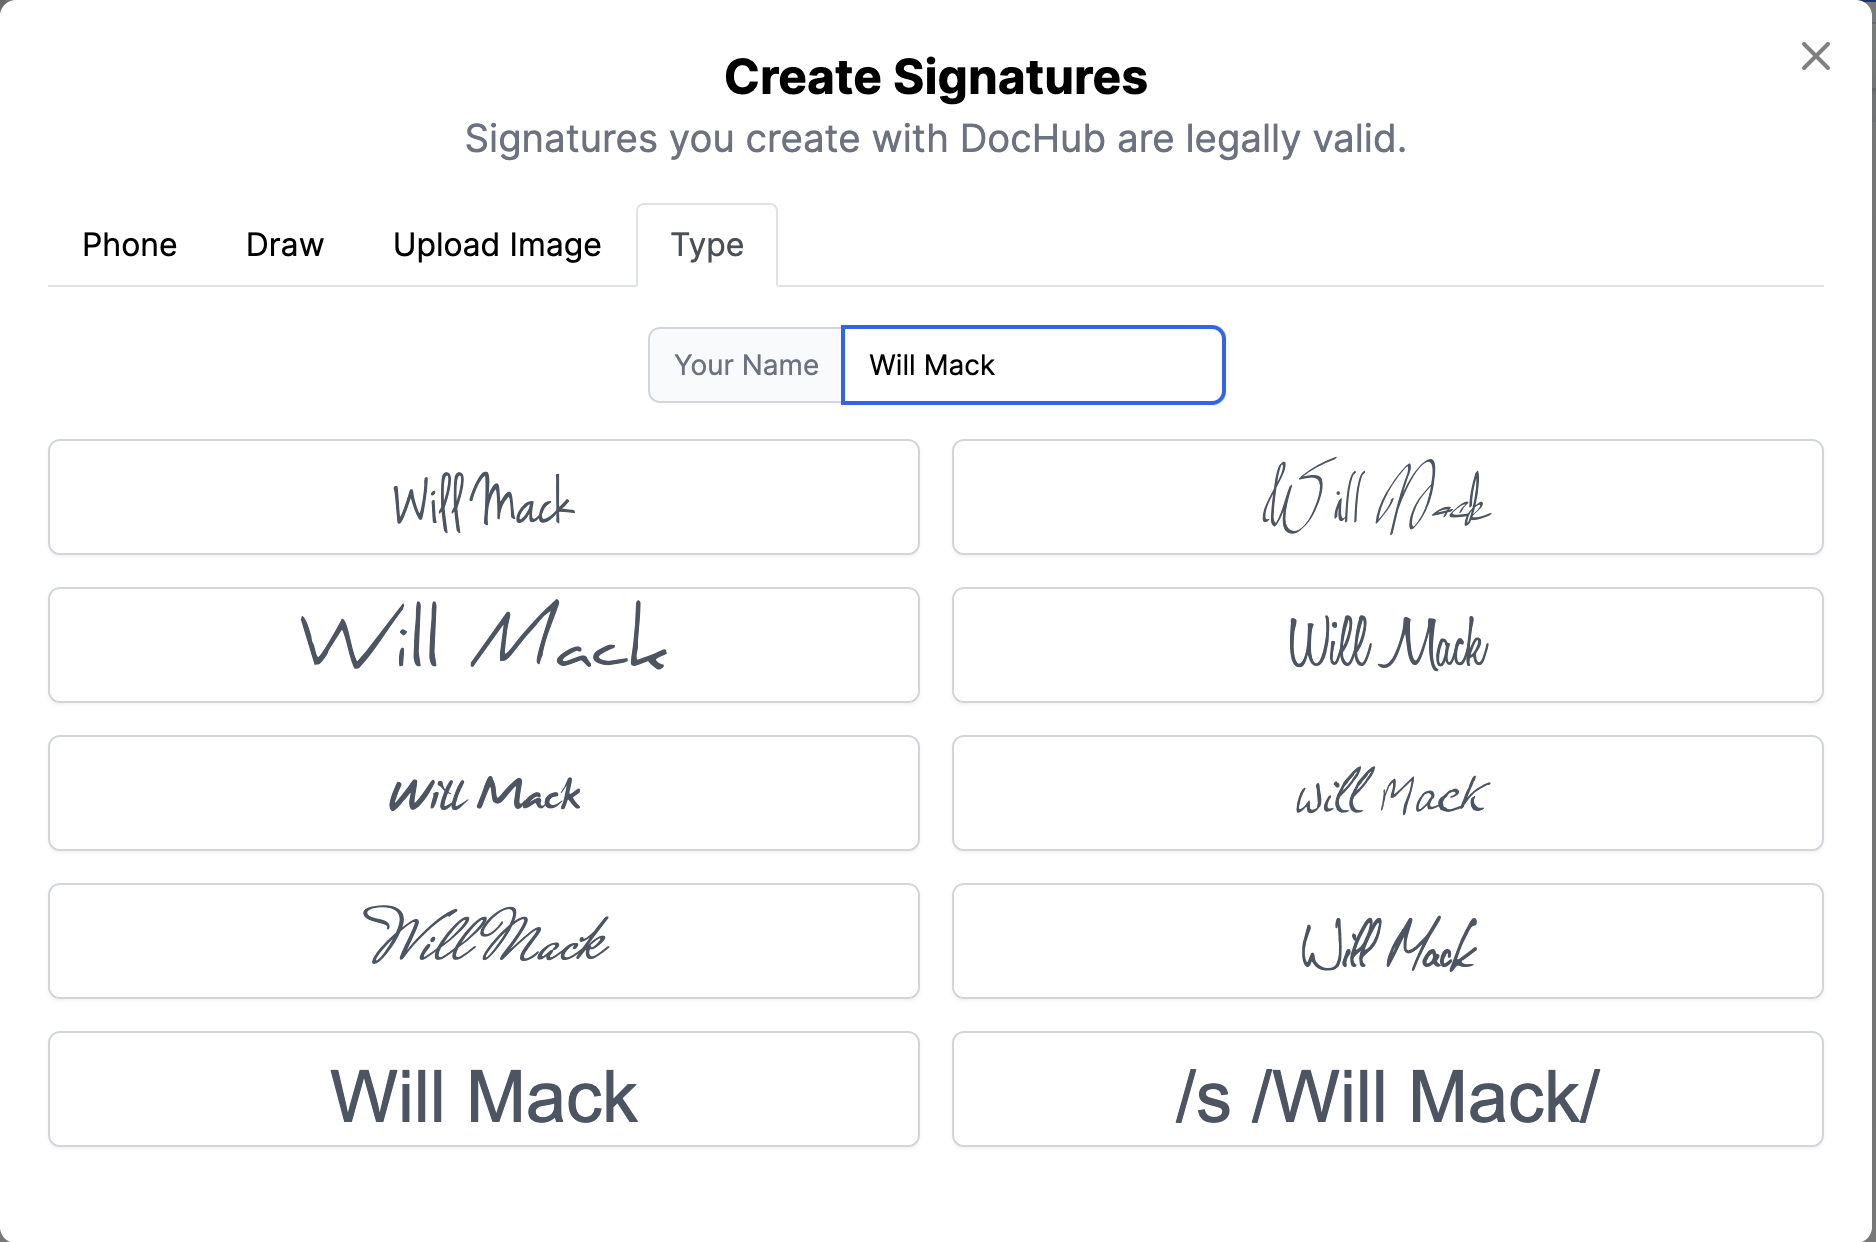
Sign the document by doing one of the following:
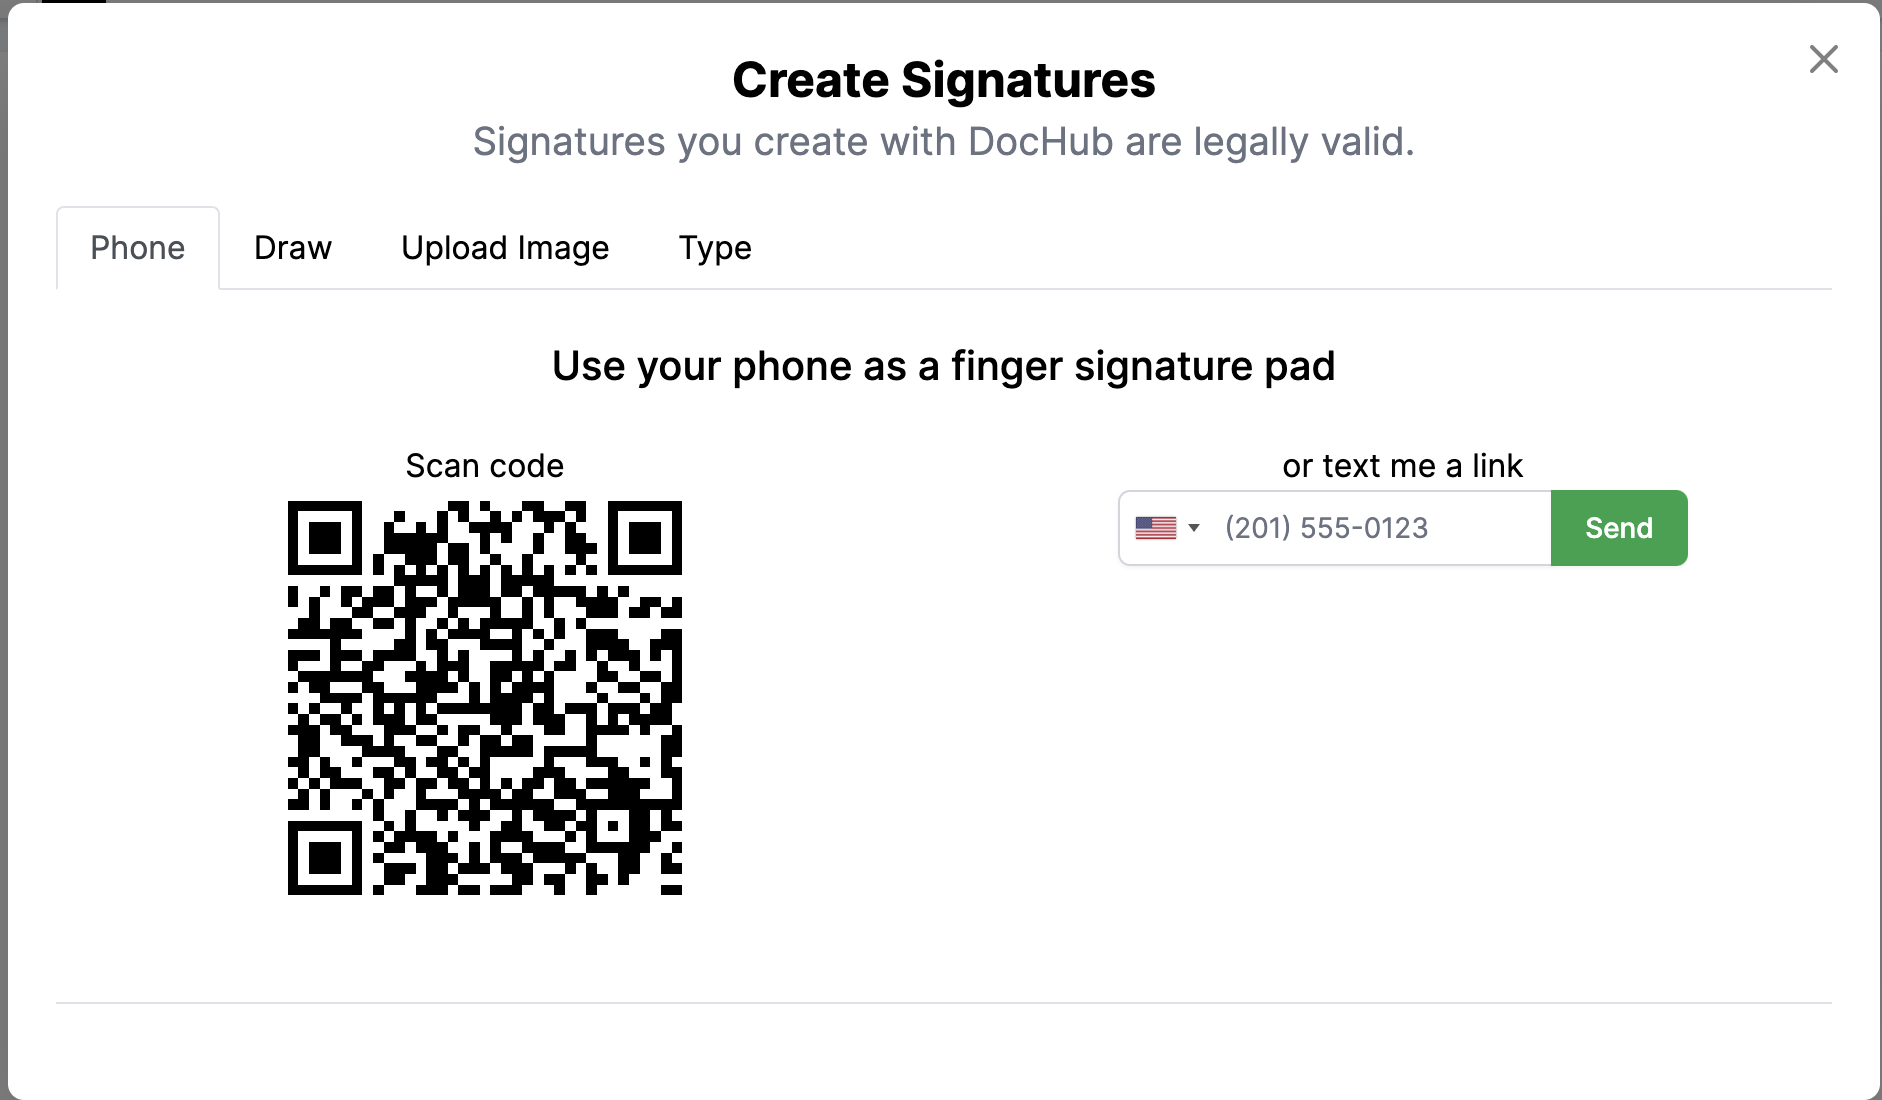
Select a previously created signature. Note: If the signer is new to DocHub, when they click to sign the field, they'll be prompted to create a new signature in DocHub which will then be applied to the field. If the signer already has a signature stored in DocHub, then click to have DocHub apply a previously saved signature.
Sign by phone - Scan the QR code or enter your mobile number for a link to a screen that you can sign with your finger.
Draw the signature - Use a mouse or touchpad to draw the signature.
Upload an image of the Signature - Select an image of your signature from your computer.
Type the signature -Type the signature on the screen and see the signature in various fonts.

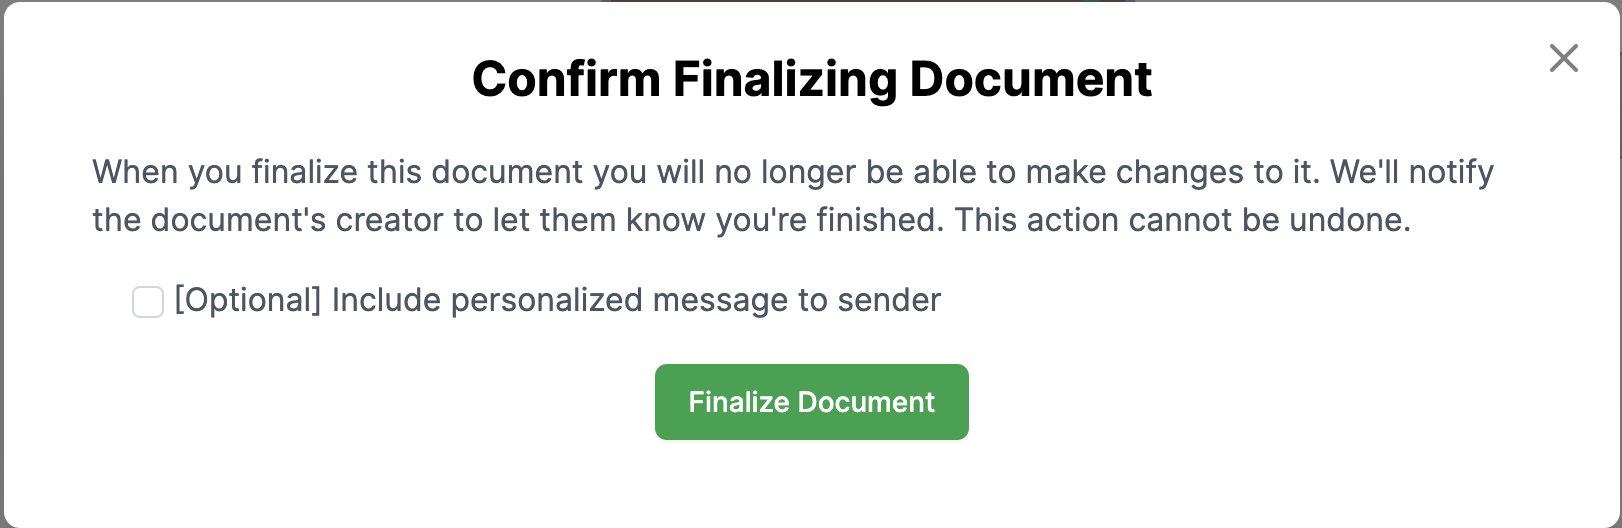
5. When you are done signing the document, you will be prompted by an arrow to click the green Finalize button at the top right.

6. Finally, click Finalize Document in the popup window. Done.

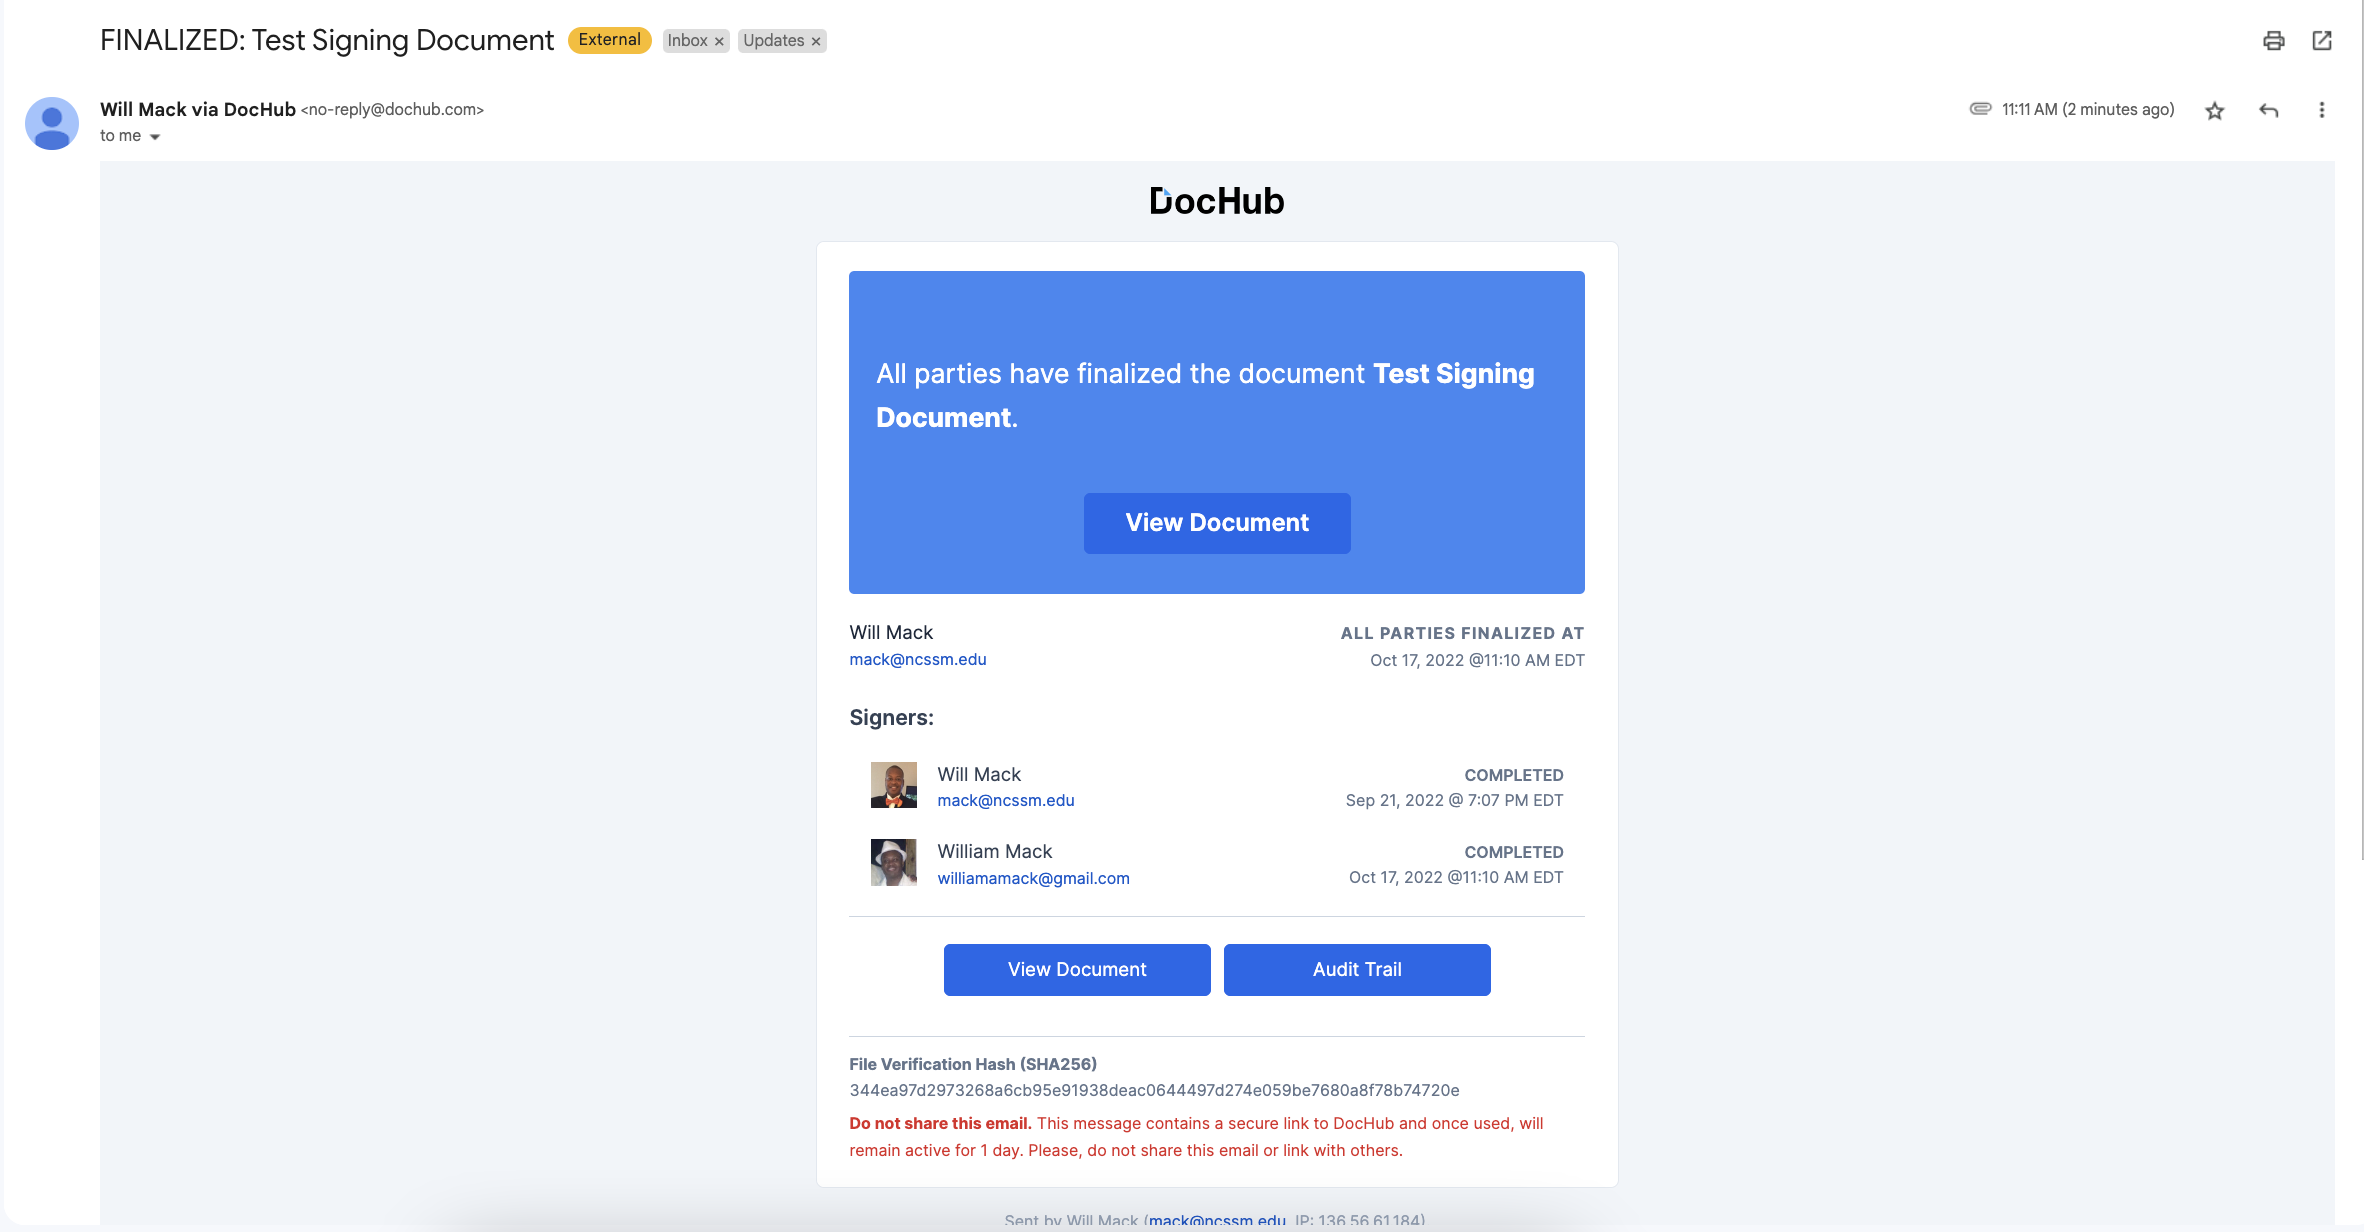
If there are additional signers on the document, then the next signer will be granted permission to the document and will be notified to sign. If all signers have signed and finalized, then all parties will be emailed the signed document as shown below. Note: You can also download the audit trail if you are the sender.
\uD83D\uDCCB Related articles
| Filter by label (Content by label) | ||||||||||||||||||
|---|---|---|---|---|---|---|---|---|---|---|---|---|---|---|---|---|---|---|
|