...
Upload the document.
Select who should sign from the following options:
Me & Others - This allows the preparer to sign along with others.
Only Me - This allows the preparer to sign and others to be copied or approve of the document.
Only Others - This allows the preparer to send the document to be signed by others.

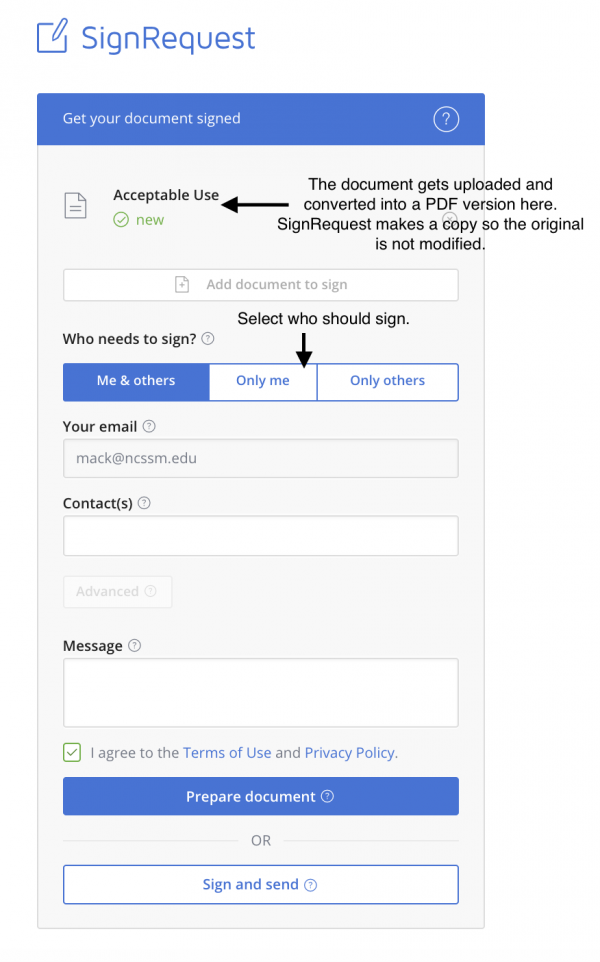
Enter the email addresses of the people involved in the Contacts field. Note: You may later select which sign, approve, are notified or copied.
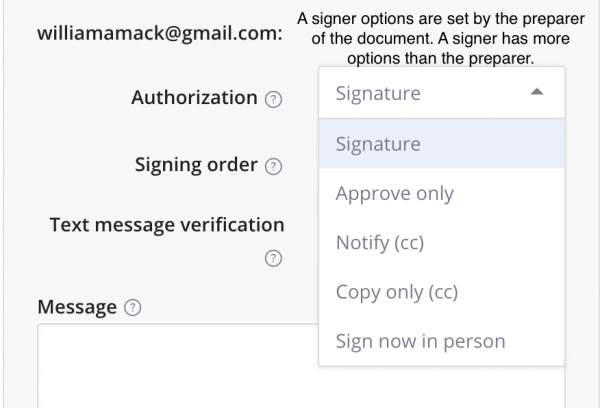
(Optional) Select Advanced to give the contacts options including:
Signature - The contact will be sent the document to sign.
Approve Only - The contact be sent the document to approve and this approval will be added to the signing log.
Notify - The contact will be notified of all events by email (i.e. Document has been sent, Document viewed, Document signed) but will not receive the signed document.
Copy Only - This contact will receive a copy of the signed document after all signers have signed.
Sign now in person - The preparer may directly hand over the device to the signer to be signed after the document has been prepared.
(Optional) Set the signing order by adding a number in the Signing Order field for each signer. The order goes from least to greatest (i.e. 0 goes first, 1 goes second, 2 goes third, etc)

Type the email message to be sent to the signer(s) in the Message field.
Select Prepare Document to add text fields and signature blocks or Send or Sign and Send.
In preparing a document, you click anywhere you think a field should be and add it to the document. You have the following options:
Signature - A resizable block where a signer would sign the document.
Date - A field where a signer could input a date.
Text - A field in which a signer could type information.
Checkmark - A box that could be checked for confirmation purposes.
Delete - Remove a field from the document.


(Optional) You may optionally change the roles of the preparer and receivers and change the message of the email.
Click Send at the top right corner to email the document to be signed.
...
After all designated signers have signed the document you will automatically receive a copy of the signed document and the signing log as attachments by email.
Related articles
| Filter by label (Content by label) | ||||||||||||||||||
|---|---|---|---|---|---|---|---|---|---|---|---|---|---|---|---|---|---|---|
|
...